Preface
Goal: Housekeeping previous code
This is a multiparts article.
For simplicity reason I use javascript without framework.
12: Javascript Class Refactoring
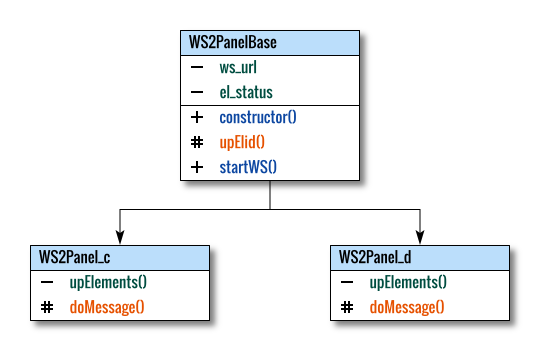
Inheritance
We have already refactored, the python script. Why not go further refactor the javascript? And yes, this also make clear separation between flow logic, and data representation.
We are going to make something like below figure:
HTML Tab Interface
Preparation
Simply copy and paste our previous table into tabbed user interface.
We will have these few assets in HTML <head>.
<head>
  <title>Your mission. Good Luck!</title>
  <link rel="stylesheet" href="bulma.min.css">
  <link rel="stylesheet" href="hover.css">
  <link rel="stylesheet" href="animate.css">
  <script src="22-tabs.js"></script>
  <script src="23-script.js"></script>
</head>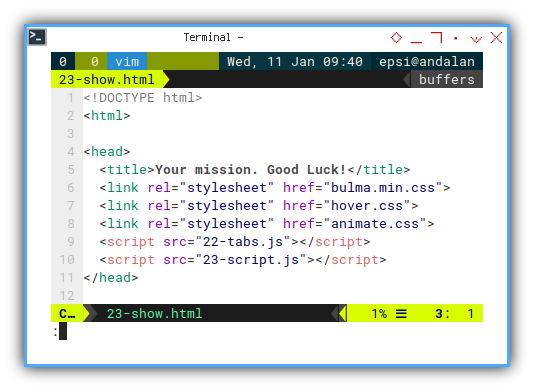
For example, our first Review sheet,
we can copy and paste the whole table element inside <div> column:
<table class="table mx-auto">
  <thead>
    <tr>
      <th># Review</th>
      <th><button class="button is-dark is-fullwidth"
          >September</button></th>
      <th><button class="button is-dark is-fullwidth"
          >October</button></th>
    </tr>
  </thead>
  <tbody>
    <tr>
      <th>
        <button class="button is-dark is-fullwidth has-text-left"
          >Budget</button></th>
      <td>
        <a class="button is-info is-fullwidth hvr-buzz"
           id="c-09-budget">C 09 Budget</a></td>
      <td>
        <a class="button is-info is-fullwidth hvr-buzz"
           id="c-10-budget">C 10 Budget</a></td>
    </tr>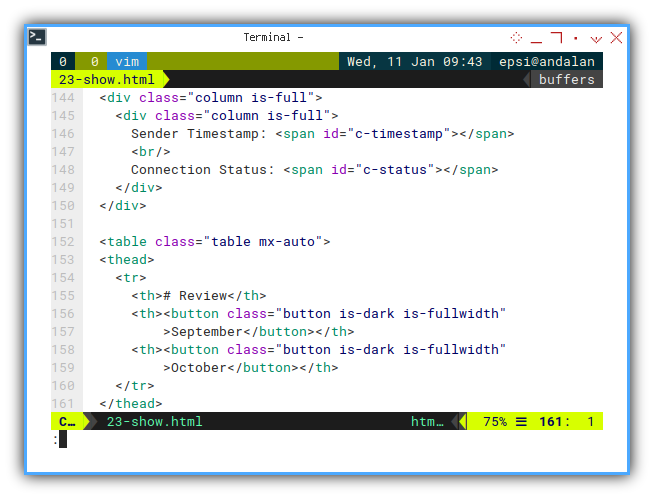
The same applied, to our Progress sheet,
we can copy and paste the whole table element inside <div> column:
  <table class="table mx-auto">
  <thead>
    <tr>
      <th># Progress</th>
      <th><button class="button is-dark is-fullwidth"
          >Target</button></th>
      <th><button class="button is-dark is-fullwidth"
          >Actual</button></th>
      <th><button class="button is-dark is-fullwidth"
          >Miss</button></th>
      <th><button class="button is-dark is-fullwidth"
          >Remain</button></th>
    </tr>
  </thead>
  <tbody>
    <tr>
      <th>
        <button class="button is-dark is-fullwidth has-text-left"
          >September</button></th>
      <td>
        <a class="button is-info    is-fullwidth hvr-buzz"
           id="d-09-target">D 09 Target</a></td>
      <td>
        <a class="button is-success is-fullwidth hvr-buzz"
           id="d-09-actual">D 09 Actual</a></td>
      <td>
        <a class="button is-danger  is-fullwidth hvr-buzz"
           id="d-09-miss">D 09 Miss</a></td>
      <td>
        <a class="button is-warning is-fullwidth hvr-buzz"
           id="d-09-remain">D 09 Remain</a></td>
    </tr>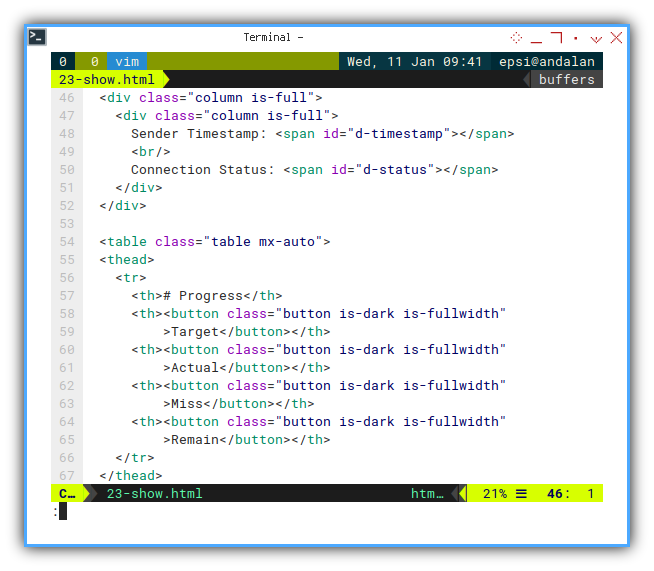
Javacript Base Class
Main Course
The base class is the core of our refactoring idea.
The sekleton only consist of one constructor and two methods.
class WS2PanelBase {
  constructor(ws_url, el_status) {...}
  upElid(elementID, value) {...}
  startWS() {...}
}
The constructor also manage el_status,
that might have different element for each worksheet.
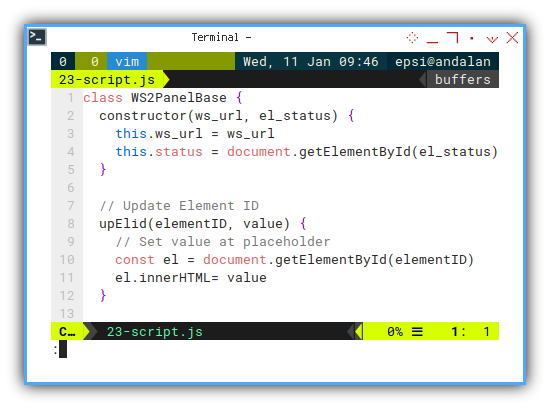
The detail can be described as below:
class WS2PanelBase {
  constructor(ws_url, el_status) {
    this.ws_url = ws_url
    this.status = document.getElementById(el_status)
  }

  // Update Element ID
  upElid(elementID, value) {
    // Set value at placeholder
    const el = document.getElementById(elementID)
    el.innerHTML= value
  }

  // Loop Entry Point
  startWS() {
    const websocket = new WebSocket(this.ws_url)

    websocket.onopen = () => {...}
  }
}
While the websocket, still manage these three events,
as previous code. The onmessage event,
handle message using doMessage method.
  startWS() {
    const websocket = new WebSocket(this.ws_url)

    websocket.onopen = () => {
      this.status.innerHTML = "Opened"
      websocket.send("Hello There.");
    }

    websocket.onclose = () => {
      this.status.innerHTML = "Closed"
      // Try to reconnect in 5 seconds
      setTimeout(() => {
        this.startWS()
      }, 5000)
    };

    websocket.onmessage = (event) => {
      this.doMessage(event)
    }
  }
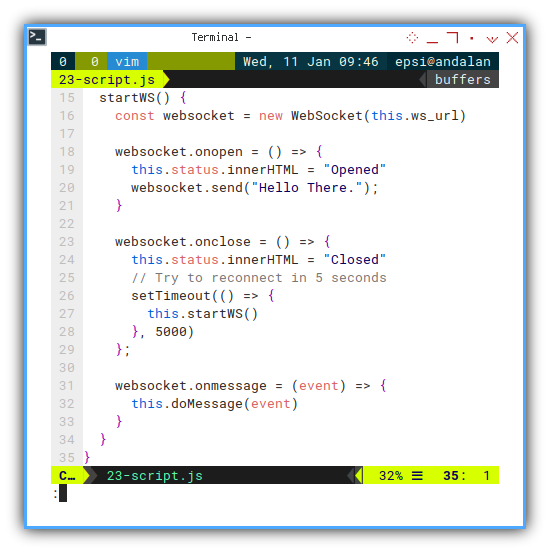
This doMessage is an abstract method.
We should implement the doMessage in descendant class.
Javacript: Child: Sheet C
This part manage data comes from Review worksheet.
After copy and paste into base class,
there left these two methods.
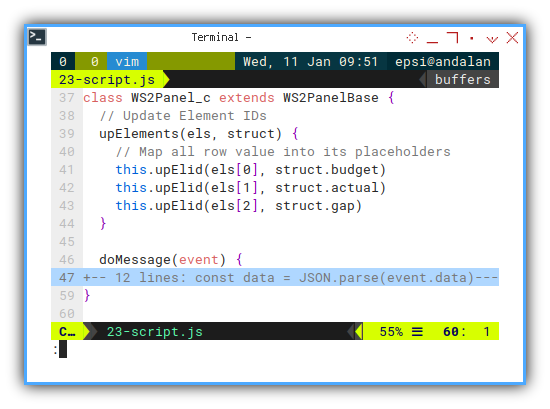
First is the upElements().
class WS2Panel_c extends WS2PanelBase {
  // Update Element IDs
  upElements(els, struct) {
    // Map all row value into its placeholders
    this.upElid(els[0], struct.budget)
    this.upElid(els[1], struct.actual)
    this.upElid(els[2], struct.gap)
  }

  doMessage(event) {...}
}
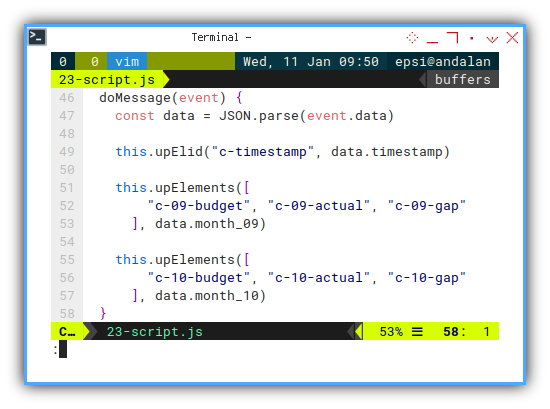
And then the doMessage(event).
  doMessage(event) {
    const data = JSON.parse(event.data)

    this.upElid("c-timestamp", data.timestamp)

    this.upElements([
        "c-09-budget", "c-09-actual", "c-09-gap"
      ], data.month_09)

    this.upElements([
        "c-10-budget", "c-10-actual", "c-10-gap"
      ], data.month_10)
  }
Javacript: Child: Sheet D
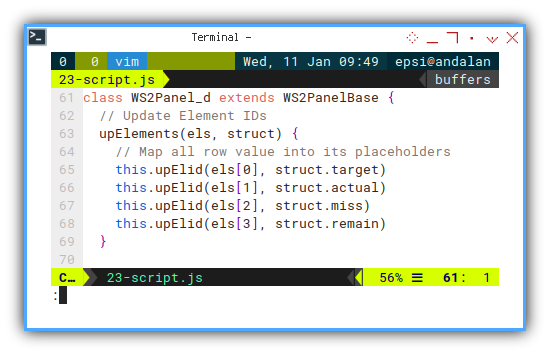
The same applied to our Progress worksheet.
class WS2Panel_d extends WS2PanelBase {
  // Update Element IDs
  upElements(els, struct) {
    // Map all row value into its placeholders
    this.upElid(els[0], struct.target)
    this.upElid(els[1], struct.actual)
    this.upElid(els[2], struct.miss)
    this.upElid(els[3], struct.remain)
  }

  doMessage(event) {...}
}
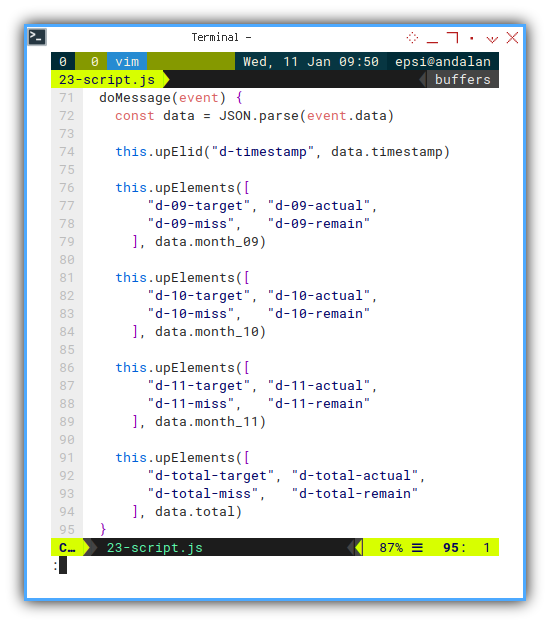
And the doMessage in this descendant class,
also have different implementation.
  doMessage(event) {
    const data = JSON.parse(event.data)

    this.upElid("d-timestamp", data.timestamp)

    this.upElements([
        "d-09-target", "d-09-actual",
        "d-09-miss",   "d-09-remain"
      ], data.month_09)

    this.upElements([
        "d-10-target", "d-10-actual",
        "d-10-miss",   "d-10-remain"
      ], data.month_10)

    this.upElements([
        "d-11-target", "d-11-actual",
        "d-11-miss",   "d-11-remain"
      ], data.month_11)

    this.upElements([
        "d-total-target", "d-total-actual",
        "d-total-miss",   "d-total-remain"
      ], data.total)
  }
Javacript: Main
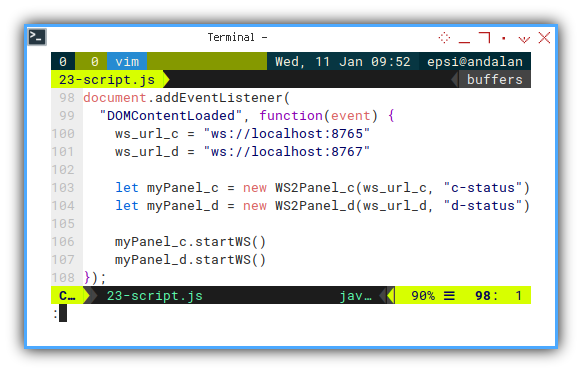
Finally we can call both websocket:
document.addEventListener(
  "DOMContentLoaded", function(event) {
    ws_url_c = "ws://localhost:8765"
    ws_url_d = "ws://localhost:8767"

    let myPanel_c = new WS2Panel_c(ws_url_c, "c-status")
    let myPanel_d = new WS2Panel_d(ws_url_d, "d-status")

    myPanel_c.startWS()
    myPanel_d.startWS()
});
Or even better, you can make the websocket more flexible.
document.addEventListener(
  "DOMContentLoaded", function(event) {
    host = window.location.hostname
    console.log(host)

    ws_url_s = "ws://" + host + ":8765"
    ws_url_d = "ws://" + host + ":8767"

    let myPanel_s = new WS2Panel_s(ws_url_s, "s-status")
    let myPanel_d = new WS2Panel_d(ws_url_d, "d-status")

    myPanel_s.startWS()
    myPanel_d.startWS()
});
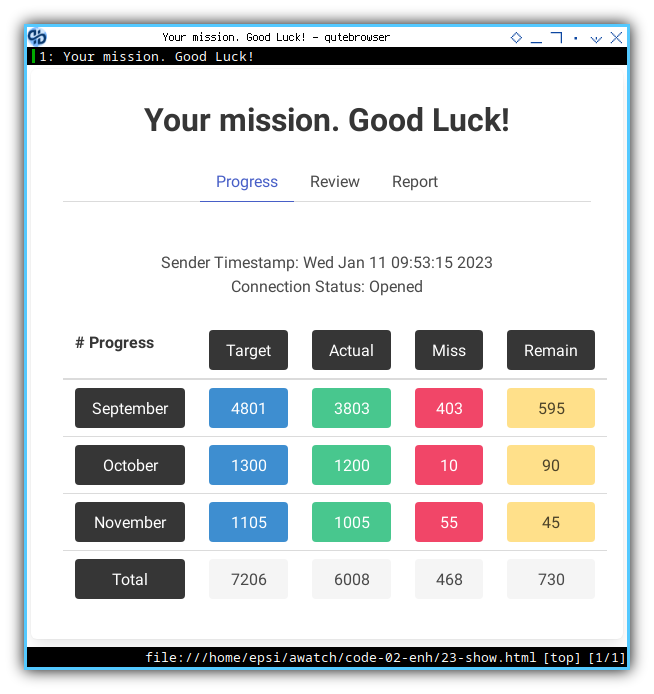
Preview in Web Browser
Again open the file in your favorite web browser.
Data Flow
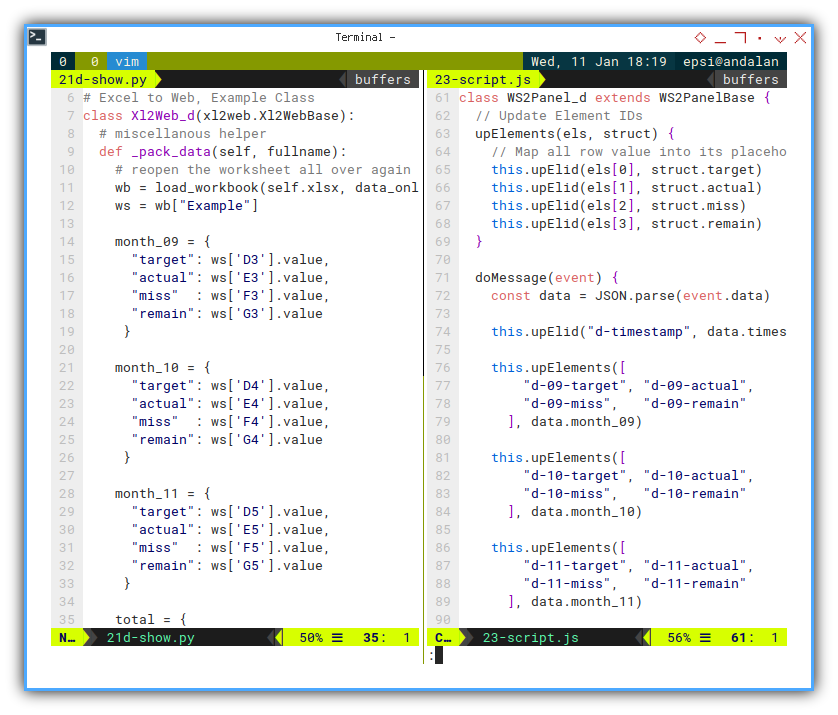
As a summary we can see how the data propagate between the script
From python to Javascript.
From Javascript to HTML
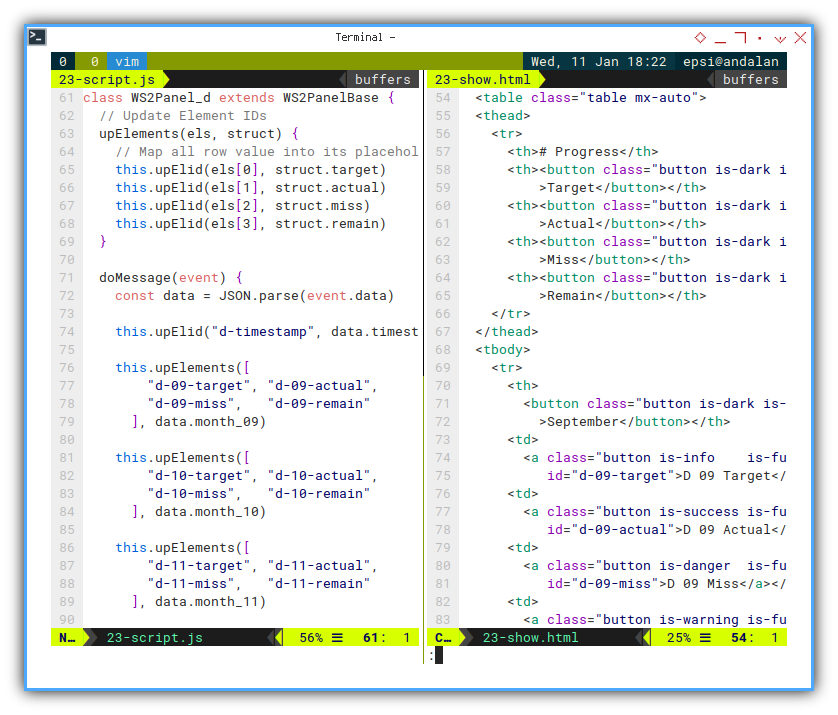
It is clearer, after class refactoring.
Displaying Our Script
Now we are ready to show our script in big monitor screen. The result is similar as video below:
We are done here.
Conclusion
It works on Production. Really.
Our journey is almost complete here. Optionally, we need a web server, to refactor the HTML document into chunks. So we can develop easier.
We also need to combine the two separate script, into one script. This terminal user interface can be done, along with nice colorful looks.
What do you think?
What is Next 🤔?
Part II
The first minimum viable product has been been made. Why don’t we continue further with common feature. We can view this as separate project or second part.
We will continue with TOML, Rich, Jinja2, AIOHTTP and maybe Flask.
Consider continue reading [ Excel - Monitor - TOML Configuration ].