Preface
Goal: Housekeeping previous code
This is a multiparts article.
For simplicity reason I choose javascript without framework.
10: Javascript Class
Don’t be barbaric. Code properly.
We are not living in the cave. Modern Javascript handle class nicely.
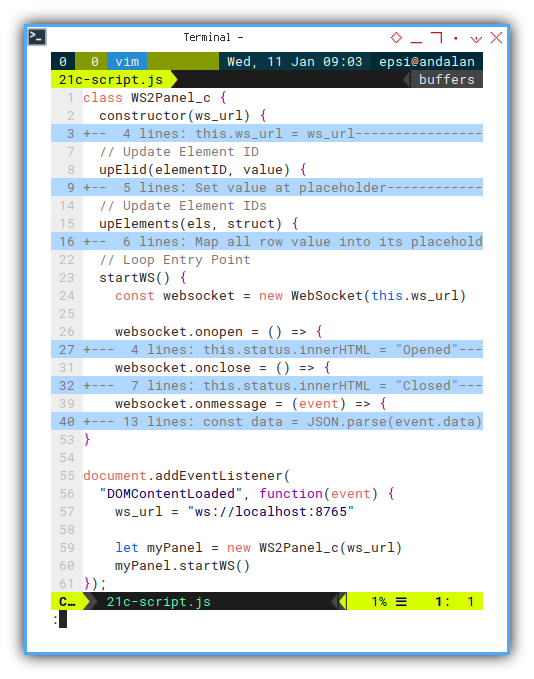
Skeleton
Here we start the class with constructor, and so on.
class WS2Panel_c {
  constructor(ws_url) {...}

  // Update Element ID
  upElid(elementID, value) {...}

  // Update Element IDs
  upElements(els, struct) {...}

  // Loop Entry Point
  startWS() {
    const websocket = new WebSocket(this.ws_url)

    websocket.onopen = () => {...}
    websocket.onclose = () => {...}
    websocket.onmessage = (event) => {...}
  }
}
So that later we can call class peacefuly.
document.addEventListener(
  "DOMContentLoaded", function(event) {
    ws_url = "ws://localhost:8765"

    let myPanel = new WS2Panel_c(ws_url)
    myPanel.startWS()
});
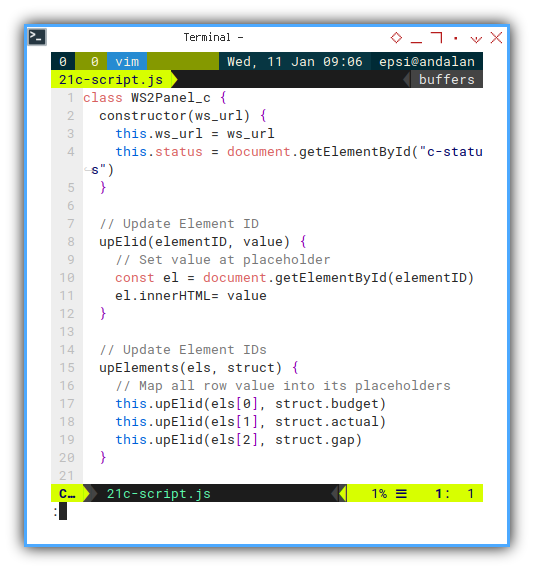
Constructor
The constructor task, only initialize variable.
  constructor(ws_url) {
    this.ws_url = ws_url
    this.status = document.getElementById("c-status")
  }
Updating Element
Then we can manage to update element, either atomic for each ID, or by group of dictionary data.
  // Update Element ID
  upElid(elementID, value) {
    // Set value at placeholder
    const el = document.getElementById(elementID)
    el.innerHTML= value
  }

  // Update Element IDs
  upElements(els, struct) {
    // Map all row value into its placeholders
    this.upElid(els[0], struct.budget)
    this.upElid(els[1], struct.actual)
    this.upElid(els[2], struct.gap)
  }
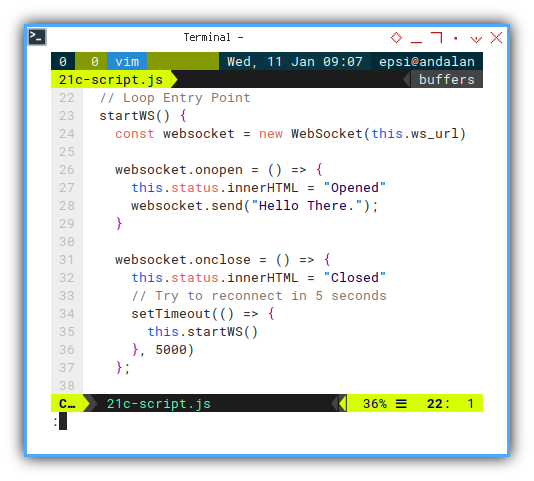
Websocket Event Handler
Managing Status
Websocket has these event:
- on open
- on close
- on message
- on error
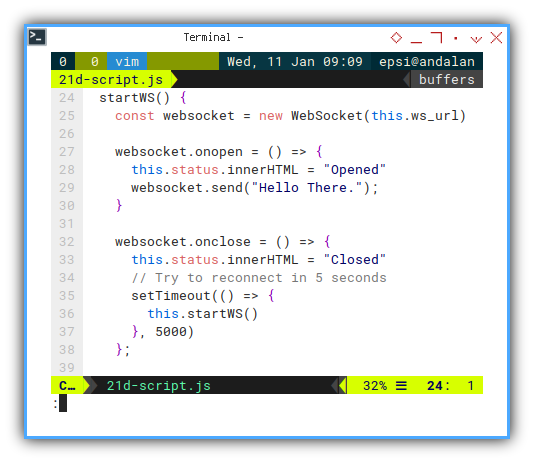
Here we use onopen and onclose to manage websocket status on page.
  startWS() {
    const websocket = new WebSocket(this.ws_url)

    websocket.onopen = () => {
      this.status.innerHTML = "Opened"
      websocket.send("Hello There.");
    }

    websocket.onclose = () => {
      this.status.innerHTML = "Closed"
      // Try to reconnect in 5 seconds
      setTimeout(() => {
        this.startWS()
      }, 5000)
    };

    websocket.onmessage = (event) => {...}
  }
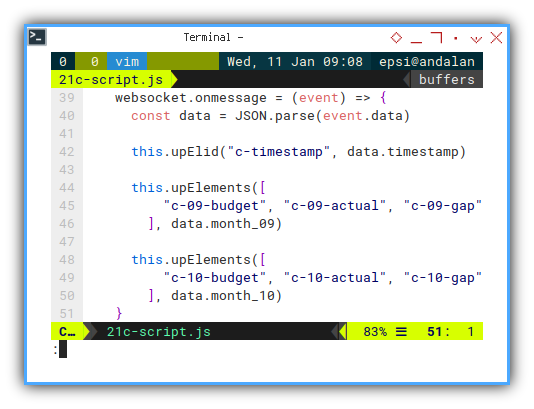
Websocket onMessage Event Handler
And later map displayed ata in page, based on JSON files given in websocket response.
    websocket.onmessage = (event) => {
      const data = JSON.parse(event.data)

      this.upElid("c-timestamp", data.timestamp)

      this.upElements([
          "c-09-budget", "c-09-actual", "c-09-gap"
        ], data.month_09)

      this.upElements([
          "c-10-budget", "c-10-actual", "c-10-gap"
        ], data.month_10)
    }
HTML Table
Finally we have to set the elements, as the placeholders of each values.
You can pick any user interface, to suit your taste. In this example I use table.
    <tr>
      <th>
        <button class="button is-dark is-fullwidth has-text-left"
          >Budget</button></th>
      <td>
        <a class="button is-info is-fullwidth hvr-buzz"
           id="c-09-budget">C 09 Budget</a></td>
      <td>
        <a class="button is-info is-fullwidth hvr-buzz"
           id="c-10-budget">C 10 Budget</a></td>
    </tr>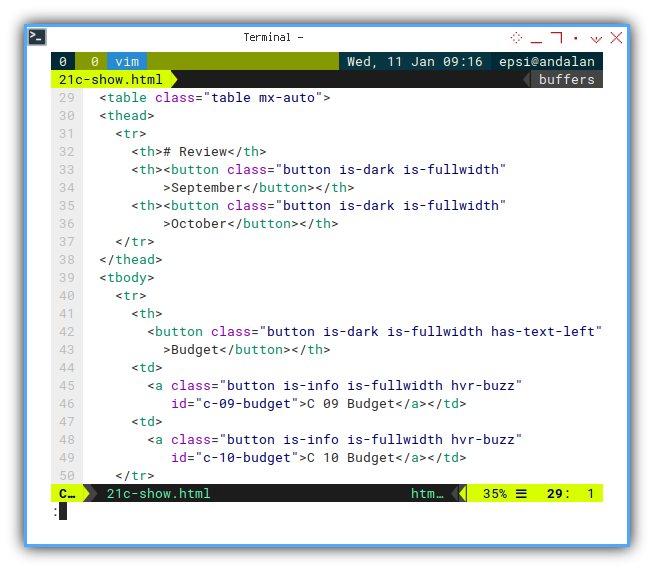
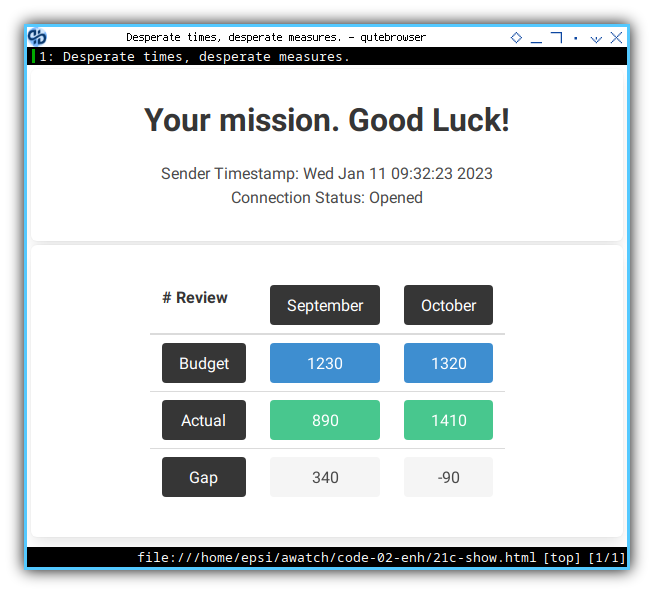
Preview in Web Browser
Right click your HTML file from your file manager using right click, and open it using any web browser.
Second Example
The same applied to second sheet. We have to map, each cell to python, then map python to javascript, and finally javascript to HTML.
class WS2Panel_c {
  constructor(ws_url) {...}
  upElid(elementID, value) {...}
  upElements(els, struct) {...}
  startWS() {...}
}
So that later we can call class after DOM content loaded.
document.addEventListener(
  "DOMContentLoaded", function(event) {...});
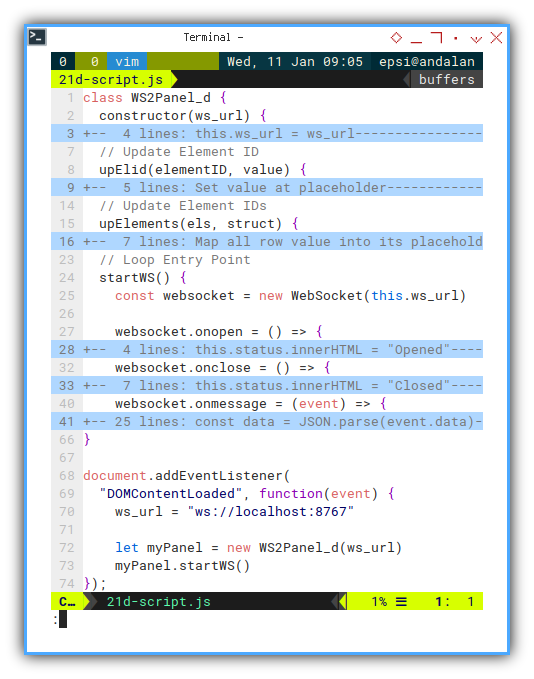
The same as previous, except, using different element.
class WS2Panel_d {
  constructor(ws_url) {
    this.ws_url = ws_url
    this.status = document.getElementById("d-status")
  }

  // Update Element ID
  upElid(elementID, value) {
    // Set value at placeholder
    const el = document.getElementById(elementID)
    el.innerHTML= value
  }
Beware that we have different data structure here.
  // Update Element IDs
  upElements(els, struct) {
    // Map all row value into its placeholders
    this.upElid(els[0], struct.target)
    this.upElid(els[1], struct.actual)
    this.upElid(els[2], struct.miss)
    this.upElid(els[3], struct.remain)
  }

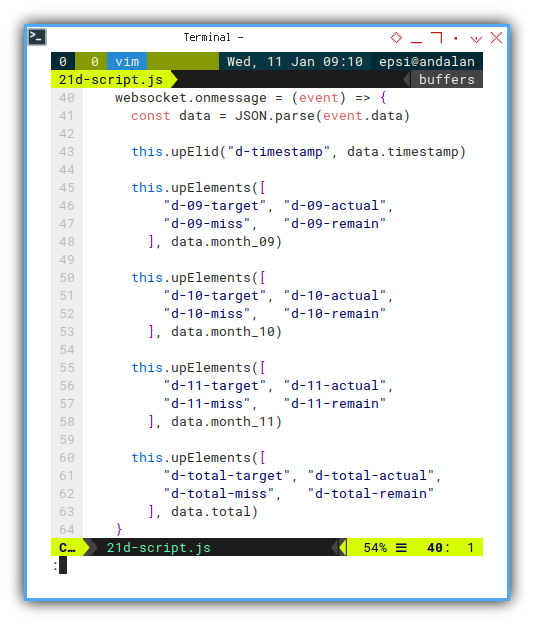
Thus different data interpretation
    websocket.onmessage = (event) => {
      const data = JSON.parse(event.data)

      this.upElid("d-timestamp", data.timestamp)

      this.upElements([
          "d-09-target", "d-09-actual",
          "d-09-miss",   "d-09-remain"
        ], data.month_09)

      this.upElements([
          "d-10-target", "d-10-actual",
          "d-10-miss",   "d-10-remain"
        ], data.month_10)

      this.upElements([
          "d-11-target", "d-11-actual",
          "d-11-miss",   "d-11-remain"
        ], data.month_11)

      this.upElements([
          "d-total-target", "d-total-actual",
          "d-total-miss",   "d-total-remain"
        ], data.total)
    }
The rest websocket events are remain the same.
    websocket.onopen = () => {
      this.status.innerHTML = "Opened"
      websocket.send("Hello There.");
    }

    websocket.onclose = () => {
      this.status.innerHTML = "Closed"
      // Try to reconnect in 5 seconds
      setTimeout(() => {
        this.startWS()
      }, 5000)
    };
As usual, prepare the placehoder for elemen value in HTML documents.
    <tr>
      <th>
        <button class="button is-dark is-fullwidth has-text-left"
          >September</button></th>
      <td>
        <a class="button is-info    is-fullwidth hvr-buzz"
           id="d-09-target">D 09 Target</a></td>
      <td>
        <a class="button is-success is-fullwidth hvr-buzz"
           id="d-09-actual">D 09 Actual</a></td>
      <td>
        <a class="button is-danger  is-fullwidth hvr-buzz"
           id="d-09-miss">D 09 Miss</a></td>
      <td>
        <a class="button is-warning is-fullwidth hvr-buzz"
           id="d-09-remain">D 09 Remain</a></td>
    </tr>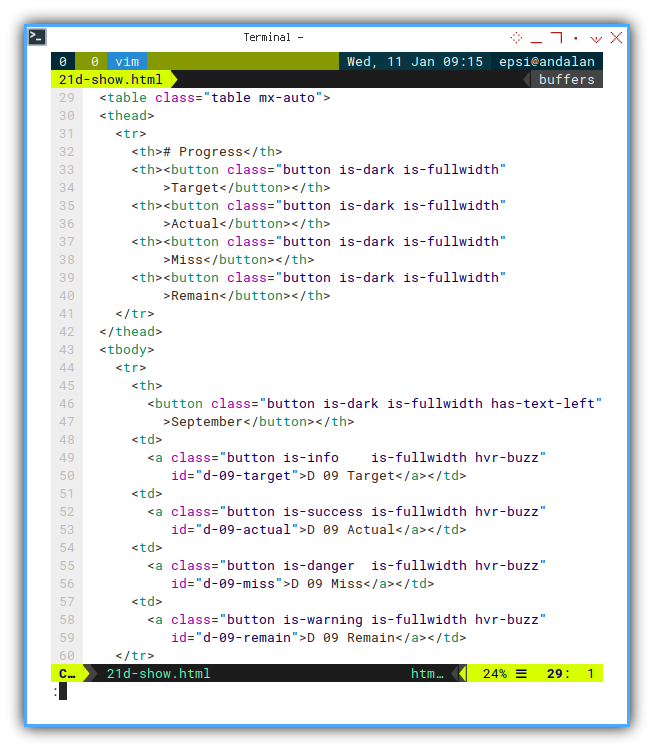
Preview in Web Browser
You can download th HTML file here.
Right click your HTML file from your file manager using right click, and open it using any web browser.
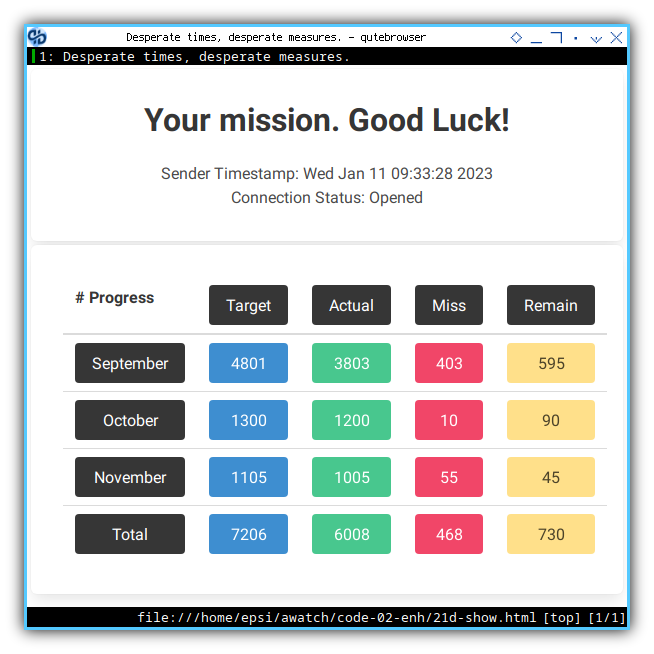
Cool. Now the page is done. I can rest for a while now. And be back later.
What is Next 🤔?
It works on my computer
After modernizing our javascript. We need to refactor more for inheritance. But first, we require tabbed user interface.
Consider continue reading [ Excel - Monitor - Tabbed Page Content ].