Preface
Goal: Monitor excel file changes and show the result in browser using websocket.
This is a multiparts article.
1: Class Introduction
Don’t be barbaric. Code properly.
Consider start with OOP from the very beginning, before we dive into more complex situation.
We are going to achieve our goal, in step by step fashioned.
Class Skeleton
All definition shown here:
class Xl2WebExample:
def __init__(self, filepath, filename):
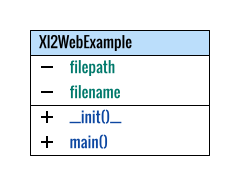
def main(self):In class diagram we can rewrite as below:
+---------------+
| Xl2WebExample |
+---------------+
| - filepath    |
| - filename    |
+---------------+
| + __init()__  |
| + main()      |
+---------------+
Python Source Code
As usual, source code are available in every step.
Here is just a simple class, with parameter initialization.
# Excel to Web, Class Example
class Xl2WebExample:
  def __init__(self, filepath, filename):
    # save initial parameter
    self.filepath = filepath
    self.filename = filename

  def main(self):
    # Running Main Method
    print("Target: %s/%s"
      % (self.filepath, self.filename))
So we can instantiate the class later as below
# Program Entry Point
example = Xl2WebExample(
  '/home/epsi/awatch', 'test-a.xlsx')
example.main()
Output in CLI
Examine The Result
The result similar as below:
❯ python 11-class.pyTarget: /home/epsi/awatch/test-a.xlsx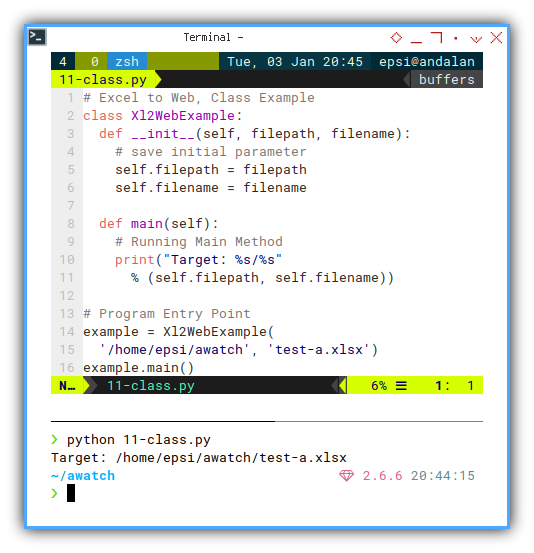
2: File Monitoring
I have difficulties mixing watchdog and websocket,
so I choose watchfiles instead.
Official Documentation
Asynchronous
What we need to know is that we are using asynchronous.
So instead of doing this below:
example.main()We are going to call as this one below:
asyncio.run(example.main())We require the asyncio library throughout this tutorial.
Spreadsheet File
Excel as Data Source
You can download the source here:
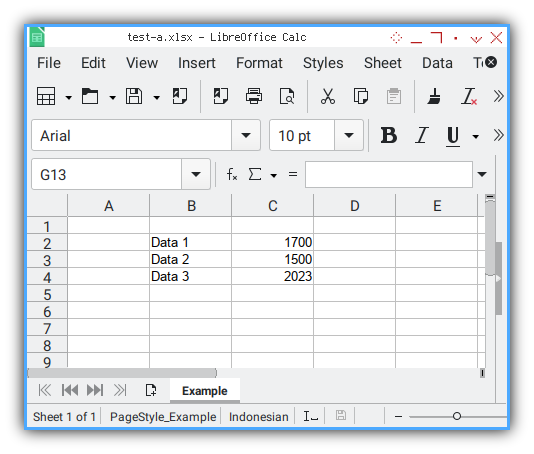
This has three cells contain data that we want to, send into our beloved web browser.
We do need to examine th cell yet. All we need to know is that, everytime we save the excel
Class Skeleton
Very similar as previous,
except we use the async keyword.
class Xl2WebExample:
  def __init__(self, filepath, filename):
  async def main(self):
Python Source Code
import asyncio
from watchfiles import awatch

# Excel to Web, Class Example
class Xl2WebExample:
  def __init__(self, filepath, filename):
    # save initial parameter
    self.filepath = filepath
    self.filename = filename

  async def main(self):
    async for changes in awatch(self.filepath):
      print(changes)

# Program Entry Point
example = Xl2WebExample(
  '/home/epsi/awatch', 'test-a.xlsx')
asyncio.run(example.main())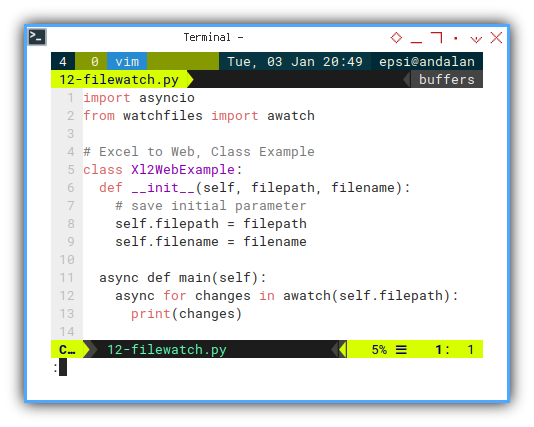
The only different with previous code is that,
I copy-paste from filewatch official documentation,
as below code:
  async def main(self):
    async for changes in awatch(self.filepath):
      print(changes)
Output in CLI
Consider have a look at the result, each time we change something in a folder, such as saving excel files.
❯ python 12-filewatch.py{(<Change.added: 1>, '/home/epsi/awatch/.~lock.test-a.xlsx#'), (<Change.added: 1>, '/home/epsi/awatch/lu22487r35sn.tmp'), (<Change.deleted: 3>, '/home/epsi/awatch/.~lock.test-a.xlsx#')}
{(<Change.deleted: 3>, '/home/epsi/awatch/lu22487r35sn.tmp'), (<Change.added: 1>, '/home/epsi/awatch/test-a.xlsx'), (<Change.modified: 2>, '/home/epsi/awatch/lu22487r35sn.tmp')}
Your result might be completely different. It depends on what changes occurred in your folder.
3: Serving Web Socket
Official Documentation
Python Source Code
Class Skeleton
Additional websocket handler.
class Xl2WebExample:
  def __init__(self, filepath, filename, site, port):
  async def handler(self, websocket, path):
  async def main(self):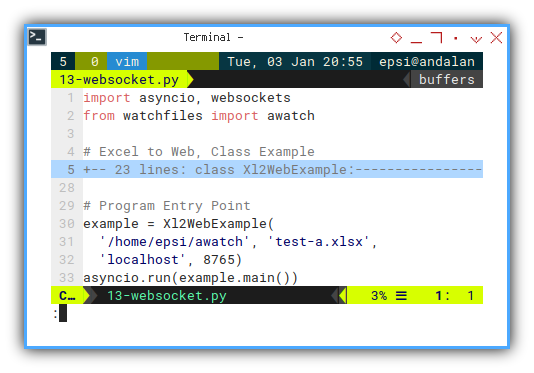
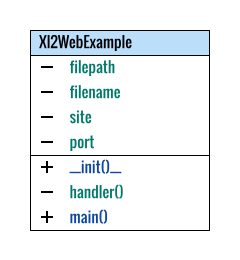
In class diagram we can rewrite as below:
+---------------+
| Xl2WebExample |
+---------------+
| - filepath    |
| - filename    |
| - site        |
| - port        |
+---------------+
| + __init()__  |
| - handler()   |
| + main()      |
+---------------+
Class: Init
Additional site and port property.
More parameter to be initialized.
class Xl2WebExample:
  def __init__(self, filepath, filename, site, port):
    # save initial parameter
    self.filepath = filepath
    self.filename = filename
    self.site = site
    self.port = port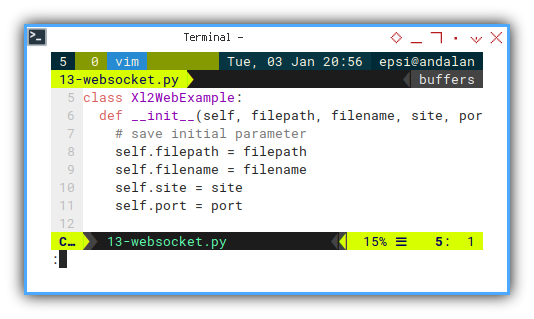
Entry Point
example = Xl2WebExample(
  '/home/epsi/awatch', 'test-a.xlsx',
  'localhost', 8765)
asyncio.run(example.main())
Websocket Handler
Asynchronously watch files as websocket handler
This is the core part of our script.
  # websocket handler
  async def handler(self, websocket, path):
    async for changes in awatch(self.filepath):
      for change in changes:
        print(change[0])
        print(change[1])
        await websocket.send(change[1])

  async def main(self):
    # Start the server
    server = await websockets.serve(
      self.handler, self.site, self.port)
    await server.wait_closed()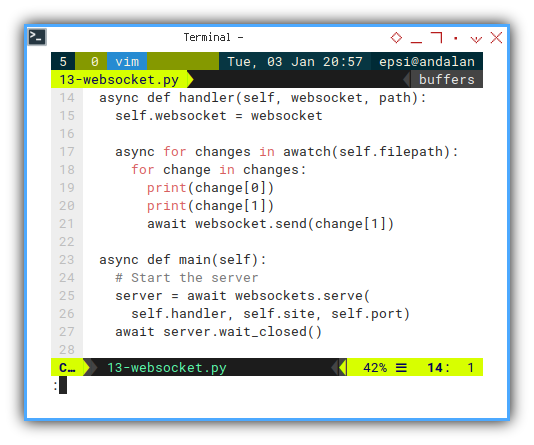
I follow the websocket from official documentation. This can be done becau
Output in CLI
Sender and Receiver
Examine the output of the script, as sender.
❯ python 13-websocket.pyChange.deleted
/home/epsi/awatch/.~lock.test-a.xlsx#
Change.added
/home/epsi/awatch/.~lock.test-a.xlsx#
Change.added
/home/epsi/awatch/lu22487r35sq.tmp
Change.deleted
/home/epsi/awatch/lu22487r35sq.tmp
Change.modified
/home/epsi/awatch/lu22487r35sq.tmp
Change.added
/home/epsi/awatch/test-a.xlsxAnd also the receiver in CLI
❯ python -m websockets ws://localhost:8765Connected to ws://localhost:8765
< /home/epsi/awatch/.~lock.test-a.xlsx#
< /home/epsi/awatch/.~lock.test-a.xlsx#
< /home/epsi/awatch/lu22487r35sq.tmp
< /home/epsi/awatch/lu22487r35sq.tmp
< /home/epsi/awatch/lu22487r35sq.tmp
< /home/epsi/awatch/test-a.xlsx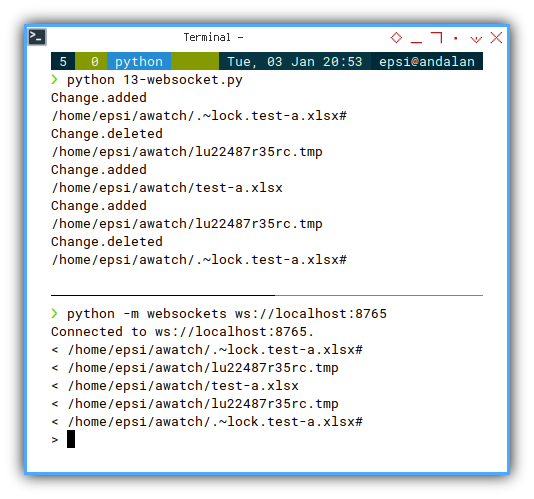
This websocket is full duplex. You can also type on CLI above, and send the data back to your python script. You can also see how it goes with multiple connection.
Three client, means three output on original script. This can be done because each connection having its own websocket .
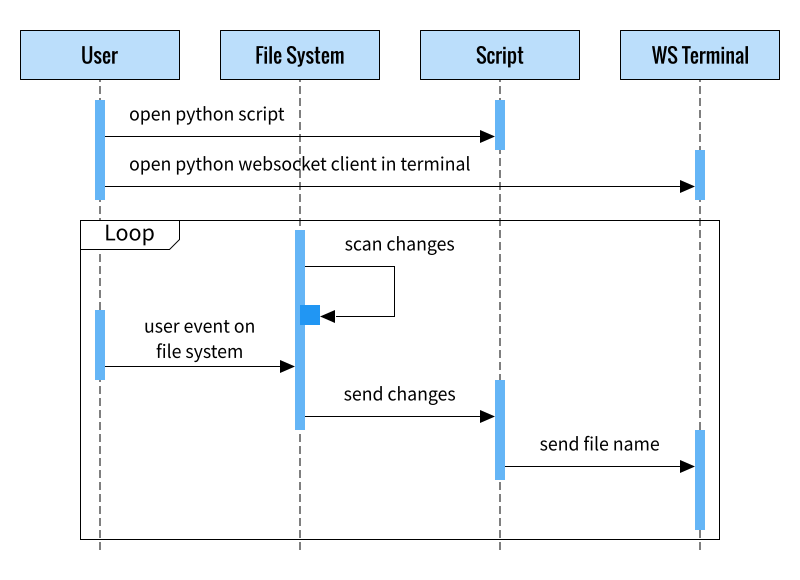
How does it Works?
The sequence diagram can be drawn in figure below:
4: Serving Multiple Client
Broadcast
Although the code above can serve multiple connection. What we have above is designed for single connection. Instead of sending messages for each connection, we can broadcast to all connection at once.
Python Source Code
Class: Init
Additional connections property,
initialized as empty set.
class Xl2WebExample:
  def __init__(self, filepath, filename, site, port):
    # save initial parameter
    self.filepath = filepath
    self.filename = filename
    self.site = site
    self.port = port

    # websocket broadcast collection
    self.connections = set()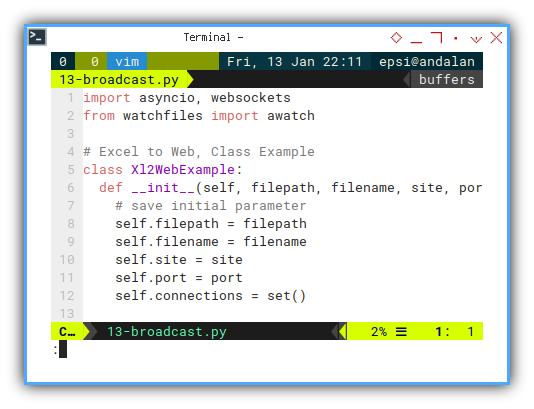
This property contain distinct websocket.
Websocket Handler
The handler is different, as we can see here:
  async def __handler(self, websocket):
    self.connections.add(websocket)
    try:
      await websocket.wait_closed()
    finally:
      self.connections.remove(websocket)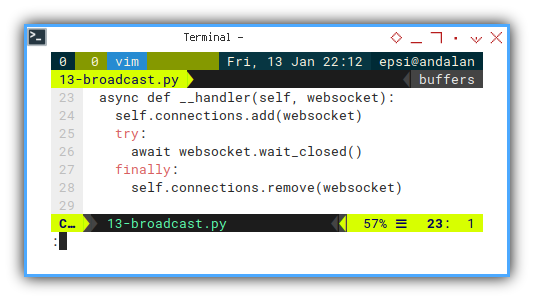
The only task the handler do is, to manage set of websocket collection.
When then connection closed event fired,
the flow goes to websockets.serve building block,
in main method.
Main Method
  async def main(self):
    # Start the server
    async with await websockets.serve(
      self.__handler, self.site, self.port):
        await self.__broadcast_[py-13-broadcast]changes()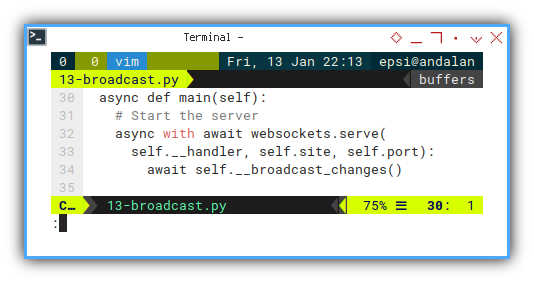
The building block, in main method, will run broadcast_changes.
Broadcast Changes
This will call websockets.broadcast.
Note that this websockets (with s) is a module.
  async def __broadcast_changes(self):
    async for changes in awatch(self.filepath):
      for change in changes:
        print(change[0])
        print(change[1])
        websockets.broadcast(
          self.connections, change[1])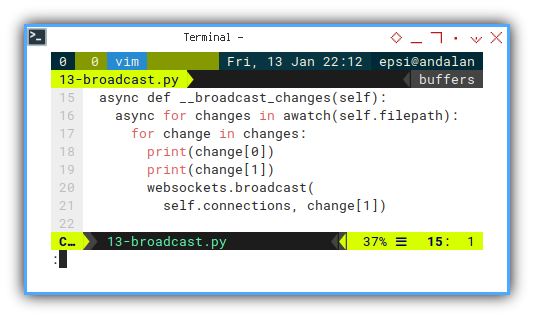
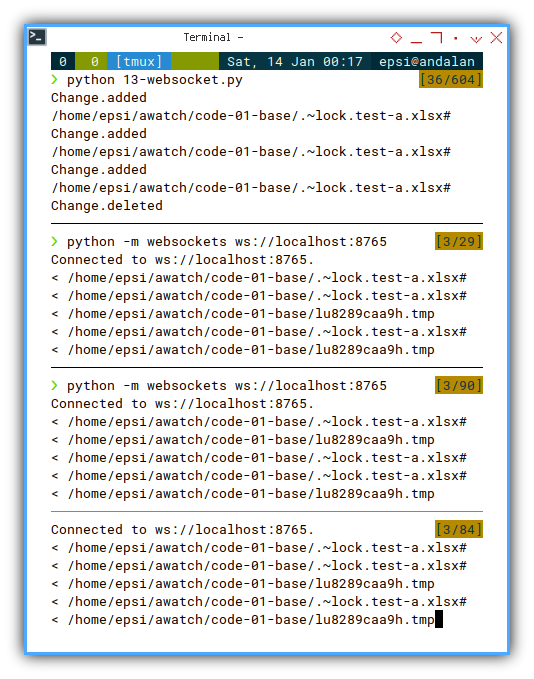
Websocket Handler
Check again the result in multiple client.
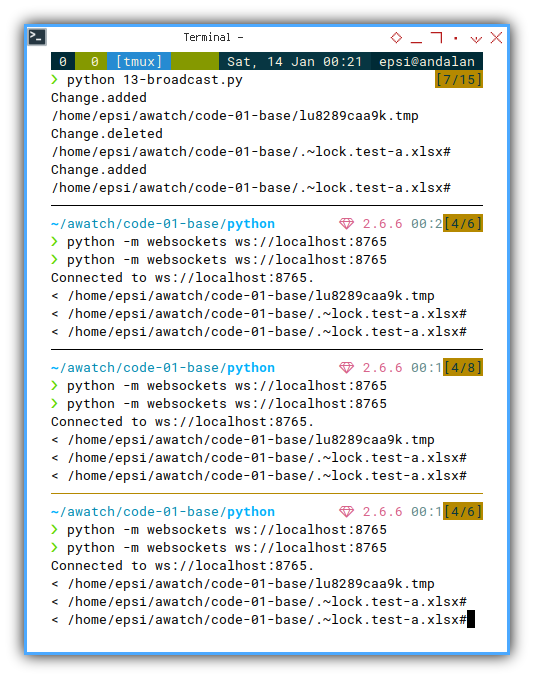
Although this looks very similar as pervious output, If you examine closely, you will see the different. The original script will print only once, instead three times.
This means smaller log footprint.
What is Next 🤔?
We are done with basic asynchronous watchfiles via websocket. Now it is a good time to read our excel sheet, and put the result in web browser.
Consider continue reading [ Excel - Monitor - Send/Receive ].