Preface
Goal: Extending unified configuration. Closing the final steps by refactoring to separate files.
We will learn how to extend this class structure. For example, to add a data coloring procedure. Finally, we’ll separate the macro, making it reusable for multiple projects that use the same library.
Example Sheet
This time, the example will be different.
Instead of a workbook with 40 worksheets,
we’ll work with just one worksheet
containing movie examples from 1900 to 2019,
with all titles including the keyword movie.
You can download the example files here:
- ODS Source: github.com/…/movies/data/movies-all.ods
- XLSX Result: github.com/…/movies/data/movies-all.xlsx
08: Step Eight
In this step, we extend the script’s capabilities by incorporating a new method, without changing the existing configuration.
I want to enhance the script, so it can color rows based on the year of the movie release. This will be achieved with the proper class structure, especially the basic flow.
Step Overview
- Basic Flow: Use hooks instead of modifying the basic flow directly.
- Similar to Previous coloring cells in simple configuration
- List Comprehension: Getting Affected Letter
Macro Source
You can obtain the macro source for this step from the repository:
Class Diagram
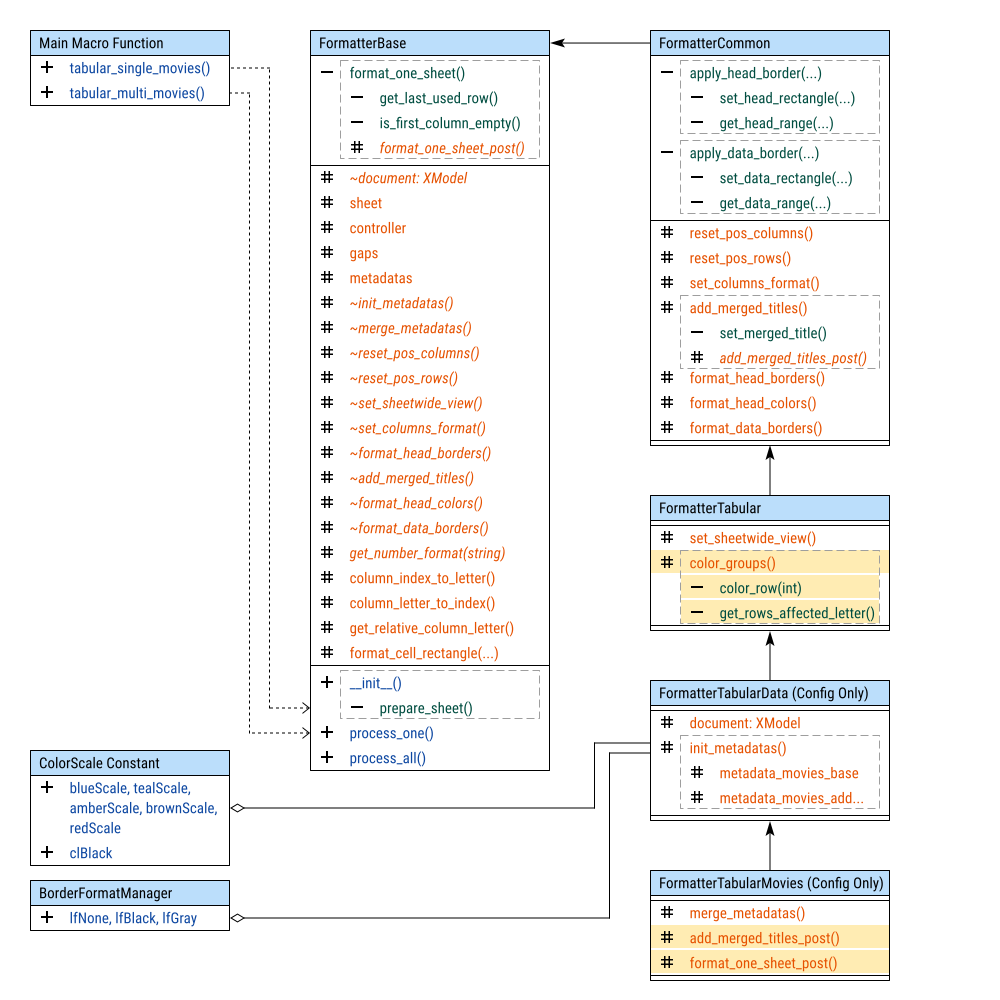
Hooks, and nomore abstract!
Rather than overriding methods, we’ll use hooks in this step. There are two key examples of this approach:
_add_merged_titles_post()_format_one_sheet_post()
This allows us to easily implement
the formatting procedure _color_groups()
in the FormatterTabular class,
along with supporting methods: __color_row() and __get_cols_affected().
Note on the Class Implementation
Where to put tabular method?
The _color_groups() method is
implemented in the FormatterTabular class,
rather than in the FormatterCommon or FormatterTabularMovies classes.
This decision was made because, in real-world spreadsheet tasks,
I frequently encounter tabular data that requires color highlighting.
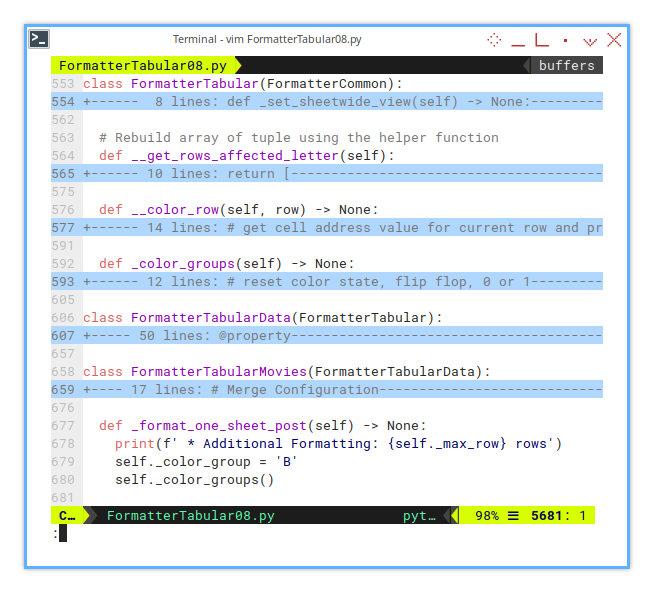
In contrast, other types of data (such as summaries, pivot tables, etc.) don’t require this kind of formatting. Each of those would need very different implementations, so the coloring feature is specifically tied to the FormatterTabular class.
Similarly, I’ve chosen not to duplicate the coloring methods in every descendant of the tabular class. Since this feature is well-suited for the FormatterTabular class, it’s more efficient to keep it there rather than repeating it across multiple descendants.
Basic Flow
Instead of directly modifying the basic class, I’m using hooks to extend the functionality.
For instance, we use the hook _add_merged_titles_post() like this:
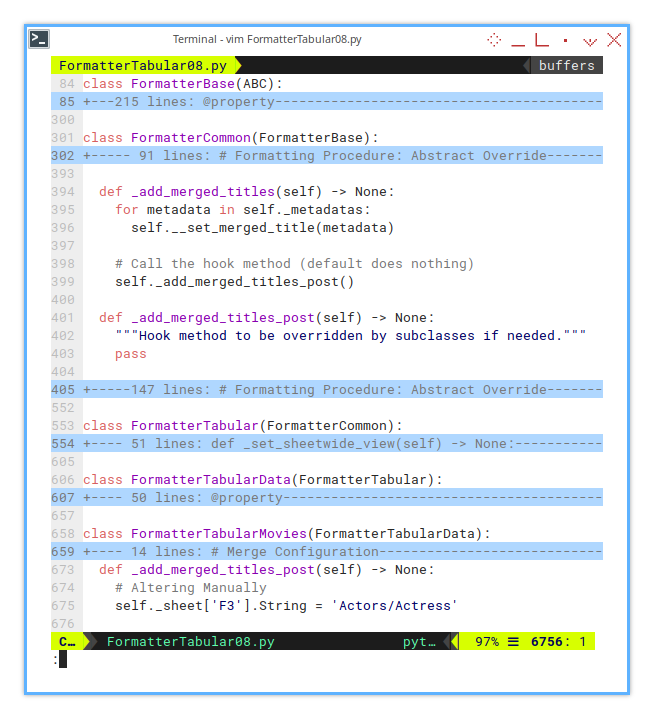
  def _add_merged_titles_post(self) -> None:
    # Altering Manually
    self._sheet['F3'].String = 'Actors/Actress'
And here’s how we use the _format_one_sheet_post() hook:
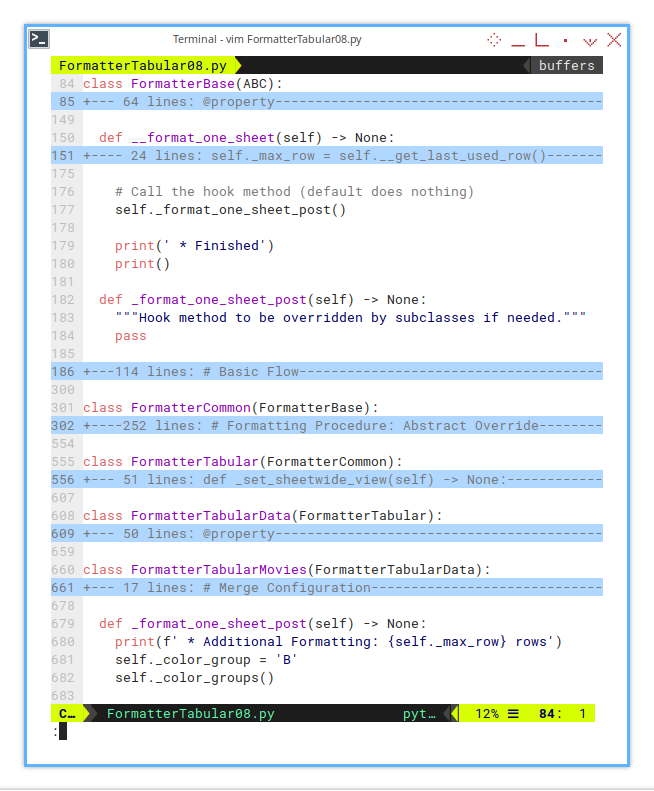
  def _format_one_sheet_post(self) -> None:
    print(f' * Additional Formatting: {self._max_row} rows')
    self._color_group = 'B'
    self._color_groups()
Let’s look at how the hook is handled
in the FormatterBase class:
  def __format_one_sheet(self) -> None:
    ...

    # Apply borders to the specified range
    print(' * Formatting Border')
    self._format_data_borders()

    # Call the hook method (default does nothing)
    self._format_one_sheet_post()

    print(' * Finished')
    print()
And also in the FormatterCommon class.
  def _add_merged_titles(self) -> None:
    for metadata in self._metadatas:
      self.__set_merged_title(metadata)

    # Call the hook method (default does nothing)
    self._add_merged_titles_post()
Now, let’s get back to the main topic:
this is where the _color_groups() method comes into play.
Formatting: Group Coloring
Now, let’s dive into the _color_groups() method.
This method works by flipping between,
two color states—0 and 1—and applying a different color for each state.
In simpler terms, it’s about deciding whether to color the rows or not.
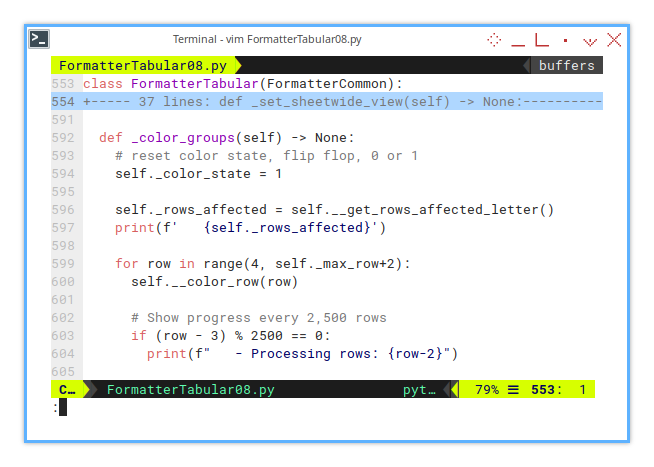
To make the process more transparent, I’ve added progress notifications in the console. For instance, the script will display progress every 2500 rows processed.
I also introduced a new instance variable: self._cols_affected.
This helps track the affected rows,
and I print the affected letters in the console,
to make debugging easier
if any formatting configuration goes wrong.
Here’s how the _color_groups() method looks:
  def _color_groups(self) -> None:
    self._color_state = 1

    self._cols_affected = self.__get_cols_affected_letter()
    print(f'   {self._cols_affected}')

    for row in range(4, self._max_row+2):
      self.__color_row(row)

      if (row - 3) % 2500 == 0:
        print(f"   - Processing rows: {row-2}")
Now, let’s put the entire method together in one class,
from _color_groups() method,
including both supporting methods:
__color_row()__get_cols_affected_letter()
Supporting Helper: Row Coloring
In this helper method, we determine whether a row belongs to a different group, by comparing the current row’s release year with the previous row’s. If the values are different, it indicates a new group, and we flip the color state accordingly.
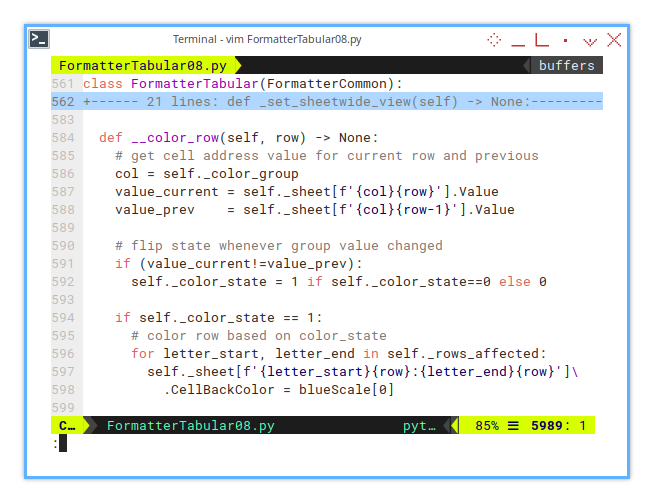
Here’s how the __color_row() method works:
  def __color_row(self, row) -> None:
    col = self._color_group
    value_current = self._sheet[f'{col}{row}'].Value
    value_prev    = self._sheet[f'{col}{row-1}'].Value

    if (value_current!=value_prev):
      self._color_state = 1 if self._color_state==0 else 0

    if self._color_state == 1:
      for letter_start, letter_end in self._cols_affected:
        self._sheet[f'{letter_start}{row}:{letter_end}{row}']\
          .CellBackColor = blueScale[0]
In this method,
I use the instance variable self._cols_affected,
as the base for the cell range that needs to be colored.
No more hardcoded column letters.
The value for self._cols_affected,
comes from the __get_cols_affected_letter() method.
Supporting Helper: Getting Affected Letter
This is one of the more complex aspects, of working with configuration metadata: calculating the position needed to rebuild an array of tuples. These tuples represent cell ranges that will be affected by the formatting.
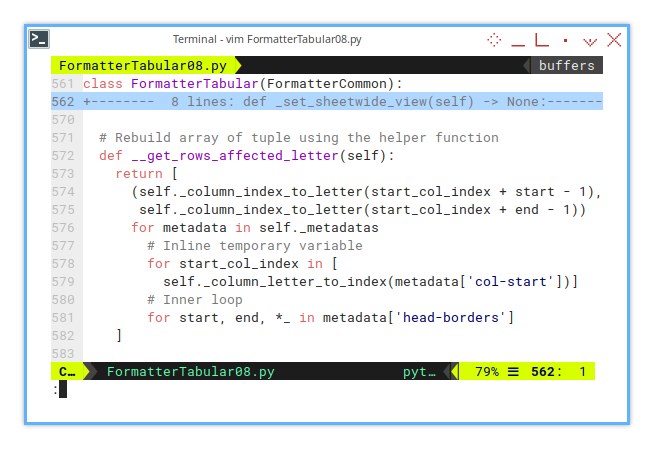
The array is rebuilt using list comprehension, in this supporting helper method.
Here’s how the __get_cols_affected_letter() method works:
  def __get_cols_affected_letter(self):
    return [
      (self._column_index_to_letter(start_col_index + start - 1),
       self._column_index_to_letter(start_col_index + end - 1))
      for metadata in self._metadatas
        # Inline temporary variable
        for start_col_index in [
          self._column_letter_to_index(metadata['col-start'])]
        # Inner loop
        for start, end, *_ in metadata['head-borders']
    ]
In this method, the list comprehension rebuilds, the list of tuples for the affected cell ranges. The values are based on the metadata, specifically the col-start column, and the head-borders for each metadata entry.
In real spreadsheet tasks, I frequently encounter different variations of list rebuilding. So, this type of list comprehension is quite common for me.
Sheet Result
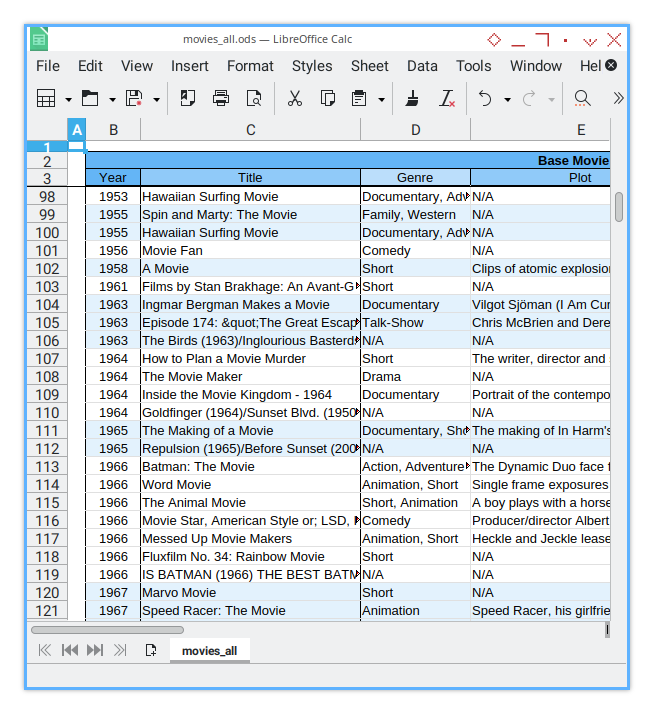
The output of the sheet will have rows, grouped by different colors based on the same release year, as shown in the figure below:
Console Logging.
For this step, the result displayed in the APSO console will look like this:
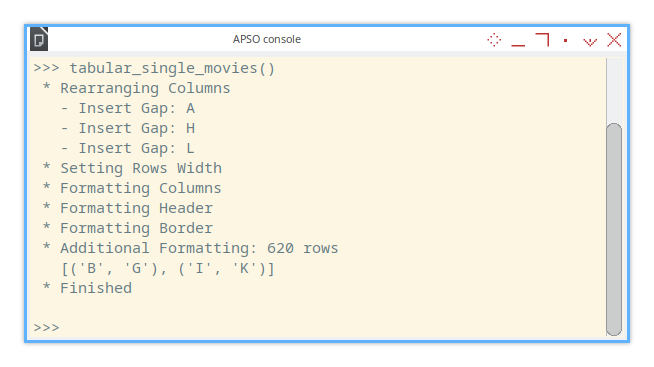
>>> tabular_single_movies()
 * Rearranging Columns
   - Insert Gap: A
   - Insert Gap: H
   - Insert Gap: L
 * Setting Rows Width
 * Formatting Columns
 * Formatting Header
 * Formatting Border
 * Additional Formatting: 620 rows
   [('B', 'G'), ('I', 'K')]
 * Finished

>>>
09: Step Nine
The Final Form of the Macro
To ensure that our base class can be used, for a variety of spreadsheet configurations, we need to refactor it into a modular structure. This allows us to treat the class, as a reusable library that can be imported as needed.
Step Overview
- Separating the base class into libraries for modularity and reuse.
Macro Source
We’ll break the previous macro into multiple files for better organization:
In the movies folder
In the movies/lib folder
- github.com/…/movies/lib/ColorScale.py
- github.com/…/movies/lib/BorderFormat.py
- github.com/…/movies/lib/FormatterBase.py
- github.com/…/movies/lib/FormatterTabular.py
This results in a total of five Python scripts.
Package Diagram
The package structure can be illustrated in the following diagram.
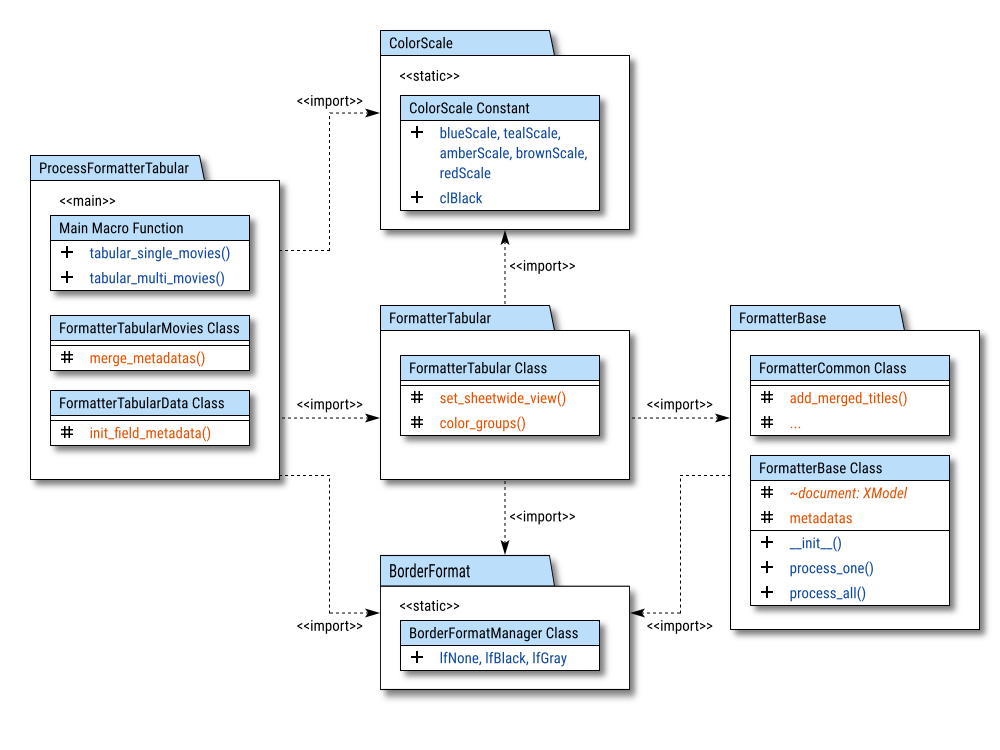
The relationships between the components are marked with <<import>>.
The <<main>> mark indicates the primary importance of the component,
while <<static>> is used to highlight constants.
Library Path
Adding the path to the macro
The process of importing libraries, can differ between Windows and Linux systems. It’s important to be aware that file paths are, formatted differently across these operating systems.
On Linux-based systems, the path might look like this:
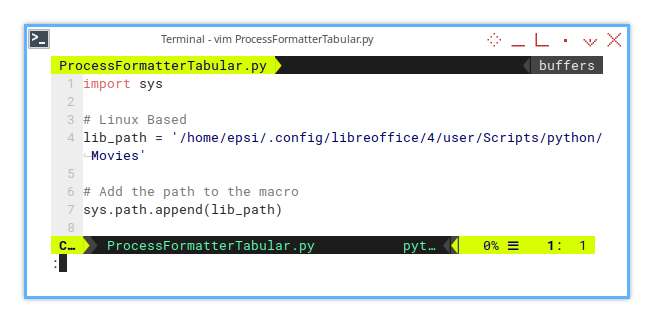
lib_path = '/home/epsi/.config/libreoffice/4/user/Scripts/python/Movies'
sys.path.append(lib_path)
While on Windows, however, the path would appear as follows:
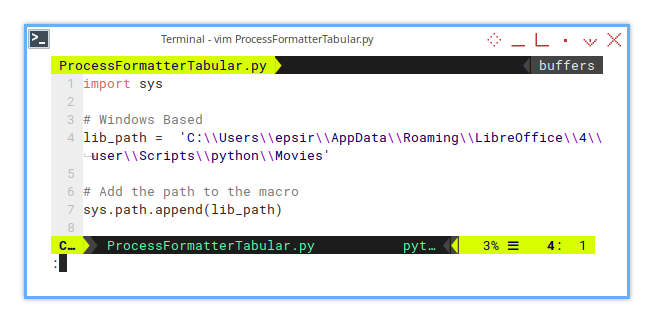
lib_path =  'C:\\Users\\epsir\\AppData\\Roaming\\LibreOffice\\4\\user\\Scripts\\python\\Movies'

sys.path.append(lib_path)
This distinction ensures that the macro can be executed seamlessly on both Linux and Windows platforms.
Import Statements
Now that each part is reusable, and we can import only what we needed. We can see the variation in example in variation below:
In the main macro:
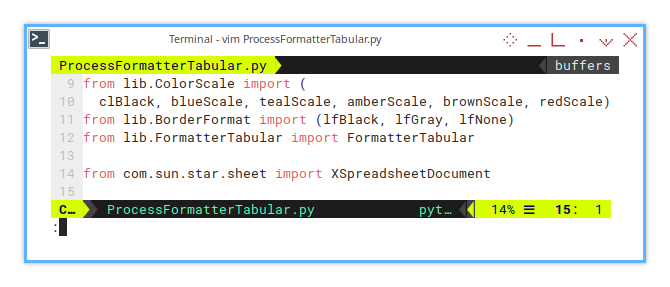
from lib.ColorScale import (
  clBlack, blueScale, tealScale, amberScale, brownScale, redScale)
from lib.BorderFormat import (lfBlack, lfGray, lfNone)
from lib.FormatterTabular import FormatterTabular
In the descendant class (of the base class):
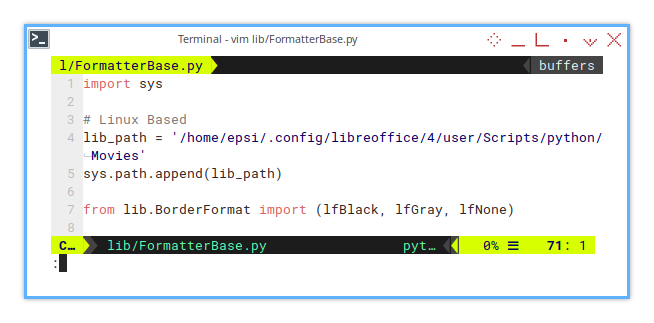
from lib.ColorScale import (blueScale, redScale)
from lib.BorderFormat import (lfBlack, lfGray, lfNone)
from lib.FormatterBase import FormatterCommon
And finally on the base class.
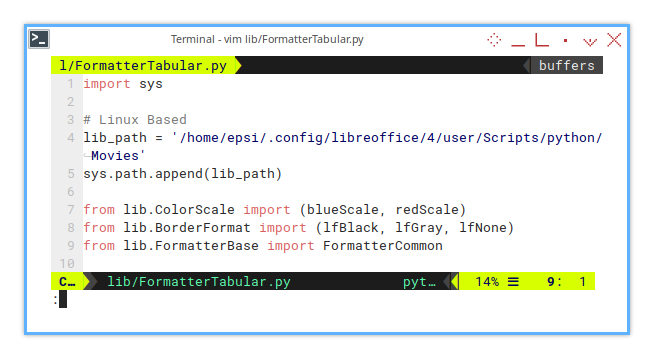
from lib.BorderFormat import (lfBlack, lfGray, lfNone)Now we’re done! The macro scripts are ready to be used.
Congratulations on completing the unified configuration!
What is Next 🤔?
After a while I found out that openpyxl can process huge workbook, something that calc macro would take a very long time. After a few days, I can produce more and more report, becoming more productive, and more time to rest from my keyboard.
Beside libreoffice macro, I also made the openpyxl version of this project.
Consider continuing with [ Formatter - Excel - Merge CSV ].
Conclusion
Good writing is rewriting. Good code is rewritten.
At this point, we can compare the original unrefined project (simple configuration), with the revised version after the refactoring process (unified configuration). While there may still be areas for improvement, I must draw the line before this becomes an endless article.
Write code like you’re the next person to maintain it. Then rewrite it like you actually care.
Thank you for visiting. We shall meet again. Farewell.