Preface
Goal: Extending simple configuration. Closing the final steps by refactoring to separate files.
Example Sheet
This time, the example will be a bit different.
Instead of a workbook with 40 worksheets,
we’ll work with a single worksheet containing examples of movies from 1900 to 2019,
with all titles including the keyword movie.
You can download the example ODS source here:
And the example XLSX result here:
08: Step Eight
In this step, we extend the script’s capability, by incorporating a new method, without changing the existing configuration.
The goal is to add a feature that colors rows based on the year of the movie release. However, implementing this feature breaks our previous structure, especially the basic flow.
Step Overview
- Helper: Row coloring
- Formatting Procedure: Groups coloring
- Basic Flow: Overriding basic flow
Macro Source
You can obtain the macro source from this repository:
Class Diagram
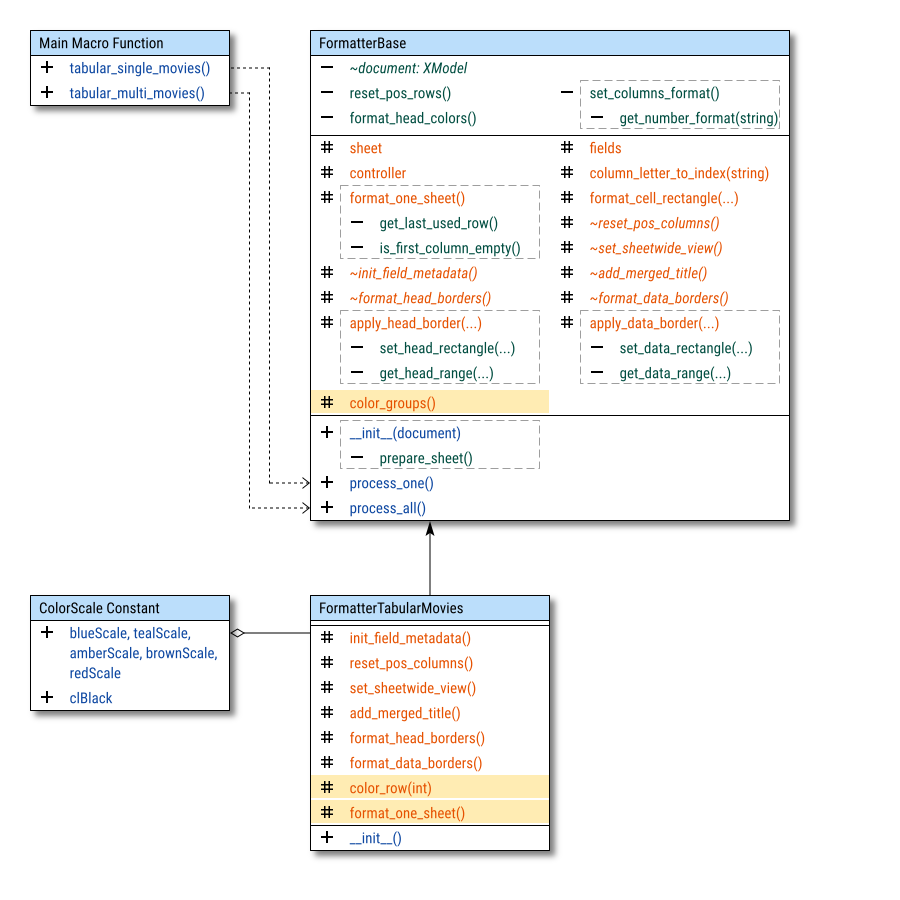
In the class diagram,
you’ll notice the highlighted abstract method
named _format_one_sheet() with protected visibility.
This change means we need to move this abstract method,
from the private section to the protected section of the base class.
Additionally, we have a formatting procedure called _color_groups(),
which is so reusable that it exists in the base class.
This method has a helper function named _color_row(),
which needs to be flexible, so it remains in the descendant class.
Confused yet? Don’t worry, we’ll sort this out.
Upon reflection, I realized my approach has, become messy and overcomplicated for a simple task. We will address this part later in the unified configuration.
Basic Flow
As a n00b beginner in the OOP paradigm, I tried to do something cool, like calling the overridden method while also invoking the parent method.
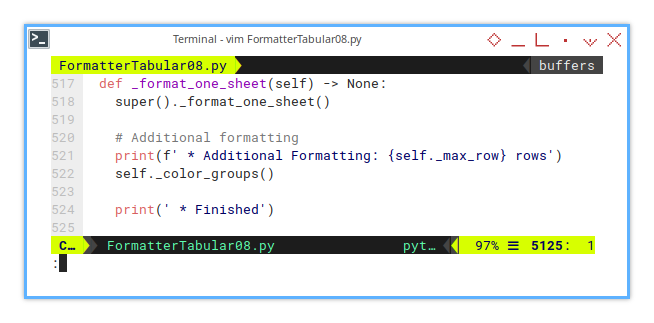
Since this format_one_sheet must be overridden,
it also needs to be visible in the descendant class.
  def _format_one_sheet(self) -> None:
    super()._format_one_sheet()

    # Additional formatting
    print(f' * Additional Formatting: {self._max_row} rows')
    self._color_groups()

    print(' * Finished')
This means changing its visibility from private to protected, in both the base class and the descendant class. Basically, this forces a visibility shift across the base class, pushing everything to a more visible level, which is not ideal for the method’s intended design.
This is obviously not the best approach, even for a beginner. Now, let’s revisit the base class and have look at the underscore.
  def _format_one_sheet(self) -> None:
    self._max_row = self.__get_last_used_row()
    ...
Alright, let’s get back to the task at hand.
Now that we’ve touched on the issue with visibility,
let’s move forward and dive into the _color_groups() method.
Formatting: Group Coloring
Let’s move to the base class by scrolling.
Now, here we are with the _color_groups() method.
This method is essentially a flip-flop mechanism,
that alternates between two color states (0 or 1).
Depending on the state, it applies a different color,
or in this example, it just determines whether to color a row or not.
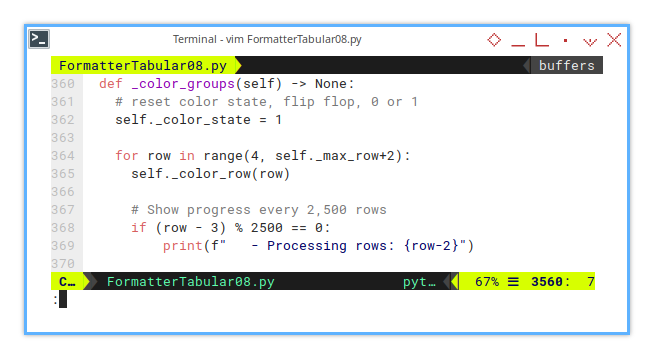
In a real-world spreadsheet with long columns and a large amount of data, this process can become time-consuming. It can be a daunting task, as we can’t always tell if the script is still running or if it’s stalled somewhere.
This is why progress notifications are important. Using console progress reporting is usually sufficient. For example, this code snippet shows the progress every 2500 rows.
  def _color_groups(self) -> None:
    self._color_state = 1

    for row in range(4, self._max_row+2):
      self._color_row(row)

      if (row - 3) % 2500 == 0:
          print(f"   - Processing rows: {row-2}")
Notice that there is a call to _color_row().
Keep scrolling to the descendant class,
and you’ll find its implementation.
Supporting Helper: Row Coloring
Let’s scroll to the descendant class, where we find the implementation.
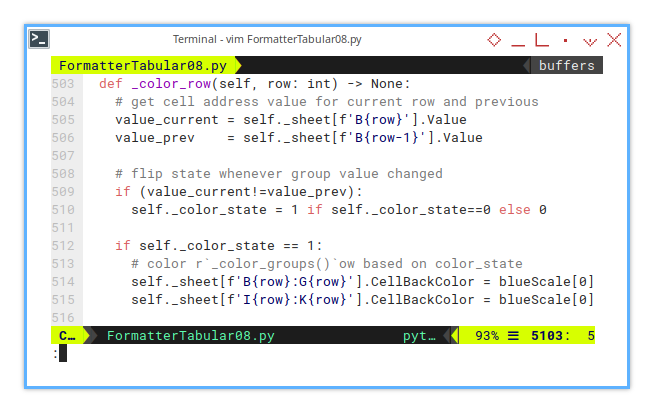
First, we retrieve the cell values for the current row and the previous row, specifically the release year of the movie. If these values differ, it indicates that they belong to different groups. In this case, we need to flip the color state whenever the group value changes.
  def _color_row(self, row: int) -> None:
    value_current = self._sheet[f'B{row}'].Value
    value_prev    = self._sheet[f'B{row-1}'].Value

    if (value_current!=value_prev):
      self._color_state = 1 if self._color_state==0 else 0

    if self._color_state == 1:
      self._sheet[f'B{row}:G{row}'].CellBackColor = blueScale[0]
      self._sheet[f'I{row}:K{row}'].CellBackColor = blueScale[0]
Next, we define actions for different color states. In this example, for state one, we apply a very light color, while for state zero, we leave the background uncolored.
Now, we can spot the issue. The column letters are hardcoded, which isn’t ideal. Maintaining different code for various reports would be exhausting. We’ll address this issue with column references later.
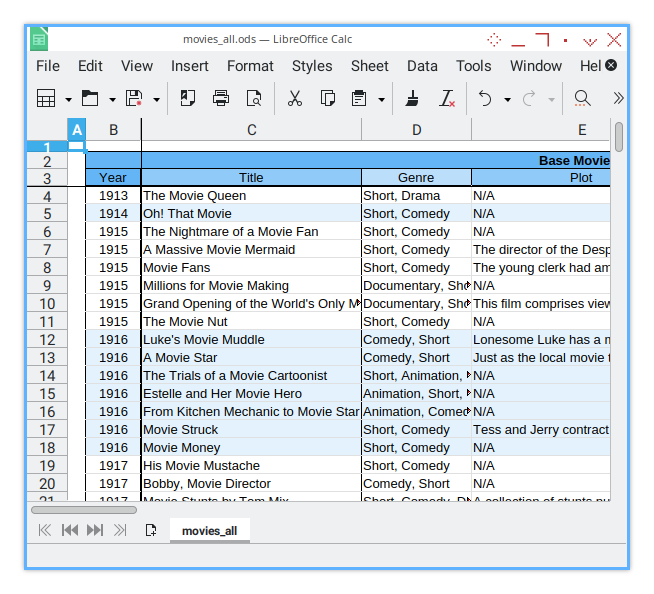
Sheet Result
The resulting sheet will have rows, grouped by different colors based on the release year, as shown in the figure below:
Console Logging
For this step, the console output will look like this:
>>> tabular_single_movies()
 * Rearranging Columns
 * Formatting Columns
 * Formatting Header
 * Formatting Border
 * Additional Formatting: 620 rows
 * Finished
 >>>
09: Step Nine
The Final Form of the Macro
To ensure our base class can be reused across different spreadsheet configurations, we need to separate the base class and treat it as a library that can be easily imported.
Step Overview
- Separating class into libraries.
Macro Source
We will split the previous macro into several files for better modularity:
- github.com/…/movies/ColorScale.py
- github.com/…/movies/FormatterBase.py
- [github.com/…/movies/lib/FormatterTabular.py][formatter-02-tabular]
In total, just three files.
Package Diagram
The package structure is depicted in the following diagram.
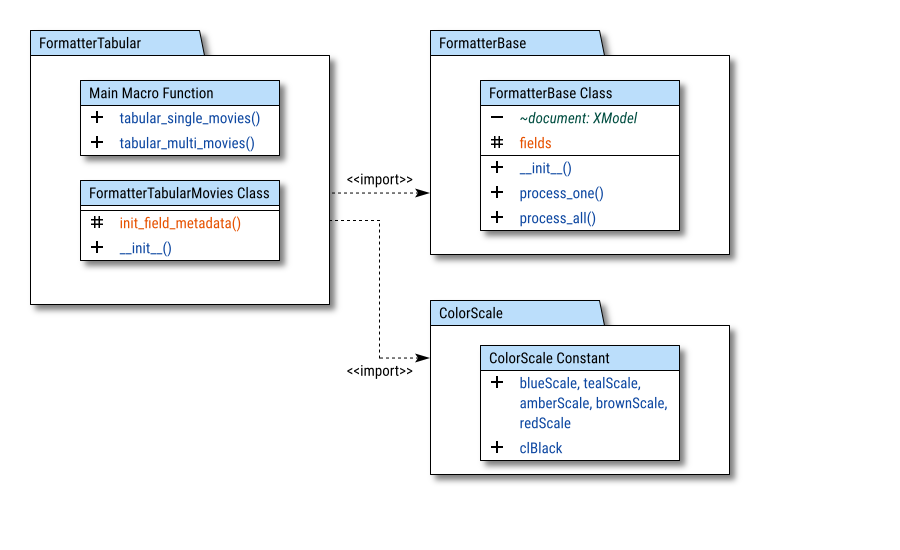
The relationships between the files are shown using <<import>> marks.
Library Path
Adding path to the macro
Importing macros in LibreOffice can be tricky. We must specify the exact directory path, and this means that once we separate the macro into different files, the macro will no longer be fully portable. However, we proceed with this approach, because we want to reuse the base class for multiple configurations.
The import paths differ between Windows and Linux. It’s important to keep in mind that file paths in Linux and Windows are formatted differently.
For Linux-based systems, the path would typically look like this:
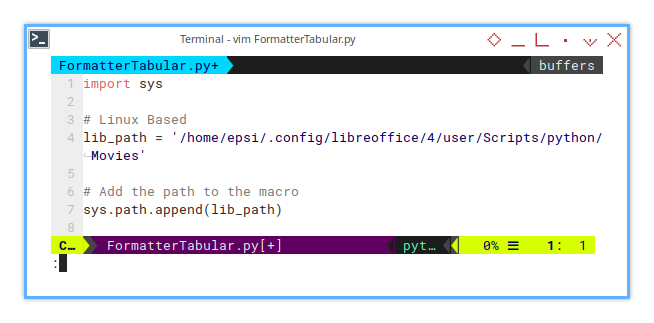
lib_path = '/home/epsi/.config/libreoffice/4/user/Scripts/python/Movies'
sys.path.append(lib_path)
For Windows users, the path would look like this:
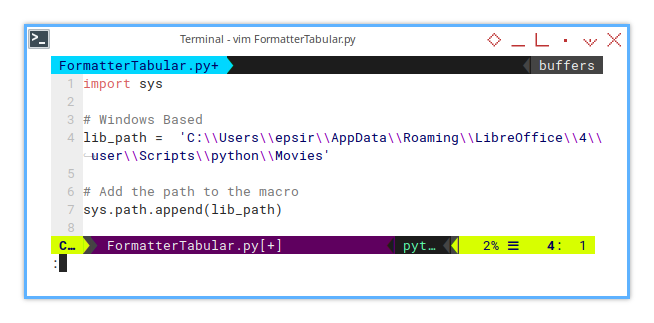
lib_path =  'C:\\Users\\epsir\\AppData\\Roaming\\LibreOffice\\4\\user\\Scripts\\python\\Movies'

sys.path.append(lib_path)
Import Statements
The Python code will include the following import statements:
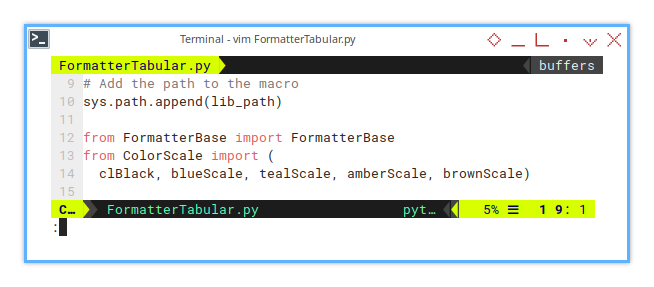
sys.path.append(lib_path)

from FormatterBase import FormatterBase
from ColorScale import (
  clBlack, blueScale, tealScale, amberScale, brownScale)
Now, we are done. The macro script is ready to be used. It is time to integrate the macro into your workflow.
What is Next 🤔?
Learn from my mistakes.
We’ll now merge all the previous messy code into a unified configuration. Let’s start over with this unified-config class, beginning with rearranging the columns. We’ll also apply design patterns using abstract methods and hooks.
We’ll compare the initial project (the original), and the revised project (the refactored version) after the refactoring process.
The best code is refactored, not written.
Thank you for reading this so far. I hope this is useful for you.
Consider continuing to read [ Formatter - Unified Config - One ].