Preface
Goal: Separating the formatting code and configuration. Example class using simple configuration.
After basic formatting, we can colorized the header. And also give border for both header and data.
Example Sheet
You can download the example ODS source here:
And the example XLSX result here:
This is essentially just a workbook with 40 worksheets. Unlike 42, 40 is not relly an answer of life. But it is till looks like magical number for me.
06: Step Six
From the plain, boring sheets, it’s time to add some visual appeal.
Step Overview
In this section, we’ll cover the following topics:
- Helper: Get head range, set head rectangle, apply head border
- Formatting Procedure: Format head border
- Formatting Procedure: Format head colors
Macro Source
The macro source can be obtained from this repository:
In the Macro Dialog, it would look like this:

Class Diagram
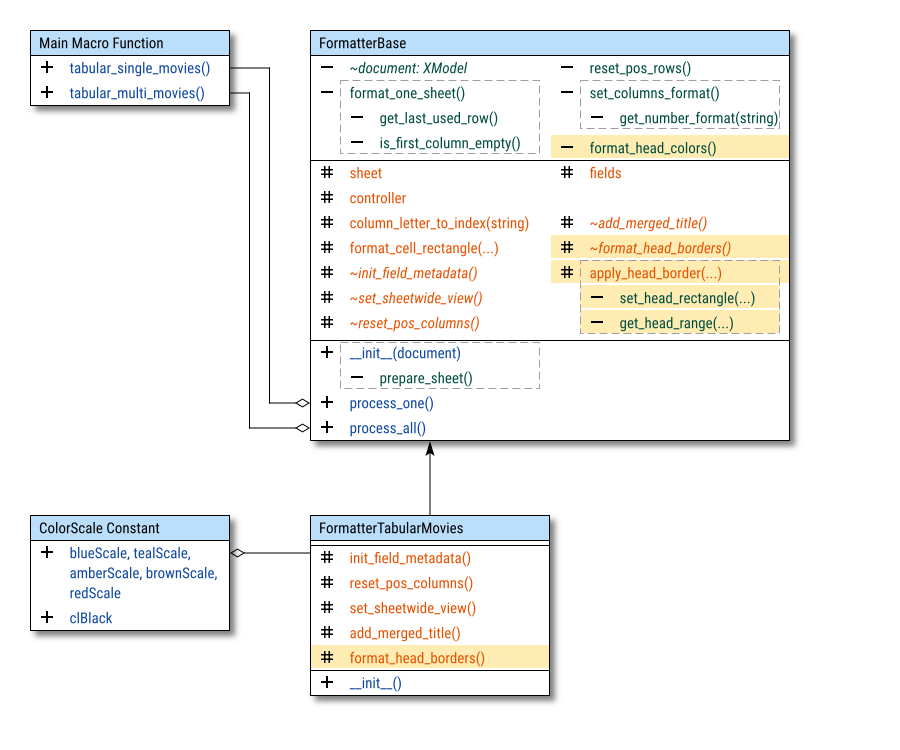
You can see a highlighted private method named _format_head_colors().
This method doesn’t need to be altered whatsoever,
so I set visibility as private.
You’ll also see another highlighted method:
an abstract method named _format_head_borders(),
with a supporting method called _apply_head_borders.
The _apply_head_borders method requires two helpers:
__set_head_rectangle() and __get_head_range().
We’re almost done with the basic structure.
Import Statements
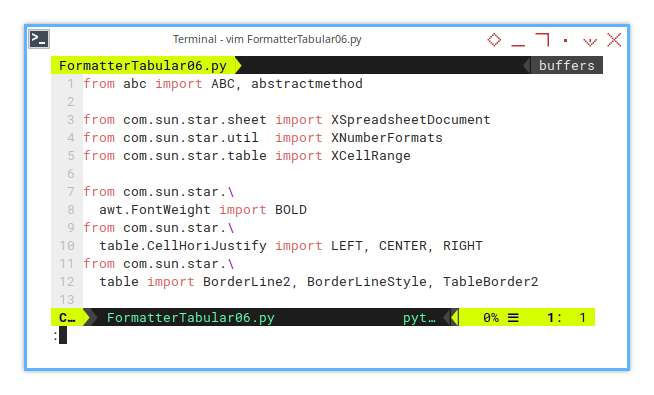
We need to import TableBorder2 from com.sun.star.
Services
from abc import ABC, abstractmethod

from com.sun.star.sheet import XSpreadsheetDocument
from com.sun.star.util  import XNumberFormats
from com.sun.star.table import XCellRange
And Formatting Constant
from com.sun.star.\
  awt.FontWeight import BOLD
from com.sun.star.\
  table.CellHoriJustify import LEFT, CENTER, RIGHT
from com.sun.star.\
  table import BorderLine2, BorderLineStyle, TableBorder2
Configuration Metadata
We can set the background color in the metadata dictionary.
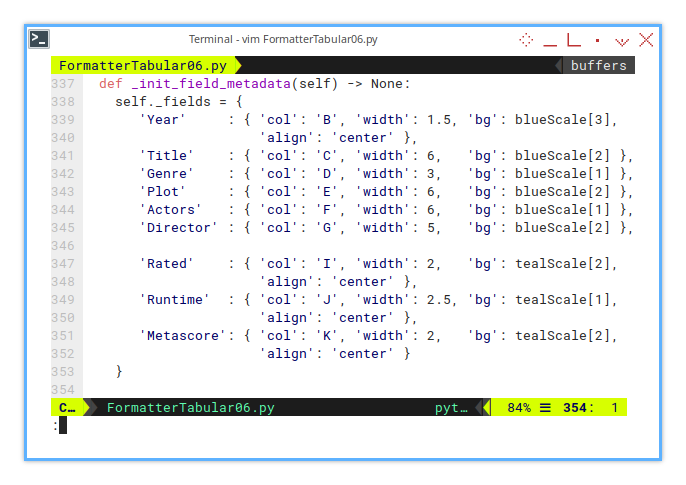
  def init_field_metadata(self) -> None:
    self._fields = {
       'Year'     : { 'col': 'B', 'width': 1.5, 'bg': blueScale[3],
                      'align': 'center' },
       'Title'    : { 'col': 'C', 'width': 6,   'bg': blueScale[2] },
       'Genre'    : { 'col': 'D', 'width': 3,   'bg': blueScale[1] },
       'Plot'     : { 'col': 'E', 'width': 6,   'bg': blueScale[2] },
       'Actors'   : { 'col': 'F', 'width': 6,   'bg': blueScale[1] },
       'Director' : { 'col': 'G', 'width': 5,   'bg': blueScale[2] },

       'Rated'    : { 'col': 'I', 'width': 2,   'bg': tealScale[2],
                      'align': 'center' },
       'Runtime'  : { 'col': 'J', 'width': 2.5, 'bg': tealScale[1],
                      'align': 'center' },
       'Metascore': { 'col': 'K', 'width': 2,   'bg': tealScale[2],
                      'align': 'center' }
    }
You can see the relevance of the background color, shown in the result below:
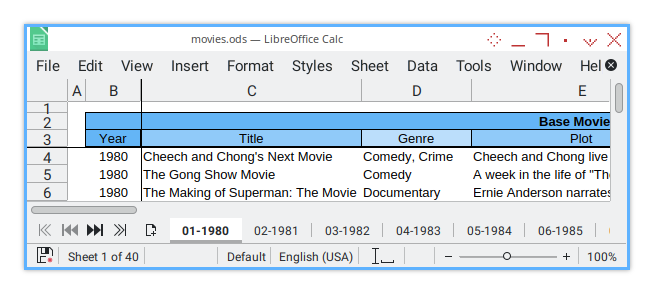
It’s a matter of taste. I like to use different color scales for each column. Let’s see another block with a different color scale.
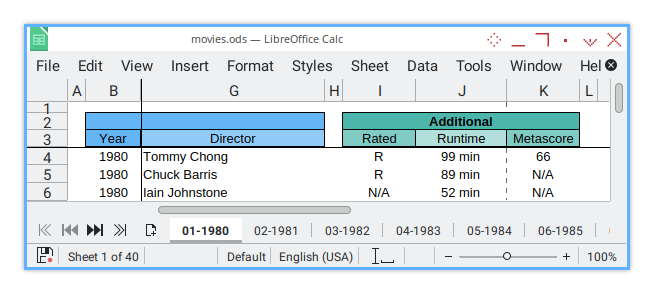
Feel free to set any color to match your preferred style. Or perhaps, to match your boss’s taste!
Basic Flow
Now we can extend the basic flow,
by adding format_head_borders() and format_head_colors().
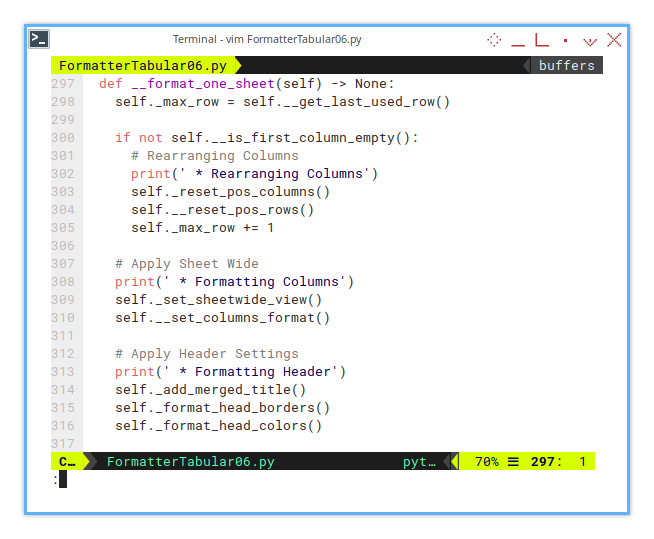
  def format_one_sheet(self) -> None:
    ...

    # Apply Header Settings
    print(' * Formatting Header')
    self._add_merged_title()
    self._format_head_borders()
    self._format_head_colors()
The implementation follows below.
Formatting: Head Colors
How does the coloring work?
Let’s take a look at the private _format_head_colors()
method in the descendant class.
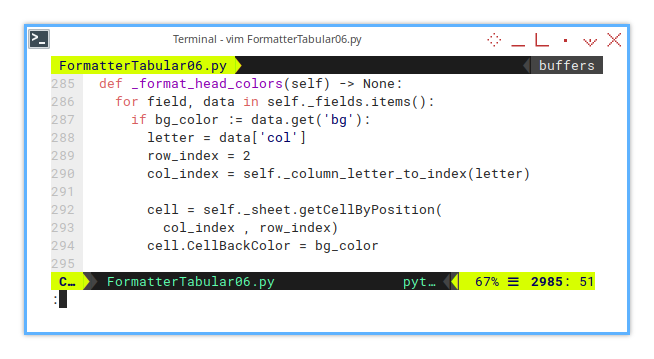
  def _format_head_colors(self) -> None:
    for field, data in self._fields.items():
      if bg_color := data.get('bg'):
        letter = data['col']
        row_index = 2
        col_index = self._column_letter_to_index(letter)

        cell = self._sheet.getCellByPosition(
          col_index , row_index)
        cell.CellBackColor = bg_color
The method iterates over each metadata field.
It first checks if a background color configuration exists
using the walrus operator (:=).
Then, it updates the color for the corresponding cell.
Abstract Method
To ensure flexibility, the format_head_borders() method needs,
to be implemented in the descendant class,
but it is called in the basic flow of the base class.
This is why we define it as an abstract method,
with protected visibility in the base class.
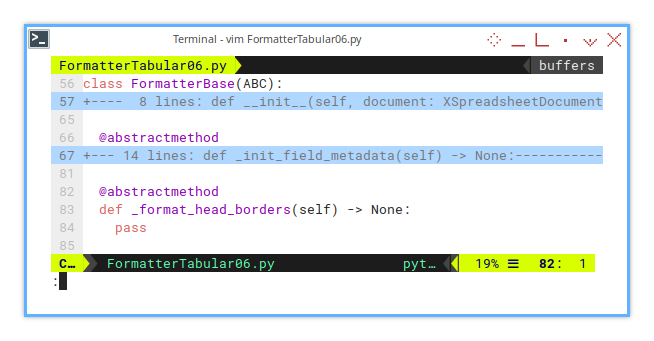
from abc import ABC, abstractmethod

class FormatterBase(ABC):
  ...

  @abstractmethod
  def _format_head_borders(self) -> None:
    pass
Formatting: Head Borders
Now let’s look at the implementation in the descendant class. This is essentially another hardcoded configuration. We will later refactor this into a dictionary to eliminate the hardcoding.
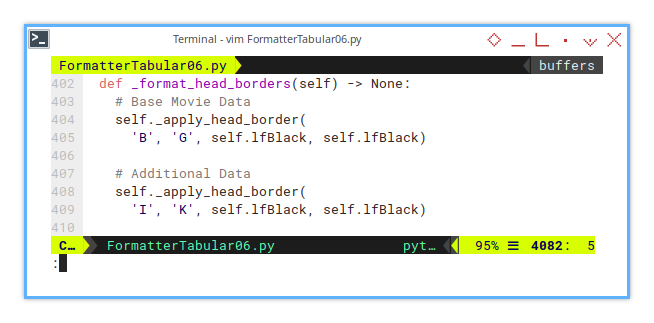
  def _format_head_borders(self) -> None:
    # Base Movie Data
    self._apply_head_border(
      'B', 'G', self.lfBlack, self.lfBlack)

    # Additional Data
    self._apply_head_border(
      'I', 'K', self.lfBlack, self.lfBlack)
As you can see, it calls apply_head_border().
In a real-world sheet, with many columns,
apply_head_border() will be used extensively.
Helper: Apply Head Border
The _apply_head_border() helper is intended,
for use only within the format_head_borders() method.
Since the logic is common to any case,
it’s best implemented in the base class.
However, as it’s called in the descendant class,
it has protected visibility.
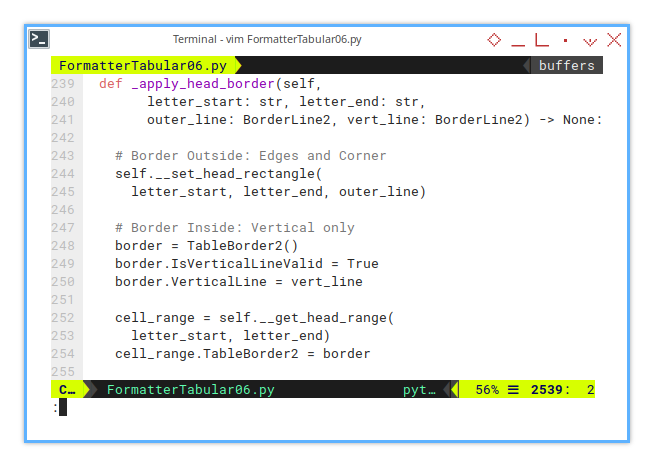
Let’s examine what happens inside _apply_head_border().
It handles two types of borders:
- Outside Border: For edges and corners
- Inside Border: For vertical lines only
First, let’s look at the outside border.
  def _apply_head_border(self,
        letter_start: str, letter_end: str,
        outer_line: BorderLine2, vert_line: BorderLine2) -> None:

    self.__set_head_rectangle(
      letter_start, letter_end, outer_line)

    ...
Next, the inside border.
  def apply_head_border(...)
    ...

    border = TableBorder2()
    border.IsVerticalLineValid = True
    border.VerticalLine = vert_line

    cell_range = self.__get_head_range(
      letter_start, letter_end)
    cell_range.TableBorder2 = border
This requires two private methods:
_set_head_rectangle()_get_head_range()
Supporting Helper: Head Rectangle
Border Outside: Edges and Corner
This supporting helper is meant to be used,
only within the _apply_head_border() method.
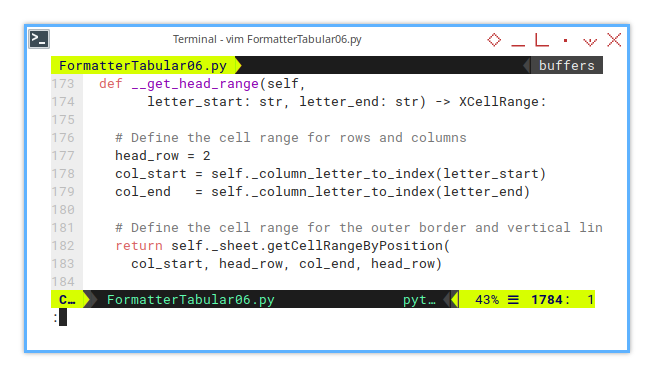
Its purpose is to define the cell range for the rows and columns: top, bottom (max row), left, and right, within the context of column blocks.
  def __set_head_rectangle(self,
        letter_start: str, letter_end: str,
        line_format: BorderLine2) -> None:

    # Define the cell range for rows and columns
    # Top, Bottom (max row), Left, Right
    a_t = 2
    a_b = 2
    a_l = self._column_letter_to_index(letter_start)
    a_r = self._column_letter_to_index(letter_end)

    self._format_cell_rectangle(a_t, a_b, a_l, a_r, line_format)
This method uses a hardcoded row number of 2.
Supporting Helper: Head Range
This supporting helper is intended to be used,
only within the _apply_head_border() method.
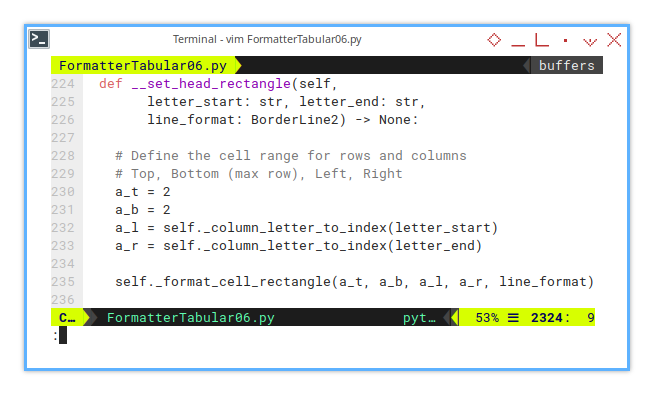
Its sole responsibility is to retrieve the cell range.
  def __get_head_range(self,
        letter_start: str, letter_end: str) -> XCellRange:

    # Define the cell range for rows and columns
    head_row = 2
    col_start = self._column_letter_to_index(letter_start)
    col_end   = self._column_letter_to_index(letter_end)

    return self._sheet.getCellRangeByPosition(
      col_start, head_row, col_end, head_row)
This method defines the cell range for the outer border and vertical lines. It uses a hardcoded row number of 2.
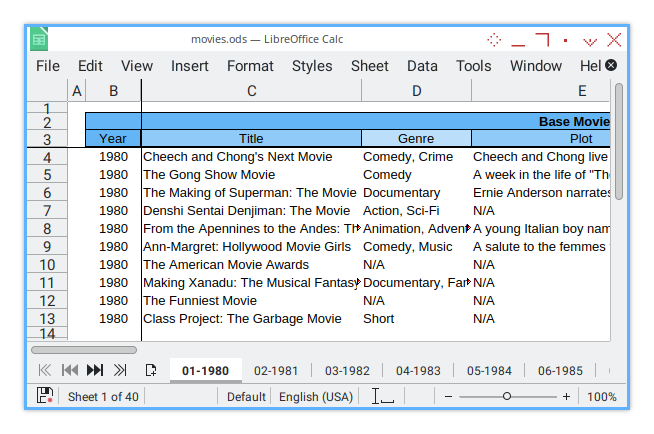
Sheet Result
The output result is as shown below:
Console Logging
For this step, the result displayed in the console will look like this:
>>> tabular_single_movies()
 * Rearranging Columns
 * Formatting Columns
 * Formatting Header
These logs give a real-time update, on which steps are being executed during the formatting process.
07: Step Seven
After enhancing the visual appeal of the header, we can apply similar formatting to the data section. Much like the header, the data formatting follows similar methods.
Step Overview
In this section, we will cover the following topics:
- Helper: Get data range, set data rectangle, apply data border
- Formatting Procedure: Format data border
Macro Source
The macro source code for this step can be found in this repository:
Class Diagram
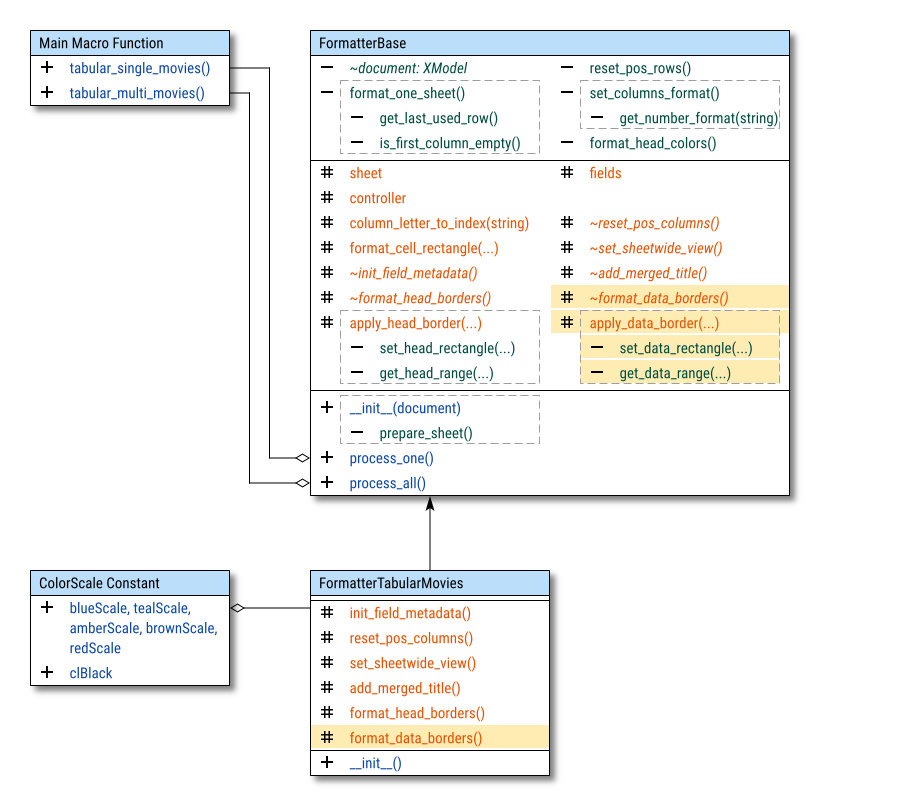
In the class diagram, you will notice the highlighted
abstract method named _format_data_borders(),
which has protected visibility.
The structure for the data border is quite similar to the header border,
with a supporting method called _apply_data_borders.
This method requires two helper functions:
__set_data_rectangle() and __get_data_range().
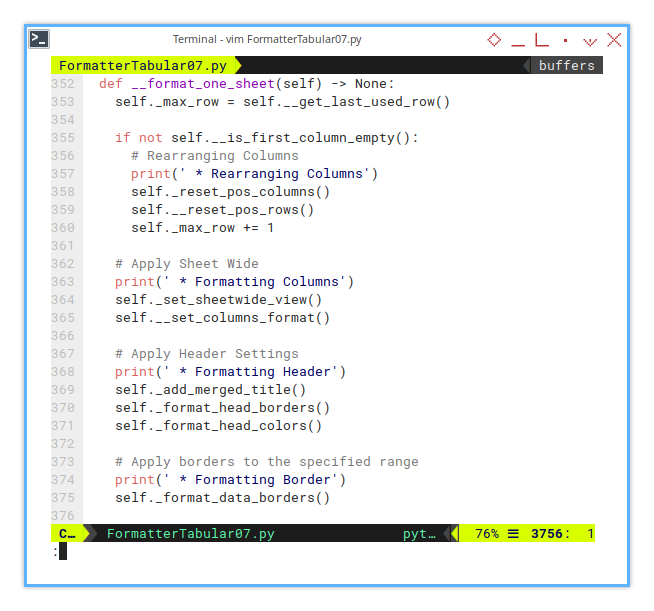
Basic Flow
Now, we extend the basic flow with _format_data_borders().
  def format_one_sheet(self) -> None:
    ...

    # Apply Header Settings
    print(' * Formatting Header')
    self._add_merged_title()
    self._format_head_borders()
    self._format_head_colors()

    # Apply borders to the specified range
    print(' * Formatting Border')
    self._format_data_borders()
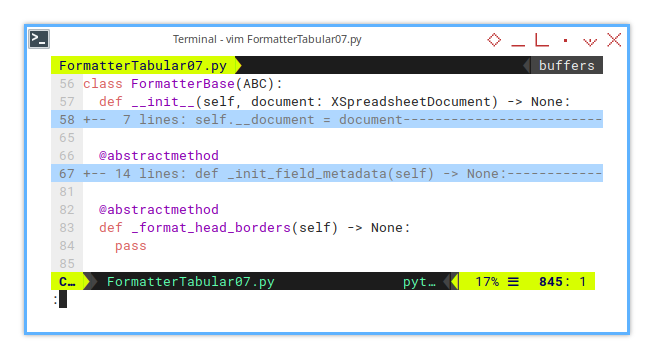
Abstract Method
Similar to _format_head_borders(),
the _format_data_borders() method in the base class is,
defined as abstract with a protected visibility specifier.
This ensures flexibility and enforces implementation in the descendant class.
from abc import ABC, abstractmethod

class FormatterBase(ABC):
  ...

  @abstractmethod
  def _format_head_borders(self) -> None:
    pass

  @abstractmethod
  def _format_data_borders(self) -> None:
    pass
Formatting: Data Borders
The implementation in the descendant class is, basically another hardcoded configuration, similar to the header border configuration.
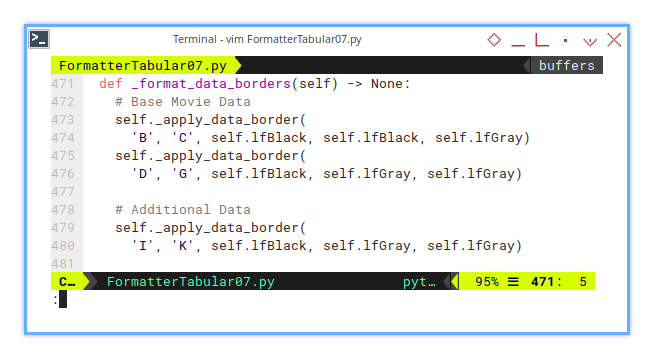
  def _format_data_borders(self) -> None:
    # Base Movie Data
    self._apply_data_border(
      'B', 'C', self.lfBlack, self.lfBlack, self.lfGray)
    self._apply_data_border(
      'D', 'G', self.lfBlack, self.lfGray, self.lfGray)

    # Additional Data
    self._apply_data_border(
      'I', 'K', self.lfBlack, self.lfGray, self.lfGray)
As seen here, _apply_data_border() is used to apply borders.
In a real-world scenario, where sheets have many columns,
_apply_data_border() will be utilized frequently.
This pattern needs to be refactored into a unified configuration later on.
Helper: Apply Data Border
For the same reason as the header counterpart,
the _apply_data_border() method has a protected visibility specifier.
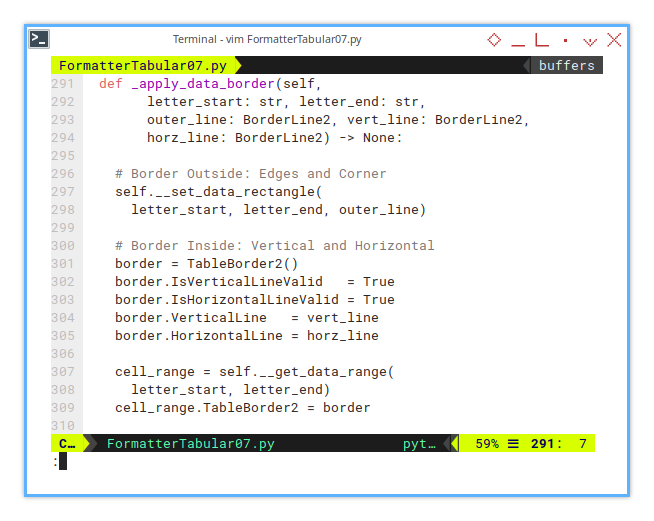
Inside the _apply_data_border() method, there are two types of borders:
- Border Outside: Edges and corners
- Border Inside: Vertical and horizontal
First, let’s look at the outside border.
  def _apply_data_border(self,
        letter_start: str, letter_end: str,
        outer_line: BorderLine2, vert_line: BorderLine2,
        horz_line: BorderLine2) -> None:

    self.__set_data_rectangle(
      letter_start, letter_end, outer_line)

    ...
Next, the inside border, which includes both vertical and horizontal borders.
  def apply_data_border(...)
    ...

    border = TableBorder2()
    border.IsVerticalLineValid   = True
    border.IsHorizontalLineValid = True
    border.VerticalLine   = vert_line
    border.HorizontalLine = horz_line

    cell_range = self.__get_data_range(
      letter_start, letter_end)
    cell_range.TableBorder2 = border
This also requires two private methods:
set_data_rectangle()get_data_range()
Keep scrolling, and we will take a look at these methods.
Supporting Helper: Data Rectangle
Border Outside: Edges and Corner
This supporting helper is meant to be used,
only within the _apply_data_border() method.
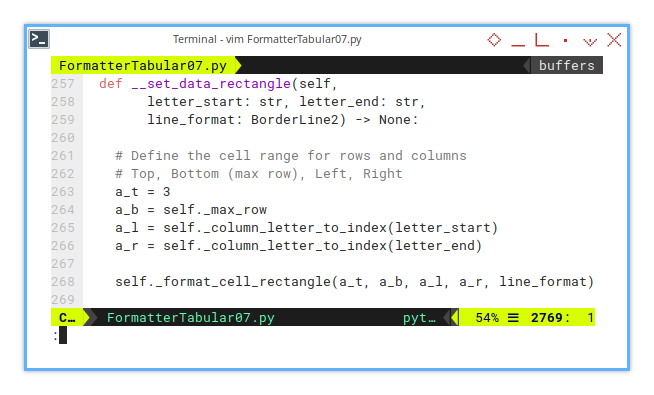
Its purpose is to define the cell range for the rows and columns, specifying the top, bottom (maximum row), left, and right boundaries, all within the context of column blocks.
  def __set_data_rectangle(self,
        letter_start: str, letter_end: str,
        line_format: BorderLine2) -> None:

    # Define the cell range for rows and columns
    # Top, Bottom (max row), Left, Right
    a_t = 3
    a_b = self._max_row
    a_l = self._column_letter_to_index(letter_start)
    a_r = self._column_letter_to_index(letter_end)

    self._format_cell_rectangle(a_t, a_b, a_l, a_r, line_format)
Supporting Helper: Data Range
This supporting helper is meant to be used,
only within the _apply_data_border() method.
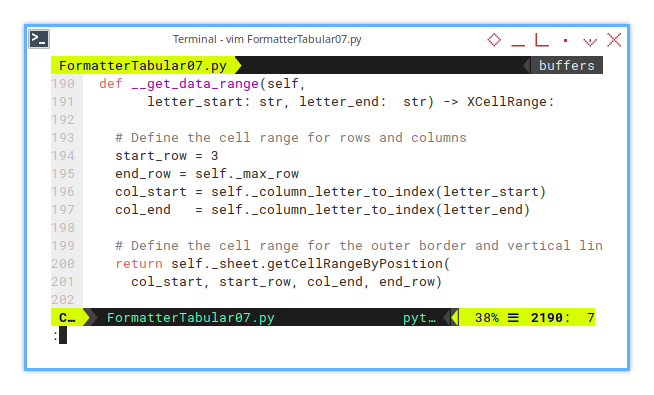
Its function is to retrieve the range for the data section.
  def __get_data_range(self,
        letter_start: str, letter_end:  str) -> XCellRange:

    # Define the cell range for rows and columns
    start_row = 3
    end_row = self._max_row
    col_start = self._column_letter_to_index(letter_start)
    col_end   = self._column_letter_to_index(letter_end)

    return self._sheet.getCellRangeByPosition(
      col_start, start_row, col_end, end_row)
The return value defines the cell range for both the outer border and vertical lines.
Sheet Result
The output result is shown below:
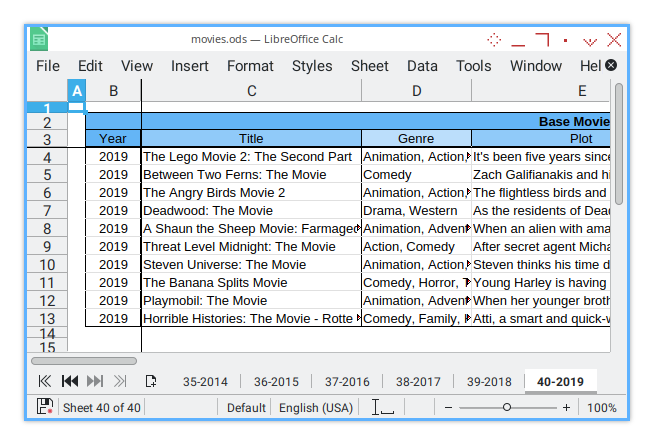
With the core functionality complete, I’d like to add some additional material. You can easily insert hooks into the basic flow, which will allow modifications for special cases. For example, you could add logic to color rows based on specific values.
Console Logging
For this step, the result can be displayed as shown below:
>>> tabular_single_movies()
 * Rearranging Columns
 * Formatting Columns
 * Formatting Header
 * Formatting Border
This way is better, than constatly watching htop,
showing one CPU core hogging up to 100%.
What is Next 🤔?
We’re almost done! The next step is to explore how to extend this class structure, for instance, by adding an additional data coloring procedure. Finally, we’ll look at how to separate the macro, making it reusable across multiple projects with the same library.
I really have some fun writing the article, also preparing the material and drawing the diagram.
Consider continuing with [ Formatter - Simple Config - Four ].