Preface
Goal: Merging multiple CSVs into a workbook using a Python macro with the UNO library.
Before diving into the code for the formatter class, we first need to merge the example data into a single workbook. In this section, we’ll use a macro to combine the example CSV files into one workbook.
CSV Source Options
How do we choose the CSV source?
There are two approaches to consider:
-
Using a Directory: The simpler option is to use a directory as the source.
-
Using a Config: In real-world scenarios, more control is often needed, such as using a TOML configuration.
Reference
While we can manually load CSV files into a Calc sheet using LibreOffice, automating this process requires a simple trick.
For more details, refer to the following link:
You can read the full details on that page.
Manual Loading
Normally, you can load CSV files directly from the file manager, and LibreOffice will show this dialog:
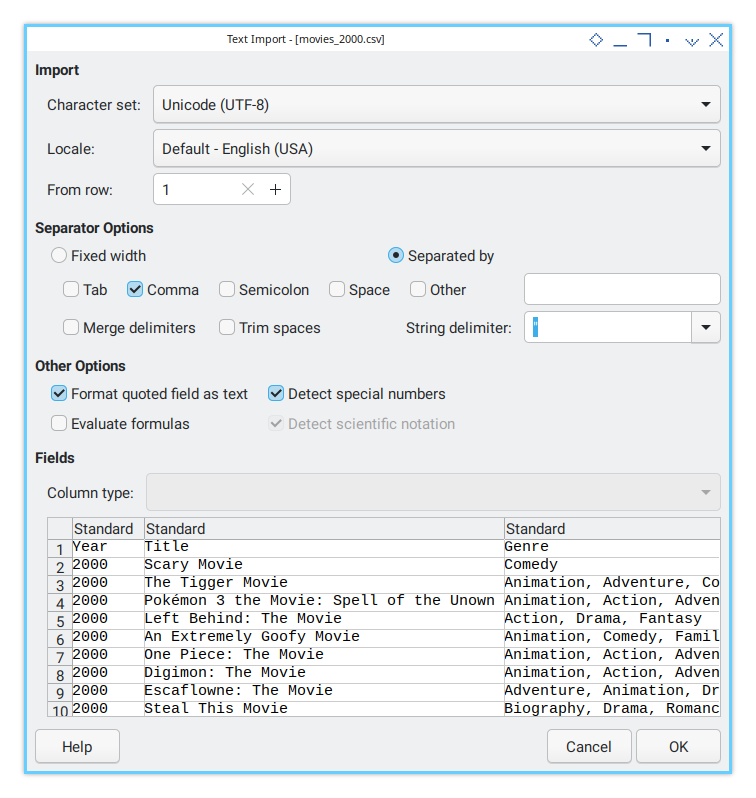
But how do we load CSV files using a macro? We should avoid the dialog, especially when dealing with dozens of CSV files.
1: CSV Importer: By Directory
The simpler case would be to use a directory as the source.
Macro Skeleton
You can find the full macro here:
The macro consists of only a few methods.
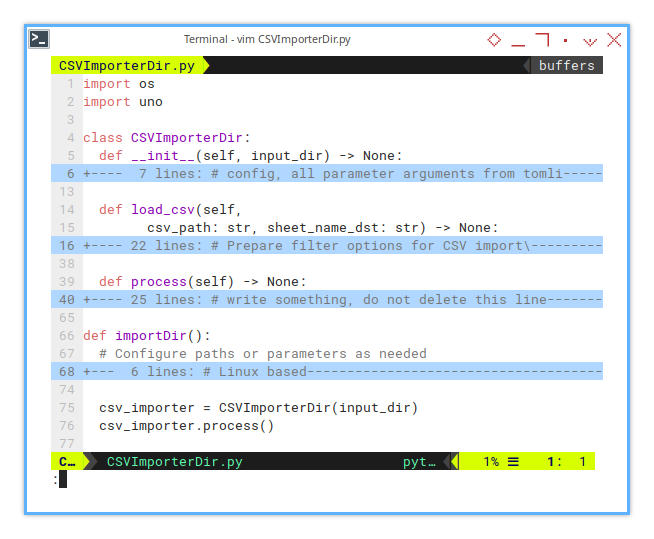
import os, uno

class CSVImporterDir:
  def __init__(self, input_dir) -> None:
    ...

  def load_csv(self,
        csv_path: str, sheet_name_dst: str) -> None:
    ...

  def process(self) -> None:
    ...

def importDir():
  ...

  csv_importer = CSVImporterDir(input_dir)
  csv_importer.process()
The core part of the macro is the filter options.
This is handled in the load_csv() method where the CSV is processed.
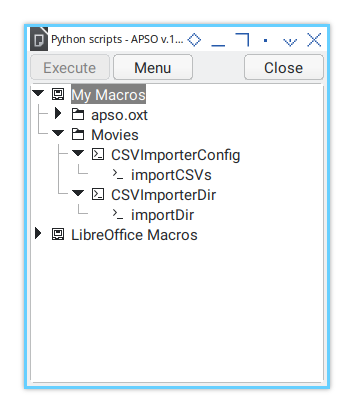
APSO Dialog
You can load the macro using APSO
Initialization
The initialization part is simple and nearly identical in all macros.
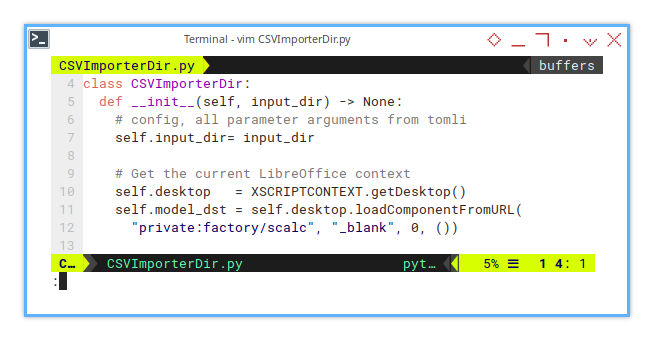
  def __init__(self, input_dir) -> None:
    # config, all parameter arguments from tomli
    self.input_dir= input_dir

    # Get the current LibreOffice context
    self.desktop   = XSCRIPTCONTEXT.getDesktop()
    self.model_dst = self.desktop.loadComponentFromURL(
      "private:factory/scalc", "_blank", 0, ())
Just remember, whenever you plan to refactor,
the XSCRIPTCONTEXT should remain in the main script.
Loading CSV
Filter Options
This is the trick we are referring to. With this method, we can avoid the dialog.
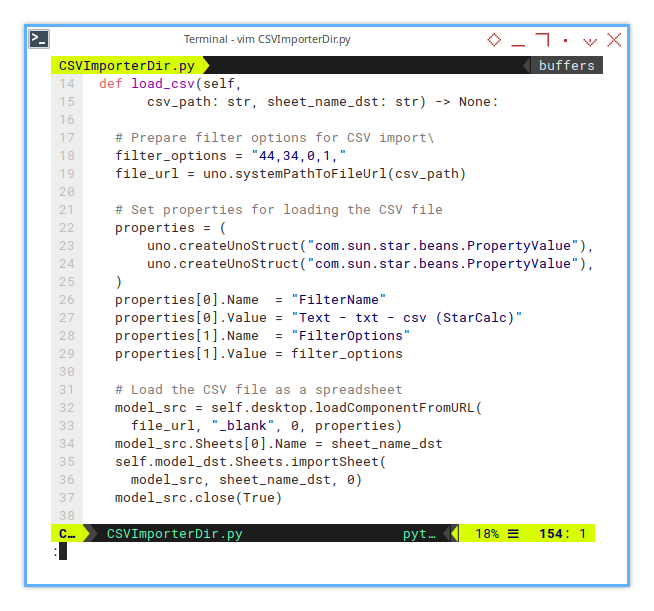
First, define the filter options.
  def load_csv(self,
        csv_path: str, sheet_name_dst: str) -> None:

    # Prepare filter options for CSV import\
    filter_options = "44,34,0,1,"
    file_url = uno.systemPathToFileUrl(csv_path)
Then some ritual to set properties using official guidance.
    # Set properties for loading the CSV file
    properties = (
        uno.createUnoStruct("com.sun.star.beans.PropertyValue"),
        uno.createUnoStruct("com.sun.star.beans.PropertyValue"),
    )
    properties[0].Name  = "FilterName"
    properties[0].Value = "Text - txt - csv (StarCalc)"
    properties[1].Name  = "FilterOptions"
    properties[1].Value = filter_options
Now, create the sheet from thin air.
    # Load the CSV file as a spreadsheet
    model_src = self.desktop.loadComponentFromURL(
      file_url, "_blank", 0, properties)
    model_src.Sheets[0].Name = sheet_name_dst
    self.model_dst.Sheets.importSheet(
      model_src, sheet_name_dst, 0)
    model_src.close(True)
This is essentially practical magic. The behind-the-scenes process is something I can’t fully explain.
Process
Multiple CSV
Instead of just loading a single sheet, we can extend this method to handle mass CSV imports.
The main process for loading multiple CSV files, into a single workbook is as follows.
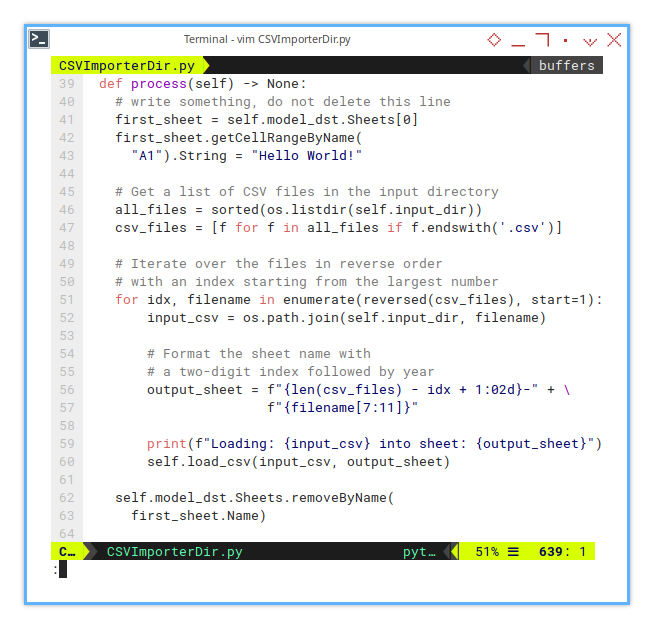
We must ensure that we retain one non-empty sheet, and delete it once the process is complete.
  def process(self) -> None:
    # write something, do not delete this line
    first_sheet = self.model_dst.Sheets[0]
    first_sheet.getCellRangeByName(
      "A1").String = "Hello World!"
Next, manage the content of the directory as input to the loop.
    # Get a list of CSV files in the input directory
    all_files = sorted(os.listdir(self.input_dir))
    csv_files = [f for f in all_files if f.endswith('.csv')]

    # Iterate over the files in reverse order
    for idx, filename in enumerate(reversed(csv_files), start=1):
        ...

    self.model_dst.Sheets.removeByName(
      first_sheet.Name)
This is the actual CSV loading process.
    # Iterate over the files in reverse order
    # with an index starting from the largest number
    for idx, filename in enumerate(reversed(csv_files), start=1):
        input_csv = os.path.join(self.input_dir, filename)

        # Format the sheet name with
        # a two-digit index followed by year
        output_sheet = f"{len(csv_files) - idx + 1:02d}-" + \
                       f"{filename[7:11]}"

        print(f"Loading: {input_csv} into sheet: {output_sheet}")
        self.load_csv(input_csv, output_sheet)
Class Instance
Path
The macro function simply creates a class instance with path arguments. Be mindful that paths differ between Linux and Windows systems.
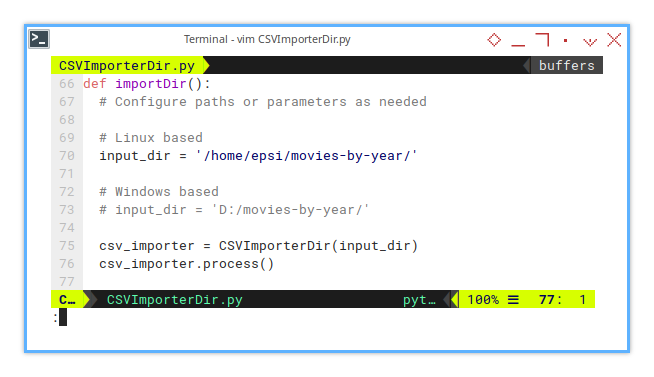
def importDir():
  # Configure paths or parameters as needed

  # Linux based
  input_dir = '/home/epsi/movies-by-year/'

  # Windows based
  # input_dir = 'D:/movies-by-year/'

  csv_importer = CSVImporterDir(input_dir)
  csv_importer.process()
APSO Console
APSO python console [LibreOffice]
If you need to debug, you can use the APSO Console.
Simply type the function name importDir() to run the script.
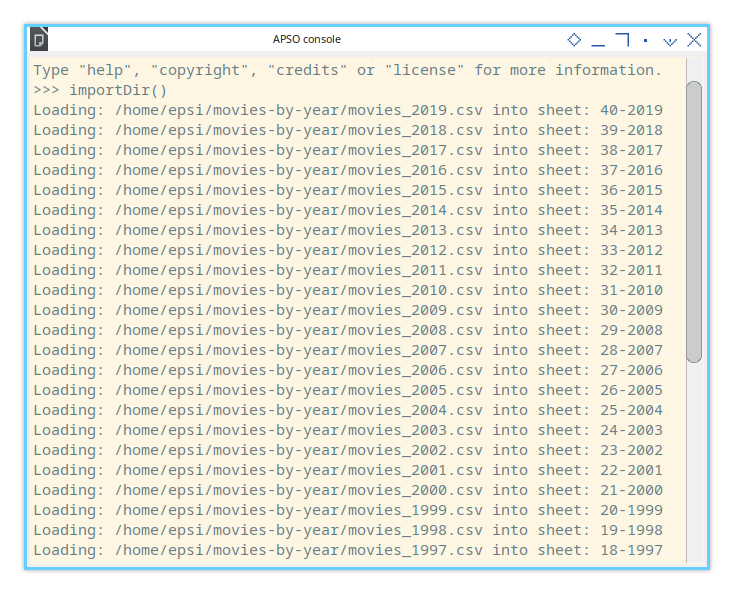
>>> importDir()
Loading: /home/epsi/movies-by-year/movies_2019.csv into sheet: 40-2019
Loading: /home/epsi/movies-by-year/movies_2018.csv into sheet: 39-2018
Loading: /home/epsi/movies-by-year/movies_2017.csv into sheet: 38-2017
Loading: /home/epsi/movies-by-year/movies_2016.csv into sheet: 37-2016
Loading: /home/epsi/movies-by-year/movies_2015.csv into sheet: 36-2015
Loading: /home/epsi/movies-by-year/movies_2014.csv into sheet: 35-2014
Loading: /home/epsi/movies-by-year/movies_2013.csv into sheet: 34-2013
Loading: /home/epsi/movies-by-year/movies_2012.csv into sheet: 33-2012
Loading: /home/epsi/movies-by-year/movies_2011.csv into sheet: 32-2011
Loading: /home/epsi/movies-by-year/movies_2010.csv into sheet: 31-2010
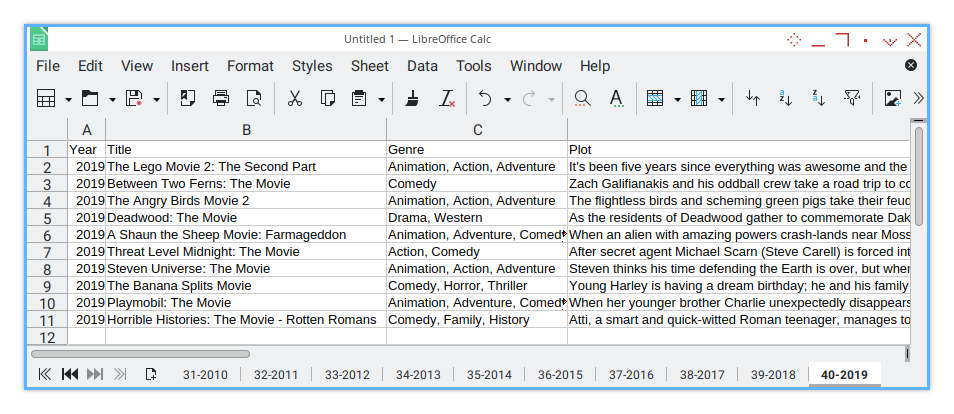
Sheet Result
The result of the macro is displayed in the screenshot below:
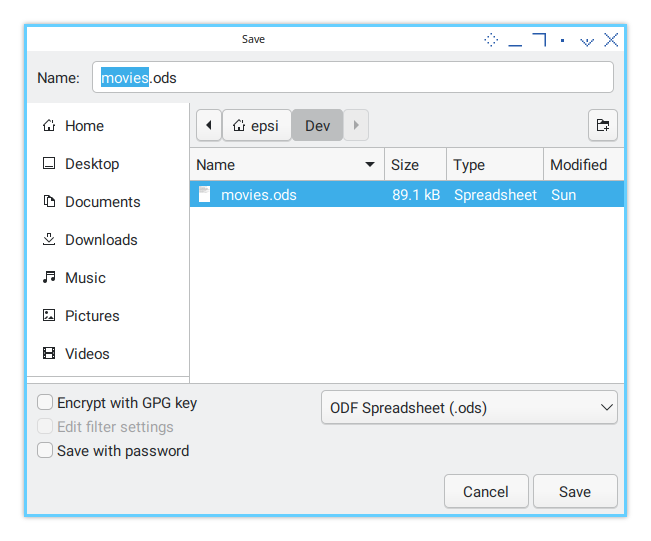
Now you can save it to ODS, for example, as movies.ods.
You can download the example ODS result here:
We are done here.
Prerequisite
This is the only parts that require tomli.
The formatting steps that follow do not depend on tomli.
TOML Config
This configuration relies on TOML to avoid hardcoded data, giving us the flexibility to handle different types of CSV files.
Real-world data processing can be challenging, because you need to deliver tasks quickly, while dealing with a variety of use cases, such as:
-
Inconsistent data formats: Every customer may have a different flavor of data format.
-
Dynamic data: You can’t prevent your colleagues, from adding new columns as accounting data grows.
-
Changing requirements: Your boss might need different kinds of summaries, so your pivot tables may change over time.
-
Personal curiosity: You might want to explore different views of the data with varying parameters.
Despite these challenges, we can create an abstraction in the code, so that a single script can handle most of these use cases.
Windows
Installing TOML within python environment for LibreOffice on Windows
LibreOffice carries its own Python environment, which generally works fine on Linux. However, on Windows, we need to ensure we’re installing TOML in the correct Python environment, as installing it in the system’s Python won’t work for macros in LibreOffice.
Follow these steps in PowerShell:
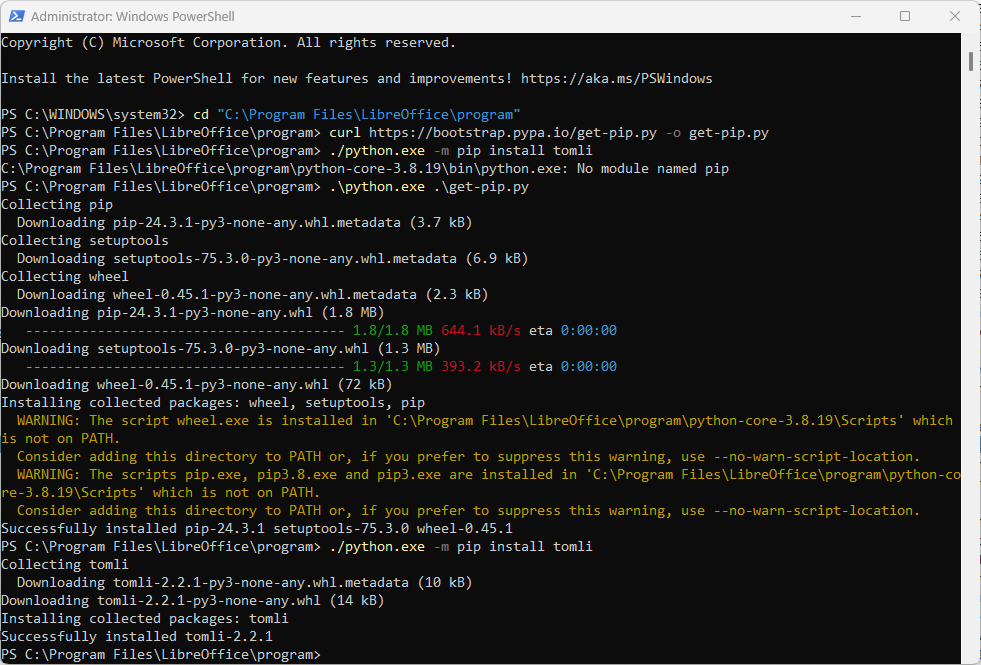
Change the directory to LibreOffice’s installation folder:
PS C:\WINDOWS\system32> cd "C:\Program Files\LibreOffice\program"Download the get-pip.py script using CURL:
PS C:\Program Files\LibreOffice\program> curl https://bootstrap.pypa.io/get-pip.py -o get-pip.pyRun the get-pip.py script to install PIP.
If you encounter the error above, proceed to the next step.
PS C:\Program Files\LibreOffice\program> ./python.exe -m pip install tomli
C:\Program Files\LibreOffice\program\python-core-3.8.19\bin\python.exe: No module named pip
Add PIP to the environment by running get-pip.py.
This will install PIP successfully.
PS C:\Program Files\LibreOffice\program> .\python.exe .\get-pip.py
Collecting pip
  Downloading pip-24.3.1-py3-none-any.whl.metadata (3.7 kB)
Collecting setuptools
  Downloading setuptools-75.3.0-py3-none-any.whl.metadata (6.9 kB)
Collecting wheel
  Downloading wheel-0.45.1-py3-none-any.whl.metadata (2.3 kB)Now we can automate the sheet formatting.
Let's start with a simple class, rearangging the column.
Formatting single sheet and multiple sheet.
Downloading pip-24.3.1-py3-none-any.whl (1.8 MB)
   ---------------------------------------- 1.8/1.8 MB 644.1 kB/s eta 0:00:00
Downloading setuptools-75.3.0-py3-none-any.whl (1.3 MB)
   ---------------------------------------- 1.3/1.3 MB 393.2 kB/s eta 0:00:00
Downloading wheel-0.45.1-py3-none-any.whl (72 kB)
Installing collected packages: wheel, setuptools, pip
  WARNING: The script wheel.exe is installed in 'C:\Program Files\LibreOffice\program\python-core-3.8.19\Scripts' which is not on PATH.
  Consider adding this directory to PATH or, if you prefer to suppress this warning, use --no-warn-script-location.
  WARNING: The scripts pip.exe, pip3.8.exe and pip3.exe are installed in 'C:\Program Files\LibreOffice\program\python-core-3.8.19\Scripts' which is not on PATH.Now we can automate the sheet formatting.
Let's start with a simple class, rearangging the column.
Formatting single sheet and multiple sheet.
  Consider adding this directory to PATH or, if you prefer to suppress this warning, use --no-warn-script-location.
Successfully installed pip-24.3.1 setuptools-75.3.0 wheel-0.45.1
Now, install TOML using PIP in LibreOffice’s Python environment. After this, the installation should complete successfully:
PS C:\Program Files\LibreOffice\program> ./python.exe -m pip install tomli
Collecting tomli
  Downloading tomli-2.2.1-py3-none-any.whl.metadata (10 kB)
Downloading tomli-2.2.1-py3-none-any.whl (14 kB)
Installing collected packages: tomli
Successfully installed tomli-2.2.1
2: CSV Importer: By Config
Real world case require more control, such as using TOML config.
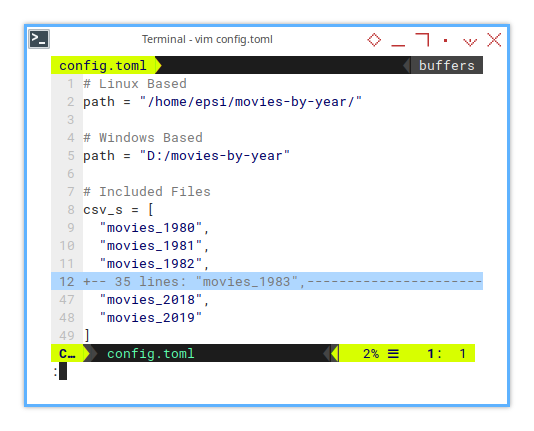
TOML Configuration
The TOML configuration might look like this:
# Linux Based
path = "/home/epsi/movies-by-year/"

# Windows Based
path = "D:/movies-by-year"

# Included Files
csv_s = [
  "movies_1980",
  "movies_1981",
  "movies_1982",
  ...
  ...
  "movies_2018",
  "movies_2019"
]
Just be aware that the path format differs between Linux and Windows.
Macro Skeleton
You can find the macro here:
There is only one additional method.
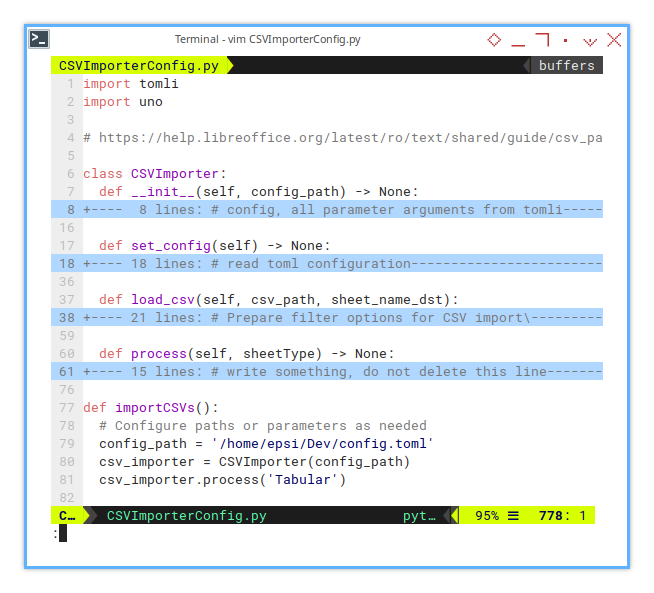
import tomli, uno

class CSVImporter:
  def __init__(self, config_path) -> None:
    ...

  def set_config(self) -> None:
    ...

  def load_csv(self, csv_path, sheet_name_dst):
    ...

  def process(self, sheetType) -> None:
    ...

def importCSVs():
  config_path = '/home/epsi/Dev/config.toml'
  csv_importer = CSVImporter(config_path)
  csv_importer.process('Tabular')
Initialization
This is very similar to the previous approach,
but instead of using a directory,
we now use config.toml as the source.
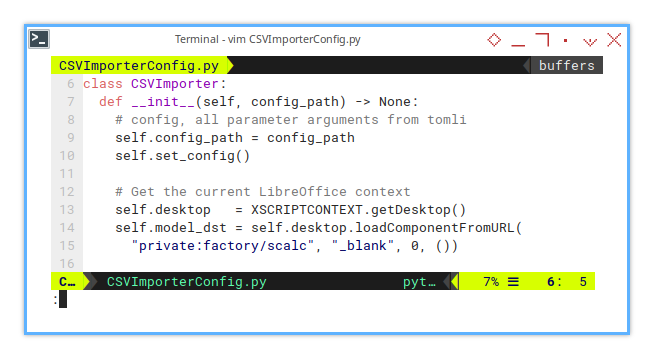
  def __init__(self, config_path) -> None:
    # config, all parameter arguments from tomli
    self.config_path = config_path
    self.set_config()

    # Get the current LibreOffice context
    self.desktop   = XSCRIPTCONTEXT.getDesktop()
    self.model_dst = self.desktop.loadComponentFromURL(
      "private:factory/scalc", "_blank", 0, ())
Configuration
We need to build a list with dictionaries containing the following:
- filename (input-expand)
- sheetname (sheet-expand)
The term expand here is my internal naming convention.
I tend to name my data CSV files in various ways depending on the processing step.
My naming steps are as follows: tabular, expand, pivot, and stat for statistics.
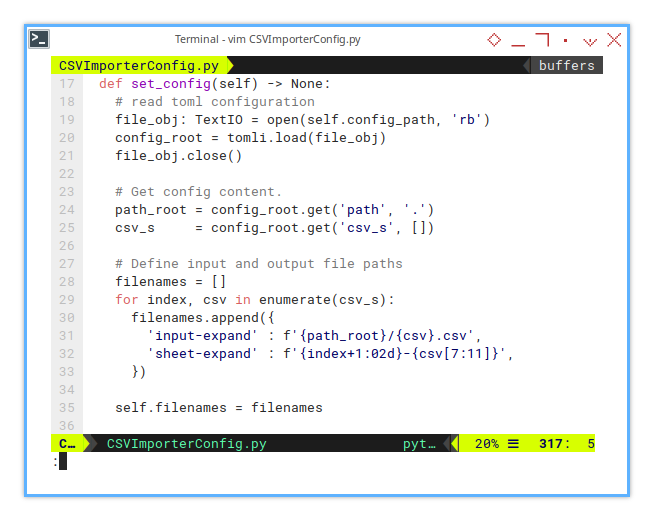
The result of this list will be stored in self.filenames.
  def set_config(self) -> None:
    # read toml configuration
    file_obj: TextIO = open(self.config_path, 'rb')
    config_root = tomli.load(file_obj)
    file_obj.close()

    # Get config content.
    path_root = config_root.get('path', '.')
    csv_s     = config_root.get('csv_s', [])

    # Define input and output file paths
    filenames = []
    for index, csv in enumerate(csv_s):
      filenames.append({
        'input-expand' : f'{path_root}/{csv}.csv',
        'sheet-expand' : f'{index+1:02d}-{csv[7:11]}',
      })

    self.filenames = filenames
The worksheet names would look like below:

Loading CSV
Filter Options
This part is exactly the same as in the previous method.
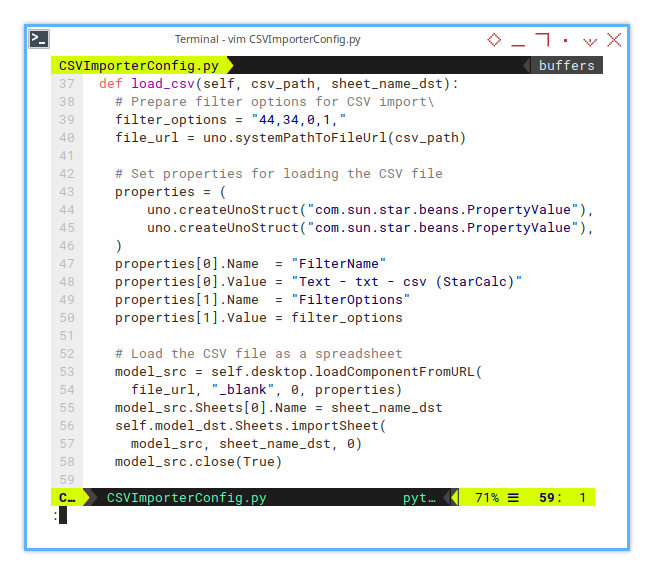
So there’s no need to repeat the source code here.
Process
This is where we utilize the previously mentioned self.filenames.
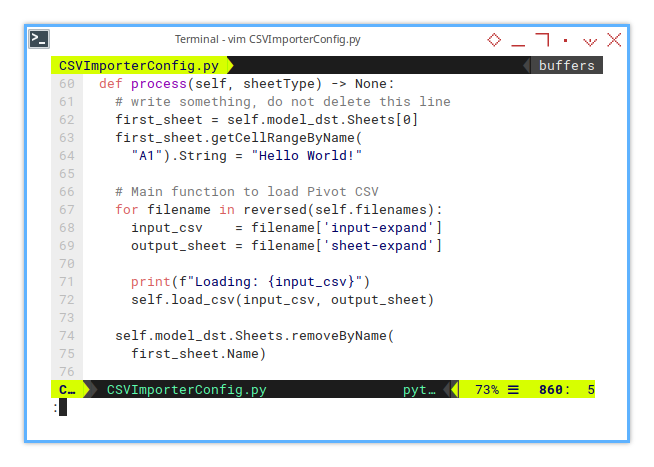
  def process(self, sheetType) -> None:
    # write something, do not delete this line
    first_sheet = self.model_dst.Sheets[0]
    first_sheet.getCellRangeByName(
      "A1").String = "Hello World!"

    # Main function to load Pivot CSV
    for filename in reversed(self.filenames):
      input_csv    = filename['input-expand']
      output_sheet = filename['sheet-expand']

      print(f"Loading: {input_csv}")
      self.load_csv(input_csv, output_sheet)

    self.model_dst.Sheets.removeByName(
      first_sheet.Name)
Class Instance
Config Path
The main method is essentially just, instantiating the class with the prepared parameters.
Instead of using a folder path, we use the config path. This allows us to store more variables, not just the directory.
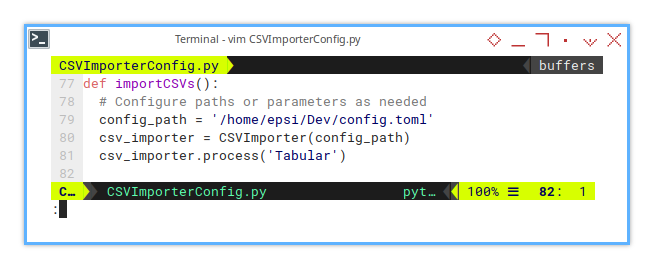
def importCSVs():
  # Configure paths or parameters as needed
  config_path = '/home/epsi/Dev/config.toml'
  csv_importer = CSVImporter(config_path)
  csv_importer.process('Tabular')
Sheet Result
The result of the macro is similar to the previous macro, but this time you have more control.
I’m using this script heavily, but of course, my CSV data is not about movies.
3: Tab Colorizer
For workbooks with many worksheets, it can be helpful to distinguish them with distinct colors. We can achieve this by defining a new Python macro in LibreOffice.
This is more of a “nice-to-have” feature, but I personally use it often. Therefore, I’d like to share the code with you.
Macro Skeleton
You can find the macro here.
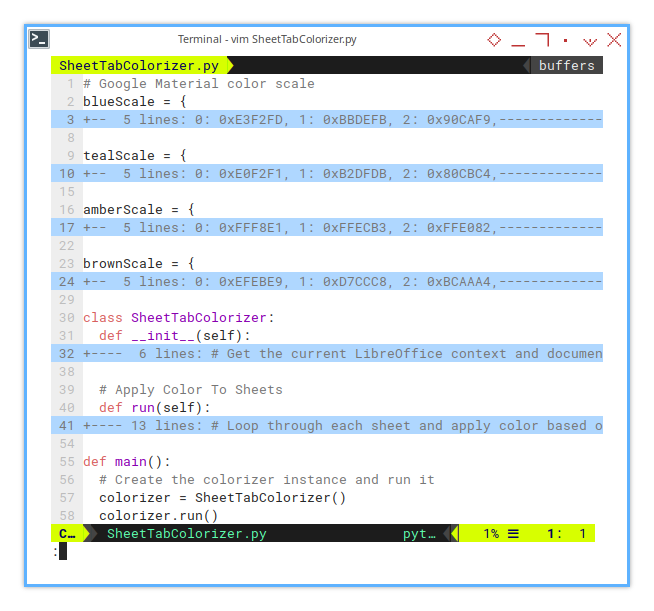
# Color scale
blueScale  = { ... }
tealScale  = { ... }
amberScale = { ... }
brownScale = { ... }

class SheetTabColorizer:
  def __init__(self):
    ...

  # Apply Color To Sheets
  def run(self):
    ...

def main():
  # Create the colorizer instance and run it
  colorizer = SheetTabColorizer()
  colorizer.run()
Color Scale
I’m using Google Material Color scales as usual.
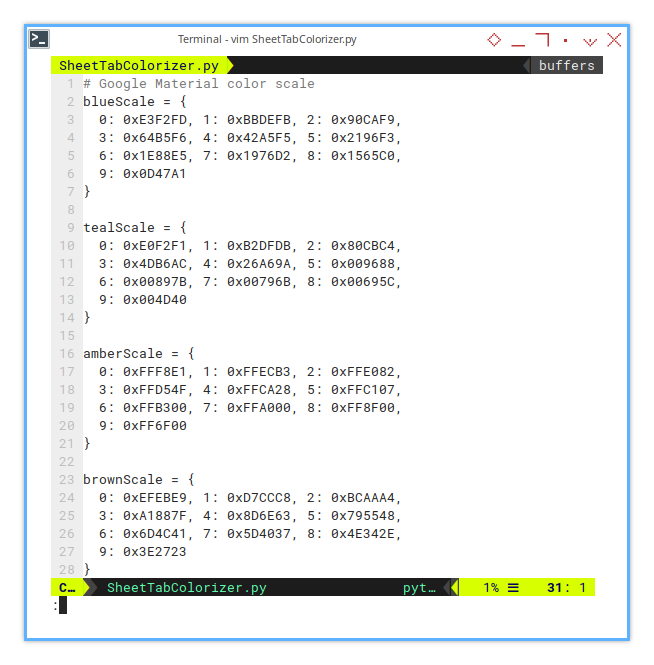
# Google Material color scale
blueScale = {
  0: 0xE3F2FD, 1: 0xBBDEFB, 2: 0x90CAF9,
  3: 0x64B5F6, 4: 0x42A5F5, 5: 0x2196F3,
  6: 0x1E88E5, 7: 0x1976D2, 8: 0x1565C0,
  9: 0x0D47A1
}

tealScale = {
  0: 0xE0F2F1, 1: 0xB2DFDB, 2: 0x80CBC4,
  3: 0x4DB6AC, 4: 0x26A69A, 5: 0x009688,
  6: 0x00897B, 7: 0x00796B, 8: 0x00695C,
  9: 0x004D40
}

amberScale = {
  0: 0xFFF8E1, 1: 0xFFECB3, 2: 0xFFE082,
  3: 0xFFD54F, 4: 0xFFCA28, 5: 0xFFC107,
  6: 0xFFB300, 7: 0xFFA000, 8: 0xFF8F00,
  9: 0xFF6F00
}

brownScale = {
  0: 0xEFEBE9, 1: 0xD7CCC8, 2: 0xBCAAA4,
  3: 0xA1887F, 4: 0x8D6E63, 5: 0x795548,
  6: 0x6D4C41, 7: 0x5D4037, 8: 0x4E342E,
  9: 0x3E2723
}
You can adjust the color scale to suit your needs.
Initialization
This step involves preparing the necessary variables.
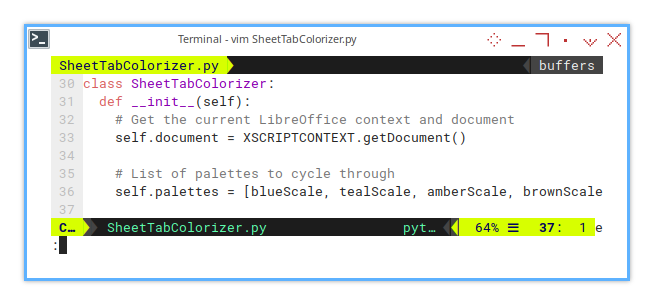
class SheetTabColorizer:
  def __init__(self):
    # Get the current LibreOffice context and document
    self.document = XSCRIPTCONTEXT.getDocument()

    # List of palettes to cycle through
    self.palettes = [blueScale, tealScale, amberScale, brownScale]
Applying Color
You may adjust the logic to suit your needs. This is just an example.
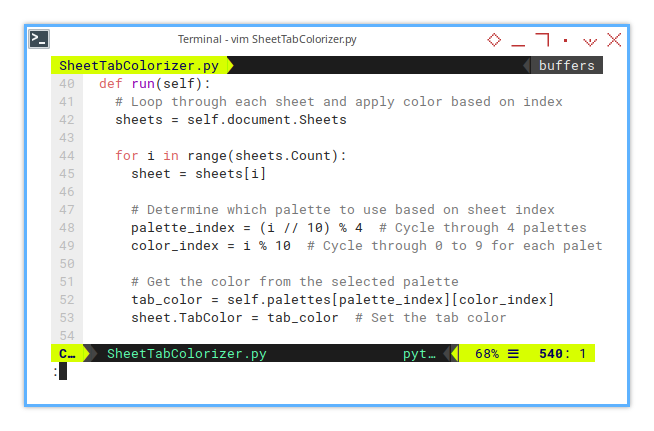
  # Apply Color To Sheets
  def run(self):
    # Loop through each sheet and apply color based on index
    sheets = self.document.Sheets

    for i in range(sheets.Count):
      sheet = sheets[i]

      # Determine which palette to use based on sheet index
      palette_index = (i // 10) % 4  # Cycle through 4 palettes
      color_index = i % 10  # Cycle through 0 to 9 for each palette

      # Get the color from the selected palette
      tab_color = self.palettes[palette_index][color_index]
      sheet.TabColor = tab_color  # Set the tab color
Class Instance
The main method simply instantiates the class along with the prepared parameters.
def main():
  # Create the colorizer instance and run it
  colorizer = SheetTabColorizer()
  colorizer.run()
Sheet Result
The worksheet names will look like the example below:
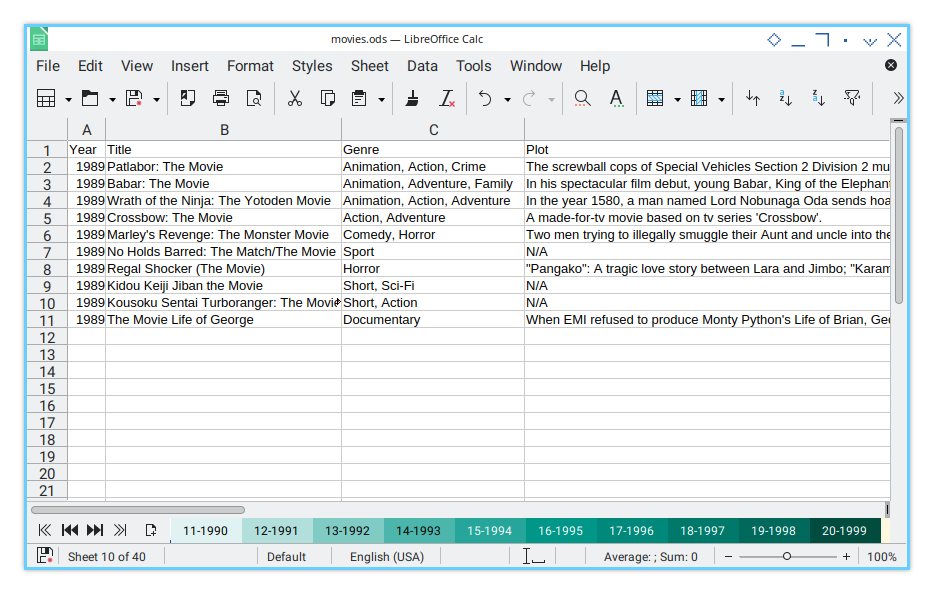
You can compare this with the previous preview:

What is Next 🤔?
Now that we’ve automated sheet formatting, let’s move on to the next step: a simple-config class for rearranging columns.
The basic flow will focus on formatting both single and multiple sheets.
Feel free to continue reading [ Formatter - Simple Config - One ].