Preface
Goal: Reader and Writer. Read data from CSV, and create both table sheet and pivot sheet.
In the final installment of our LibreOffice Macro series, we’ll delve into the process of reading data from a CSV file. This step is crucial, especially when dealing with real-world scenarios where data might be provided in a raw CSV format. By the end of this article, you’ll be equipped with the skills to import data from a CSV file into an empty workbook, allowing you to generate both the table and pivot sheets based on the extracted dataframe.
Reader: Main Macro
In this section, we will focus on reading the data
from our previously used sample-data.csv file
and populating the Table worksheet with the extracted dataframe.
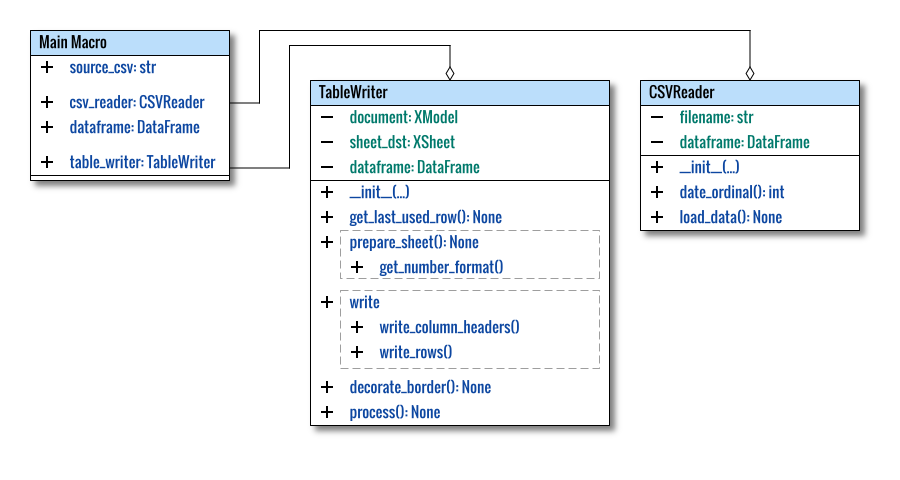
Class Diagram
To kick things off, let’s provide a visual representationof our simple macro:
Libraries
The libraries required for this macro remain consistent with the previous one.
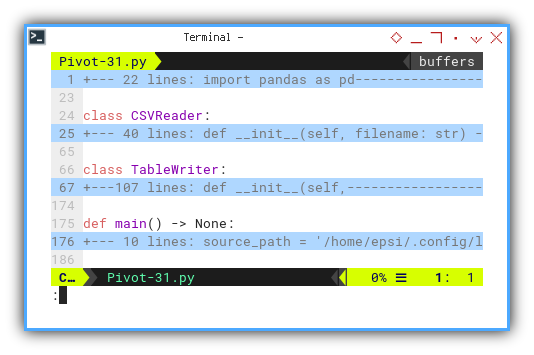
Macro Skeleton
Here’s a glimpse of the macro’s skeletal structure:
class CSVReader:
  ...

class TableWriter:
  ...

def main() -> None:
  ...
Main Method
Since our macro operates within the LibreOffice environment, we need to specify the path to the sample data. For instance, utilizing a hardcoded path as shown below:
Once the path is established, we can proceed with the main flow of the process.
def main() -> None:
  source_path = '/home/epsi/.config/libreoffice/' \
              + '4/user/Scripts/python/Pivot/'
  source_csv  = source_path + 'sample-data.csv'

  csv_reader = CSVReader(source_csv)
  csv_reader.process()
  dataframe = csv_reader.dataframe

  table_writer = TableWriter(dataframe, 'Table')
  table_writer.process()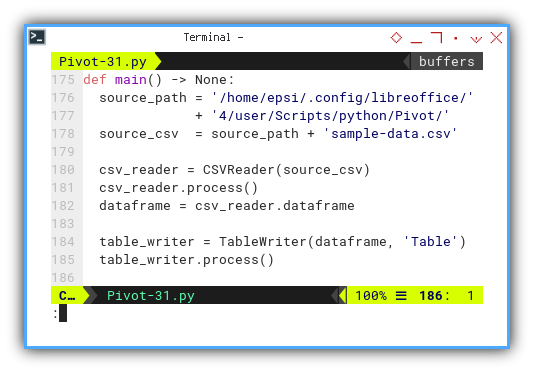
CSV Reader
The CSVReader class remains largely unchanged,
adhering to the fundamental principles ofdata modeling discussed
in the earlier sections of this article series.
The only notable adjustment involves the need
to offset the date appropriately to align with the spreadsheet date.
Class Skeleton
While the class may appear more intricate, most alterations are the outcome of refining the previous class structure.
class CSVReader:
  def __init__(self, filename: str) -> None:
    ...

  def date_ordinal(self, value, format_source):
    ...

  def load_data(self):
    ...

  def process(self) -> None:
    self.load_data()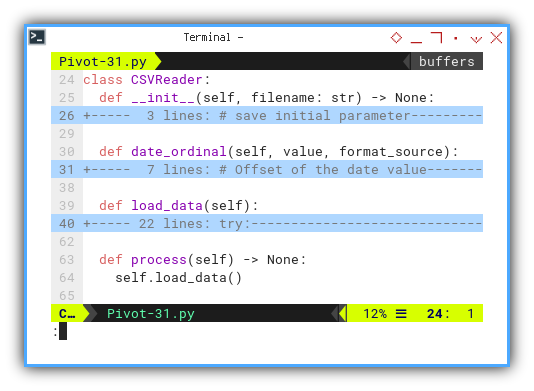
The only processed performed during the initialization phase is the loading of data.
Initialization
The initialization process is straightforward:
class CSVReader:
  def __init__(self, filename: str) -> None:

    # save initial parameter
    self.filename = filename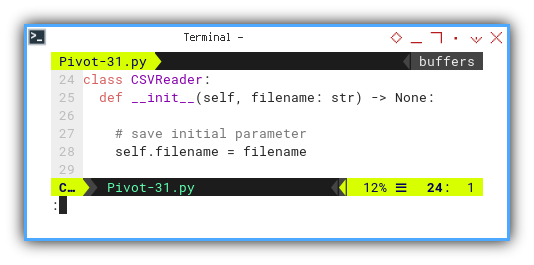
Offsetting Date
Due to historical considerations, spreadsheet dates do not conform to the epoch date. Consequently, we must compensate for this discrepancy by applying a date offset.
  def date_ordinal(self, value, format_source):
    # Offset of the date value
    # for the date of 1900-01-00
    offset = 693594

    date_value = datetime.strptime(
                   value, format_source)
    return date_value.toordinal() - offset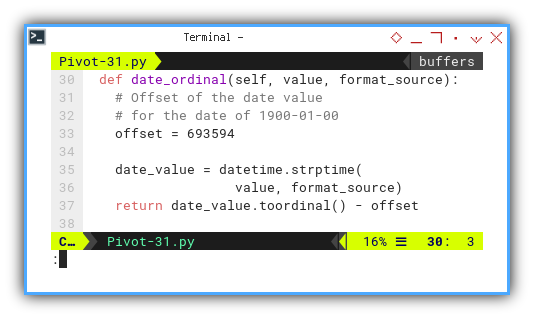
Loading Data
The code snippet responsible for loading data
from the CSV file into a dataframe is
encapsulated within a try-except clause,
as is customary for I/O operations.
  def load_data(self):
    try:
      ...

    except FileNotFoundError:
      print("Error: The file "\
        + f"'{self.filename}' was not found.")
    except Exception as e:
      print("An error occurred "
         + f"while loading data: {e}")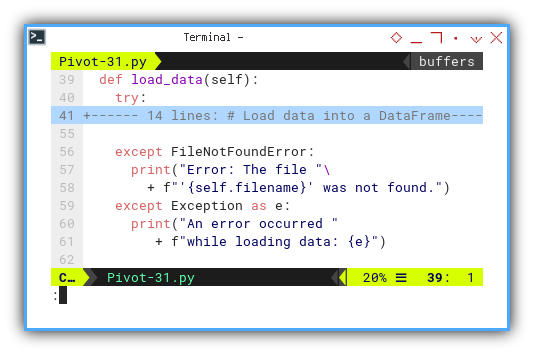
Within the try-except block, the read_csv() function and a lambda expression are employed:
      # Load data into a DataFrame
      self.dataframe = pd.read_csv(self.filename)

      # Define the format of the original date in CSV
      format_source = '%d/%m/%Y'

      # Apply the date_ordinal function
      # to the "Date" column
      self.dataframe['Date'] = self.dataframe['Date'].\
        apply(lambda date: self.date_ordinal(
          date, format_source))

      print("Data:")
      print(self.dataframe)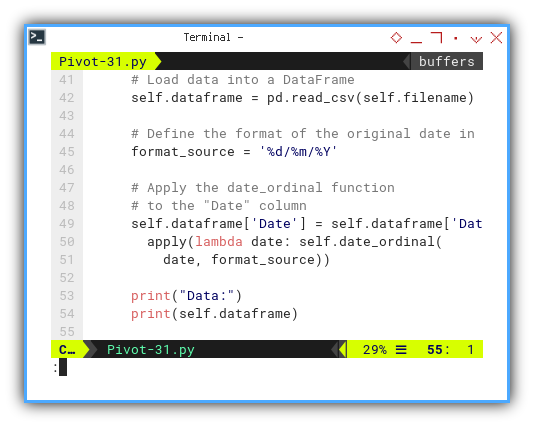
That concludes the CSV reading process.
Result Preview
To evaluate the functionality of this CSV reader class, initiate the macro in an empty Calc worksheet. The APSO terminal will display the following result:
>>> main()
Data:
     Number   Date       Fruit
0         1  42785      Orange
1         2  42785       Grape
2         3  42785  Strawberry
3         4  42785      Orange
4         5  42785       Apple
..      ...    ...         ...
750     751  42830  Strawberry
751     752  42830  Strawberry
752     753  42830       Mango
753     754  42830  Strawberry
754     755  42830      Banana

[755 rows x 3 columns]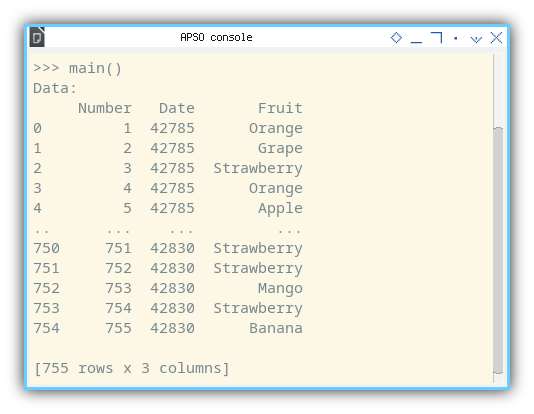
The data source is now ready for utilization.
Table Writer: Main Macro
Utilizing the dataframe derived from the CSV file,
we can populate the Table sheet with relevant data.
To maintain simplicity, I opt to use either
an empty worksheet or any active worksheet.
While it’s possible to create an instance of
an empty Calc worksheet from scratch,
there might be challenges with NumberFormats.
Python-UNO integration may not offer
direct accessto all UNO services,
and managing custom number formats
in Python macros could have limitations.
For ease of understanding,
let’s assume we are commencing from address A1.
Consequently, three columns are hardcoded:
A:index,B:date.C:fruit category
Class Skeleton
Although the class appears more intricate, most changes are the outcome of refining the previous class structure.
class TableWriter:
  def __init__(self,
      dataframe: DataFrame,
      sheetPlainName: str) -> None:
   ...

  def get_number_format(self, format_string):
   ...

  def prepare_sheet(self):
   ...

  def write_column_headers(self) -> None:
   ...

  def write_rows(self) -> None:
   ...

  def decorate_border(self) -> None:
   ...

  def process(self) -> None:
   ...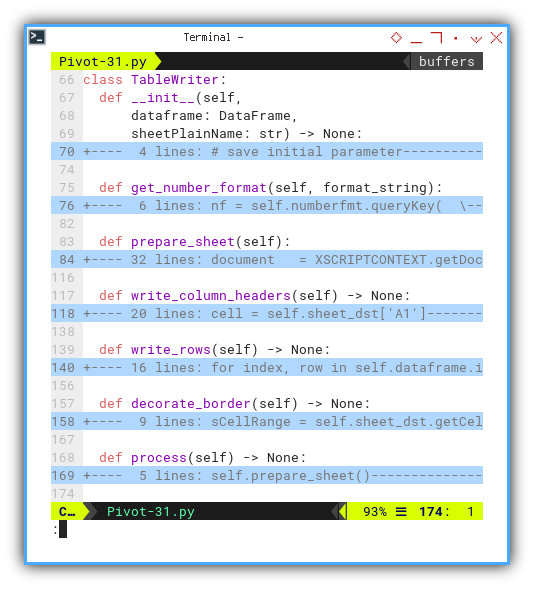
I’ve also introduced a get_number_format helper,
to simplify the complex numbering format sequence.
Initialization
The initialization process is distinct from the previous macro:
class TableWriter:
  def __init__(self,
      dataframe: DataFrame,
      sheetPlainName: str) -> None:

    # save initial parameter
    self.dataframe = dataframe
    self.sheetPlainName = sheetPlainName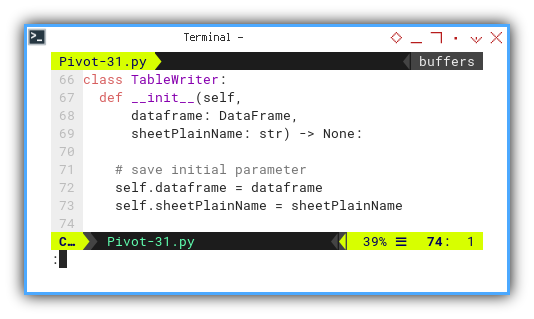
Format Numbering Key
This remains consistent with the approach taken in the previous article.
Prepare Sheet
The preparation of the sheet closely mirrors the methodology from the previous article.
Process Flow
The primary flow of the macro can be visualized here.
  def process(self) -> None:
    self.prepare_sheet()

    self.write_column_headers()
    self.write_rows()
    self.decorate_border()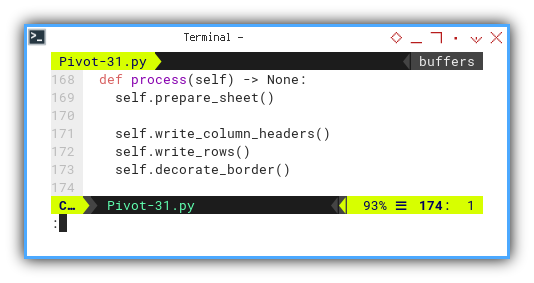
Column Headers
Initiating with the column headers is straightforward and self-explanatory.
    cell = self.sheet_dst['A1']
    cell.String = 'Number'
    cell.CellBackColor = tealScale[0]

    cell = self.sheet_dst['B1']
    cell.String = 'Date'
    cell.CellBackColor = tealScale[1]

    cell = self.sheet_dst['C1']
    cell.String = 'Categories'
    cell.CellBackColor = tealScale[0]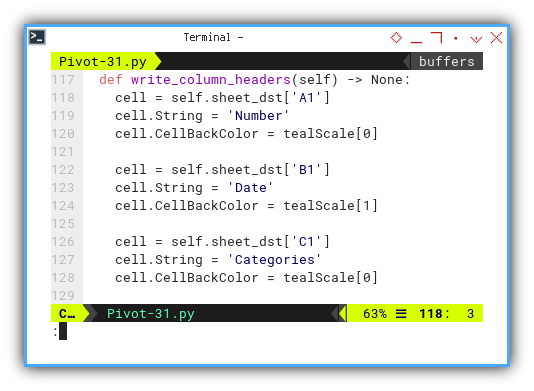
Also, applying decorative touches:
    sCellRange = self.sheet_dst. \
      getCellRangeByName('A1:C1')
    sCellRange.HoriJustify = CENTER # or just 2
    sCellRange.CharWeight = BOLD

    column = self.sheet_dst. \
      getColumns().getByIndex(4). \
      Width = 500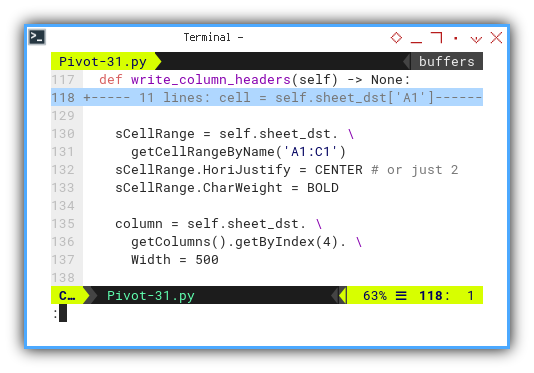
Row Content
Now, we iterate through each row,
commencing with writing row['Number'] as the first header.
  def write_rows(self) -> None:
    for index, row in self.dataframe.iterrows():
      # Index: Number
      cell = self.sheet_dst. \
        getCellByPosition(0, index + 1)
      cell.Value = row['Number']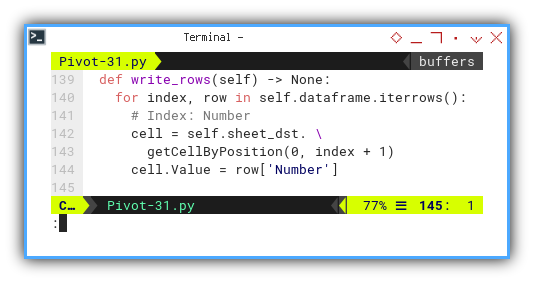
Followed by the date and category
      # Date: Date
      cell = self.sheet_dst. \
        getCellByPosition(1, index + 1)
      cell.Value = row['Date']
      cell.NumberFormat = self.dateFormat

      # Categories: Fruit
      cell = self.sheet_dst. \
        getCellByPosition(2, index + 1)
      cell.String = row['Fruit']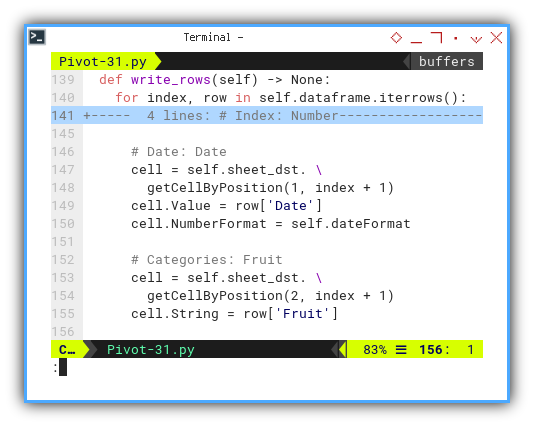
Decorate Border
Rather than decorating cells individually, we enhance efficiency by decorating a range of cells.
  def decorate_border(self) -> None:
    sCellRange = self.sheet_dst.getCellRangeByPosition(
      0, 1, 1, len(self.dataframe))
    sCellRange.RightBorder = self.lineFormat

    sCellRange = self.sheet_dst. \
      getCellRangeByName('A1:C1')
    sCellRange.HoriJustify = CENTER # or just 2
    sCellRange.CharWeight = BOLD
    sCellRange.BottomBorder = self.lineFormat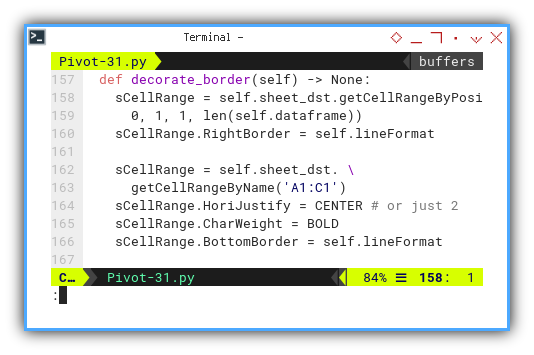
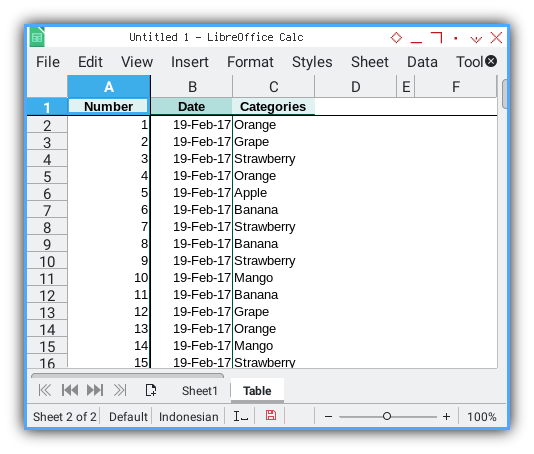
Result Preview
The simple resulting table can be viewed in the screenshot below:
Reader and Writer
Bringing It All Together
We can seamlessly integrate the previously
crafted PivotWriter class to write to the Pivot worksheet.
Class Diagram
The comprehensive diagram is visualized below:

Macro Skeleton
This macro incorporates three classes:
class PivotSample:
  ...

class TableWriter:
  ...

class PivotWriter:
  ...

def main() -> None:
  ...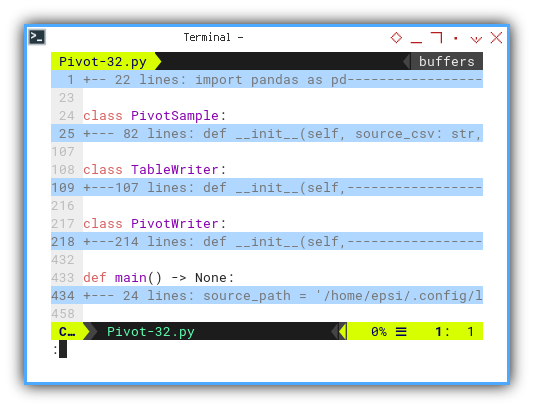
The PivotSample should be enhanced
with add_total_column() and add_total_row(s).
Main Method
The main flow process of both reading and writing, can be depicted in the comprehensive main method below. It begins with variable setup.
def main() -> None:
  source_path = '/home/epsi/.config/libreoffice/' \
              + '4/user/Scripts/python/Pivot/'
  source_csv  = source_path + 'sample-data.csv'

  categories = [
    "Apple", "Banana", "Dragon Fruit",
    "Durian", "Grape", "Mango",
    "Orange", "Strawberry"]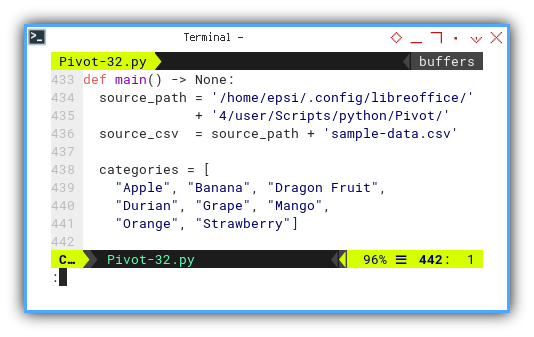
Proceeding with the utilization of the three aforementioned classes:
  pivot_sample = PivotSample(source_csv, categories)
  pivot_sample.process()
  dataframe   = pivot_sample.get_dataframe()
  pivot_table = pivot_sample.get_pivot()

  table_writer = TableWriter(dataframe, 'Table')
  table_writer.process()

  # Print the newly created pivot table on console
  print(pivot_table)
  print()

  writer = PivotWriter(
    'Pivot', pivot_table, categories, 'B2')
  writer.run()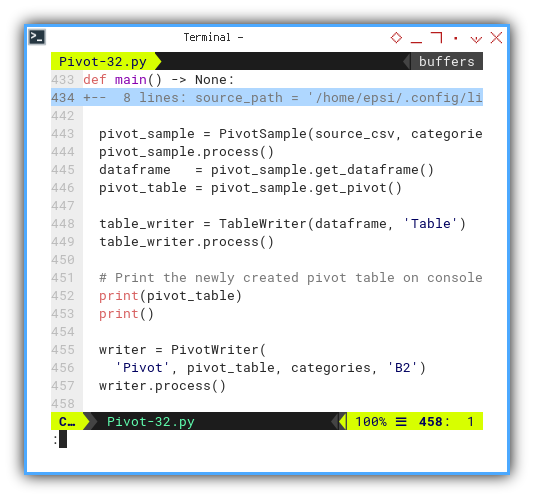
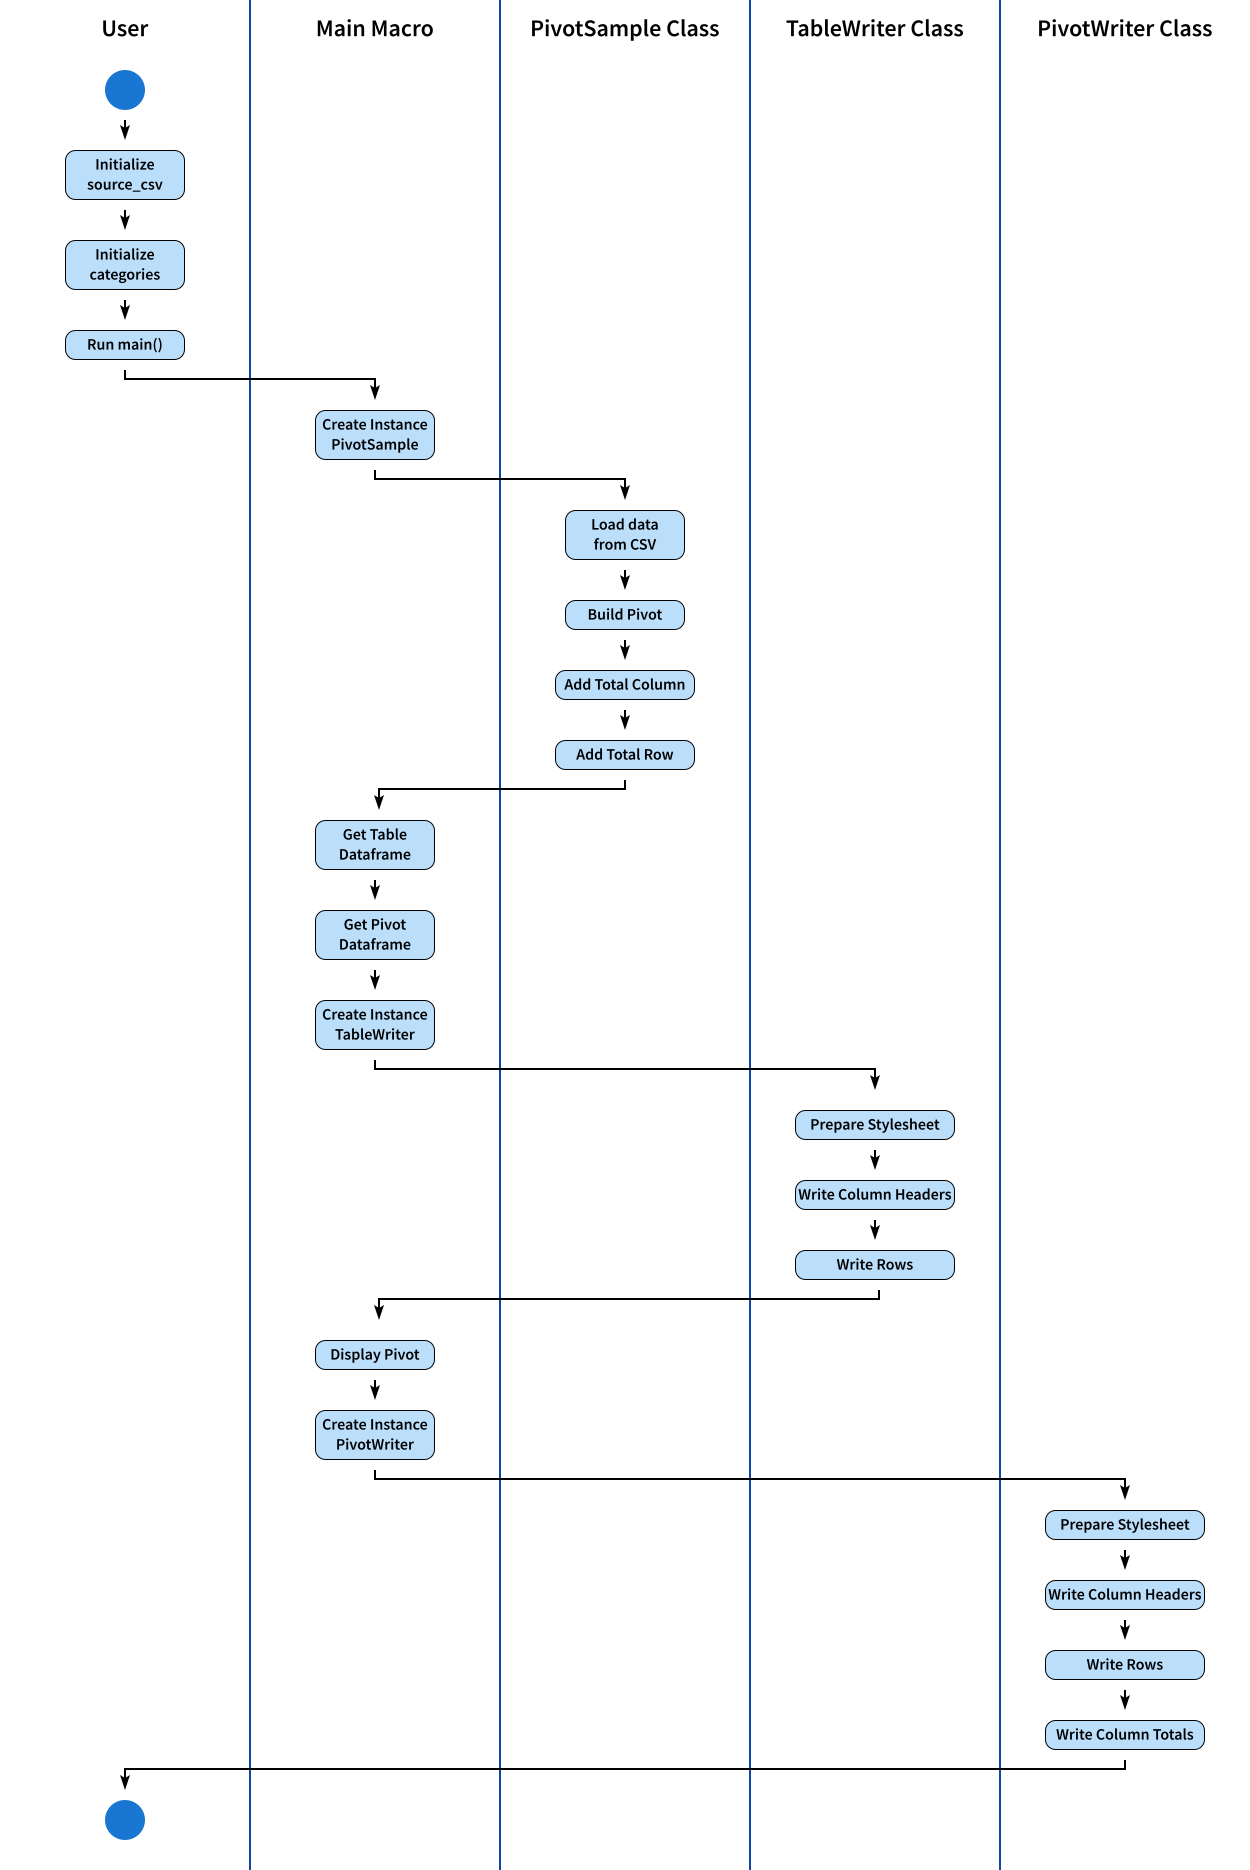
Activity Diagram
Summarizing all the processes, this chronological order is showcased:
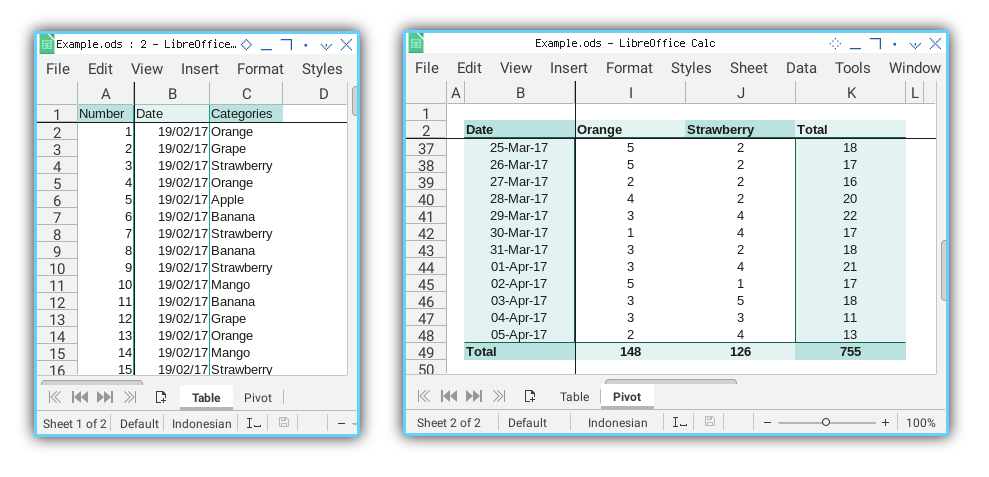
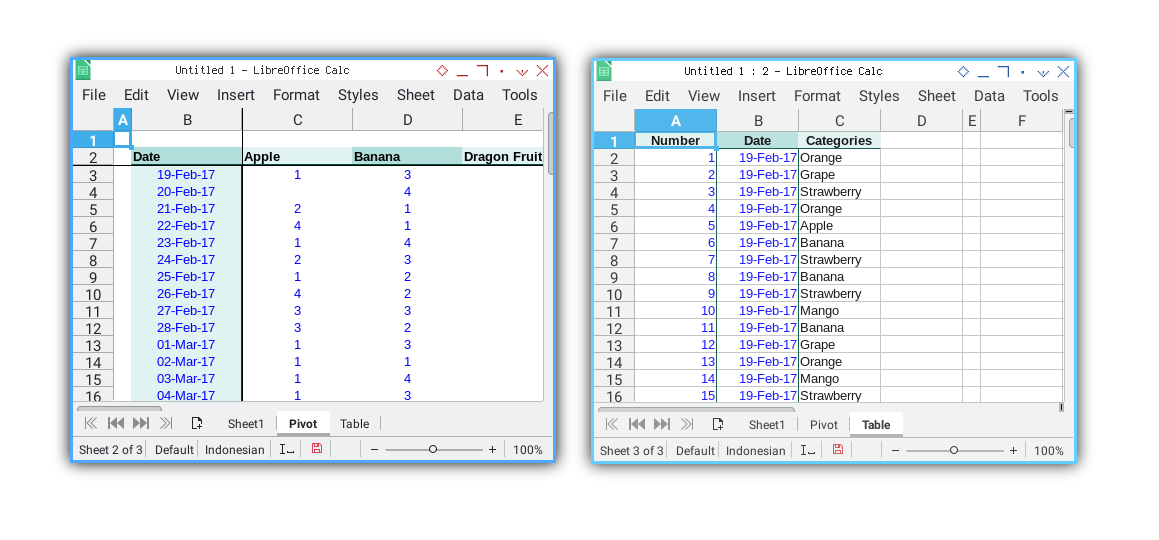
Result Preview
The results of both sheets, Table and Pivot,
are displayed in the sheet tab below.
We are done.
What Comes Next 🤔?
Instead of using Macro you can access LibreOffice from the outside using UNO. This method allows running Python scripts from the terminal without the need for APSO.
Consider continuing your exploration with [ Pivot - LO UNO - Open Instance ].