Preface
Goal: Accessing LibreOffice from the outside using UNO.
In contrast to employing Macros, UNO provides an avenue for interacting with LibreOffice externally, allowing Python scripts to run from the terminal without the need for APSO (Alternative Python Script Organizer).
Notably, the Macro itself utilizes the UNO API. Thus, a seamless transition between Macro and Python script through UNO is facilitated. This flexibility extends to script organization, enabling the distribution of classes across different files, enhancing manageability and conforming to standard Python scripting practices.
Utilizing UNO as a regular Python script liberates the script structure, eliminating the necessity to consolidate all code into a single file. This divergence offers the convenience of managing each class in separate files, providing a more modular and structured approach.
Unlike openPyXL, UNO can directly access
OpenDocument Spreadsheet (ODS) files,
eliminating the dependency on .xlsx files.
Caveat
At the time of crafting this article,
certain limitations and nuances are worth noting.
UNO relies on the soffice executable,
making the Python-UNO integration
feel somewhat weighty compared to openPyXL.
However, once the soffice instance is fully loaded,
script execution proves to be sufficiently fast.
During development, keeping LibreOffice opened
becomes essential for optimal performance.
Another consideration is related to using headless LibreOffice, where running the LibreOffice GUI concurrently with the script in UNO headless mode may pose challenges. Although potential solutions exist, beginners are encouraged to start with the pure UNO approach for simplicity.
Source Examples
For hands-on exploration, source examples are available here.
These examples provide a practical reference, for implementing UNO scripts in Python, within the LibreOffice environment.
Getting Started
Let’s delve into the practical aspects and explore the initial setup.
Running soffice
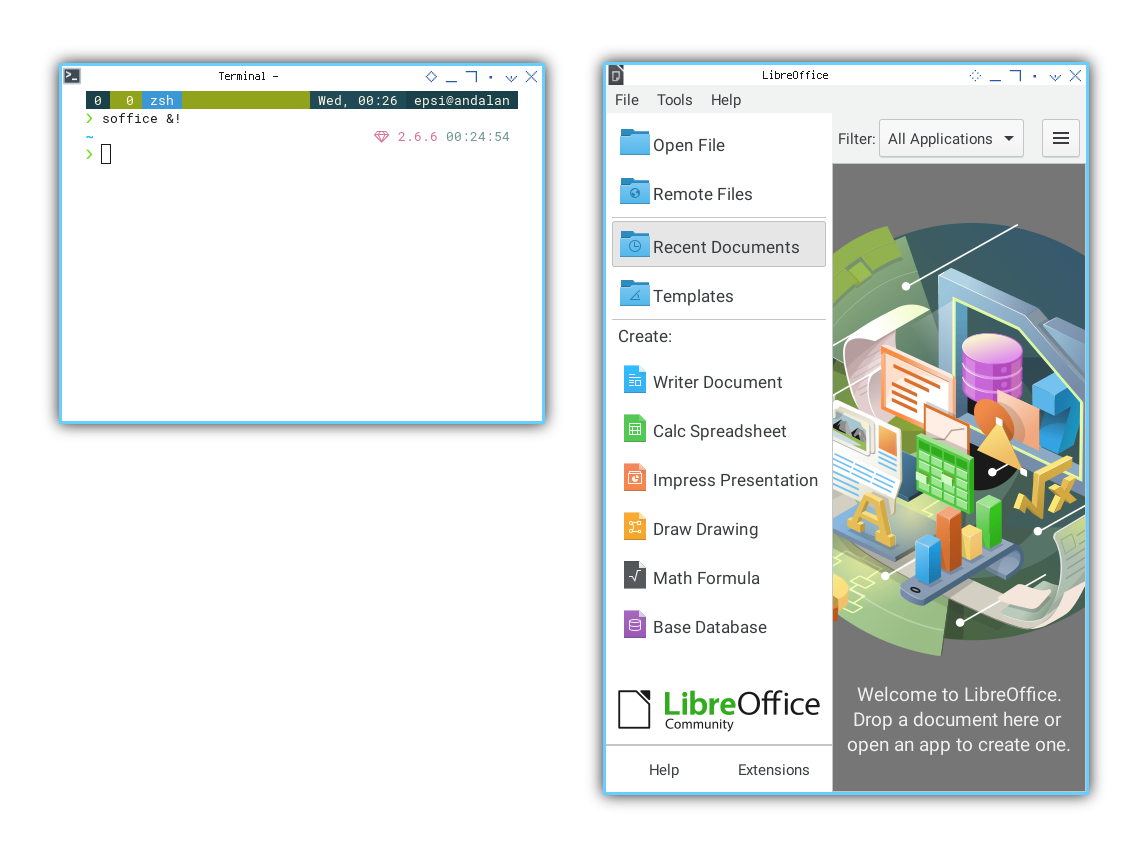
To begin, open LibreOffice through the usual means or,
for clarity, launch soffice from the terminal:
❯ soffice &!This will open the familiar LibreOffice GUI. This way we can keep libreoffice opened, without opening LibreOffice instance all the time.
Next, run a special instance of soffice
on a specific port, such as 2002.
Our script relies on this port number:
❯ soffice --norestore --nologo --norestore --nofirststartwizard --accept="socket,port=2002;urp;"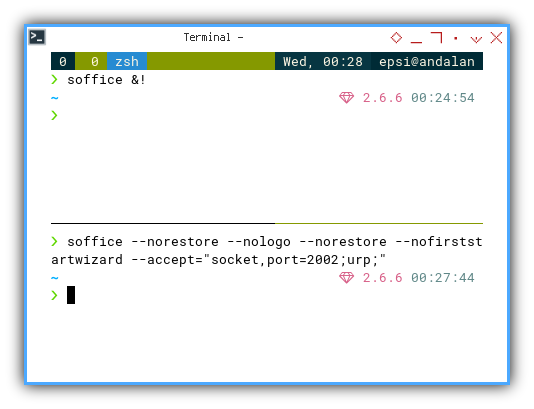
This command should be executed in the terminal.
Python Path
Environment Variable
UNO is available within the LibreOffice bundle. To access it, add the path to the Python library. This can be done either through an environment variable or programmatically. Both methods are straightforward.
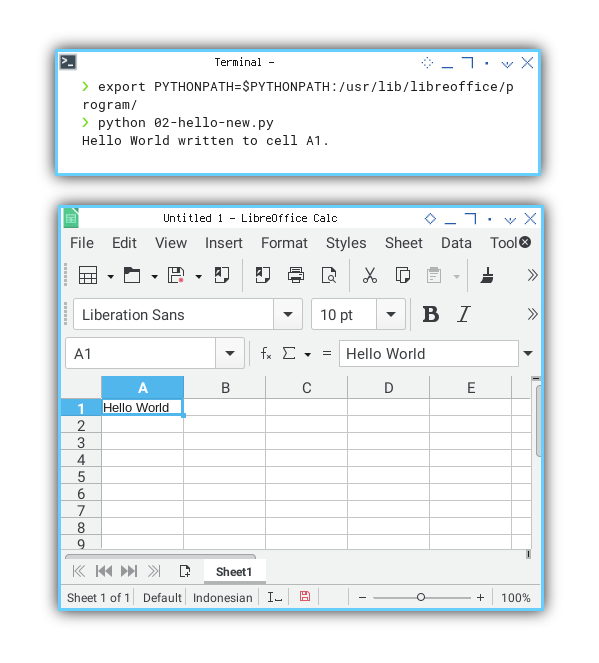
To avoid hardcoding the UNO path in the script, use an environment variable:
❯ export PYTHONPATH=$PYTHONPATH:/usr/lib/libreoffice/program/ 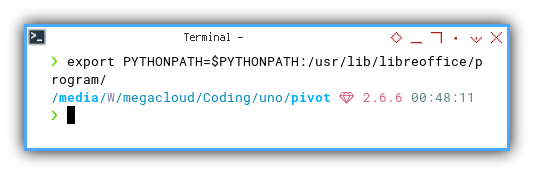
This command should also be executed in the terminal.
Running Script
Let’s run our first script. The script will be explained later.
Now, execute our first script. The script’s details will be explained later.
For now, ensure that the port in the script,
matches the port 2002 in the terminal above:
    context = resolver.resolve(
      "uno:socket,host=localhost,port=2002;"
      + "urp;StarOffice.ComponentContext")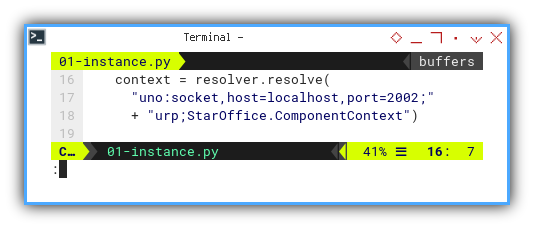
Upon running this command, you’ll observe a second instance of LibreOffice launching, accompanied by a new Calc document.
❯ python 01-instance.pyThis command should be executed in the terminal as well.

Congratulations on setting up the initial environment.
Instance Script
Let’s unravel the details of the instance script provided above.
What’s happening inside this instance script?
In essence, it retrieves the desktop and creates a new Calc document.
Library
The only library required to run this script is the uno library.
import unoLater on, we’ll blend this with native Python libraries.
Skeleton
For this script, we only need two functions.
import uno

def get_desktop() \
      -> 'com.sun.star.frame.XDesktop':
    ...

def create_calc_instance(
      desktop: 'com.sun.star.frame.XDesktop') \
      -> 'com.sun.star.frame.XModel':
    ...

if __name__ == "__main__":
    desktop  = get_desktop()
    document = create_calc_instance(desktop)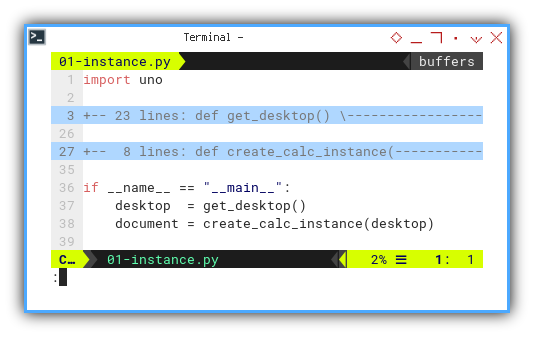
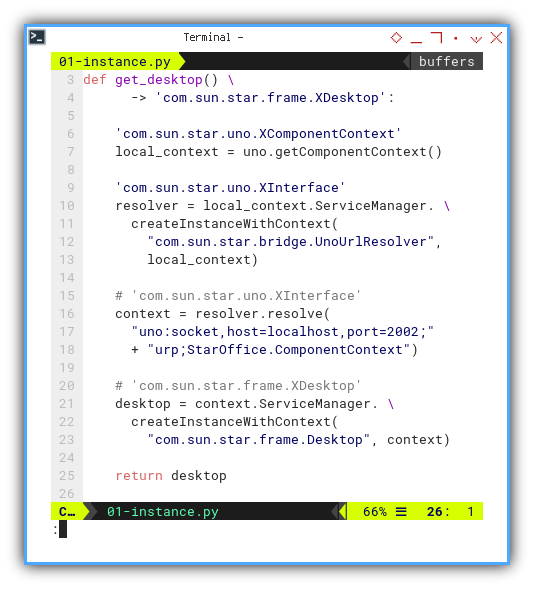
Get Desktop
The get desktop function consist of long process. From getting the UNO, resolver, context and finally the desktop. This use type hints in separate line for clarity reason, as introduced in PEP 484 and later extended in PEP 526.
def get_desktop() \
      -> 'com.sun.star.frame.XDesktop':

    'com.sun.star.uno.XComponentContext'
    local_context = uno.getComponentContext()

    'com.sun.star.bridge.UnoUrlResolver'
    resolver = local_context.ServiceManager. \
      createInstanceWithContext(
        "com.sun.star.bridge.UnoUrlResolver",
        local_context)

    'com.sun.star.uno.XComponentContext'
    context = resolver.resolve(
      "uno:socket,host=localhost,port=2002;"
      + "urp;StarOffice.ComponentContext")

    'com.sun.star.frame.XDesktop'
    desktop = context.ServiceManager. \
      createInstanceWithContext(
        "com.sun.star.frame.Desktop", context)

    return desktop
Initially, my type guess looked like the one below,
using XInterface, which also works.
With the context obtained from port 2002,
we retrieve the desktop from the service manager.
    desktop = context.ServiceManager. \
      createInstanceWithContext(
        "com.sun.star.frame.Desktop", context)
Internal Diagram
While I’m not entirely sure if this sequence of class instantiation would enhance understanding, I’ve included the visualization here. At the very least, it provides an overview of the UNO environment. The diagram is based on my interpretation after delving into the LibreOffice API.
Feel free to engage in discussions
for corrections or improvements,
for instance, the XComponentContext
could be a BootstrapContext service.
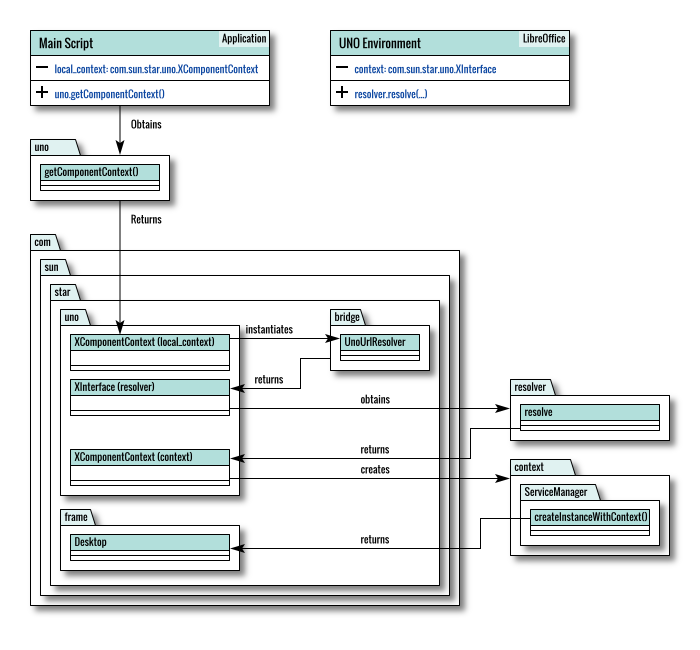
The class diagram was created using a multi-page Inkscape feature. You can access the source here, allowing you to modify it according to your needs.
Calc Instance
With the desktop acquired from the service manager, we can instantiate a Calc document from scratch.
def create_calc_instance(
      desktop: 'com.sun.star.frame.XDesktop') \
      -> 'com.sun.star.frame.XModel':

    document = desktop.loadComponentFromURL(
      "private:factory/scalc", "_blank", 0, ())

    return document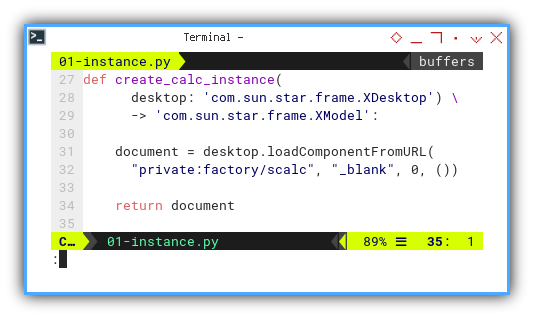
The URL responsible for the Calc instance is:
private:factory/scalc
    document = desktop.loadComponentFromURL(
      "private:factory/scalc", "_blank", 0, ())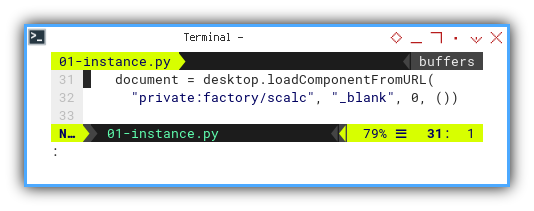
Main
Now, let’s employ the newly created generic function:
if __name__ == "__main__":
    desktop  = get_desktop()
    document = create_calc_instance(desktop)
Helper Library
To avoid redundancy and enhance reusability, let’s create a helper library that we can employ consistently across this article series.
Class Diagram
This code has no class at all.
In standard class diagrams, the main part, typically encompassing the main function or script, is not explicitly represented. To comprehensively explain the entire code, let’s adjust this rule and portray the main script as a class.
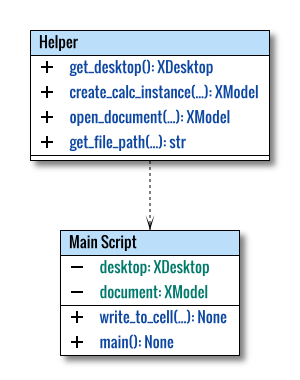
You can access the SVG source here, enabling you to tailor it to your specific needs.
Directory Structure
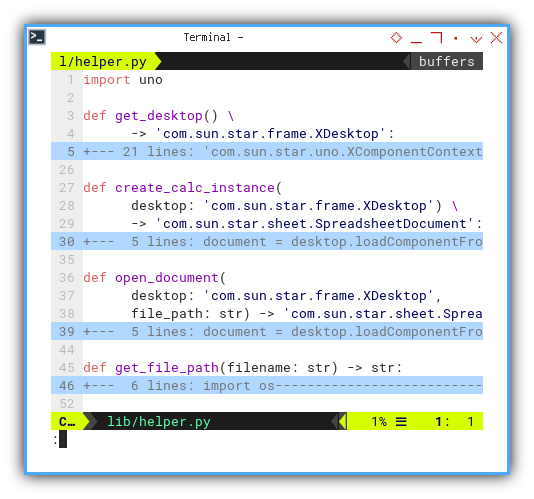
To maintain organization, let’s place the helper library in the lib directory.
.
└── lib
    └── helper.py
Library Skeleton
This library will comprise four functions:
- The first three pertain to UNO.
- The last function provides the file path for any Calc document.
import uno

def get_desktop() \
      -> 'com.sun.star.frame.XDesktop':

    ...

def create_calc_instance(
      desktop: 'com.sun.star.frame.XDesktop') \
      -> 'com.sun.star.sheet.SpreadsheetDocument':
    ...

def open_document(
      desktop: 'com.sun.star.frame.XDesktop',
      file_path: str) -> 'com.sun.star.sheet.SpreadsheetDocument':
    ...

def get_file_path(filename: str) -> str:
    ...
Get Desktop
We’ve encountered this function in the previous script.
Create Calc Instance
The distinction between creating a new instance, and opening a new document lies in the URL path.
def create_calc_instance(
      desktop: 'com.sun.star.frame.XDesktop') \
      -> 'com.sun.star.sheet.SpreadsheetDocument':

    document = desktop.loadComponentFromURL(
      "private:factory/scalc", "_blank", 0, ())

    return document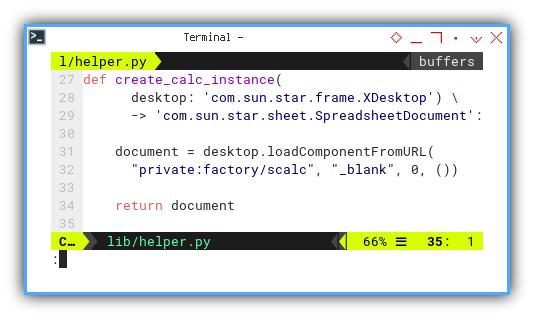
Open Document
This function is very similar to the one above.
def open_document(
      desktop: 'com.sun.star.frame.XDesktop',
      file_path: str) -> 'com.sun.star.sheet.SpreadsheetDocument':

    document = desktop.loadComponentFromURL(
      f"file://{file_path}", "_blank", 0, ())

    return document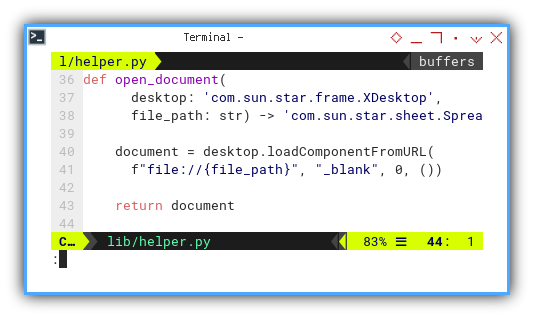
Get File Path
Since UNO’s relative path isn’t tied to the original script, we need to define a full path for this article series.
def get_file_path(filename: str) -> str:
  import os

  script_directory = os.path.dirname(
    os.path.abspath(__file__))
  return os.path.join(
    script_directory, '..', filename)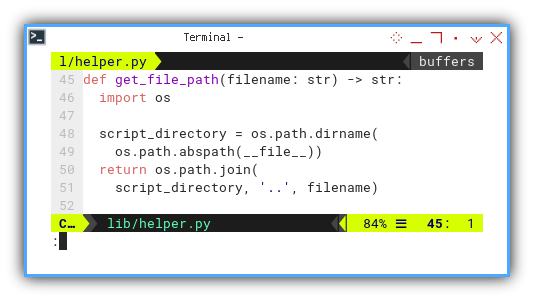
Hello World
Utilizing the helper example.
We can employ the newly created helper above to write to a sheet.
Directory Structure
Let’s utilize the helper, to create a greeting in a new document, and also for opening an existing document.
.
├── 02-hello-new.py
├── 03-hello-open.py
└── lib
    └── helper.py
Skeleton
The skeleton is identical for both files.
# Local Library
from lib.helper import (
  get_desktop, create_calc_instance, get_file_path)

def write_to_cell(
      document: 'com.sun.star.sheet.SpreadsheetDocument',
      text: str) -> None:
    ...

def main() -> None:
    ...

if __name__ == "__main__":
    main()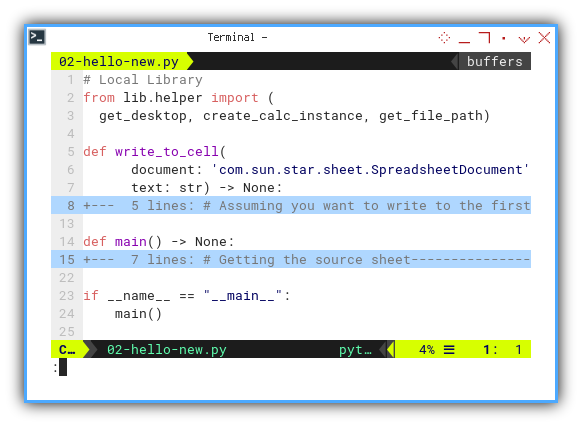
The only distinction lies in the main method, and also the library.
Writing
This section is also identical for both classes.
def write_to_cell(
      document: 'com.sun.star.sheet.SpreadsheetDocument',
      text: str) -> None:

    # Assuming you want to write to the first sheet
    sheet = document.getSheets().getByIndex(0)
    cell = sheet.getCellRangeByName("A1")
    cell.setString(text)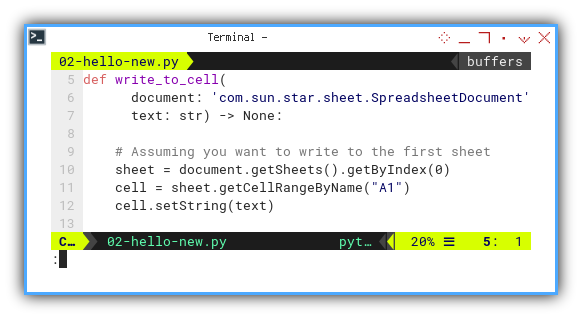
New Document Instance
def main() -> None:
    # Getting the source sheet
    desktop   = get_desktop()
    document  = create_calc_instance(desktop)

    if document:
      write_to_cell(document, 'Hello World')
      print("Hello World written to cell A1.")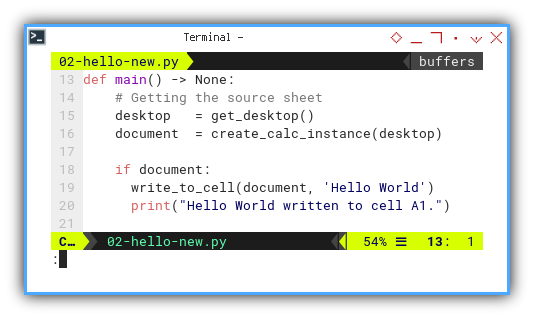
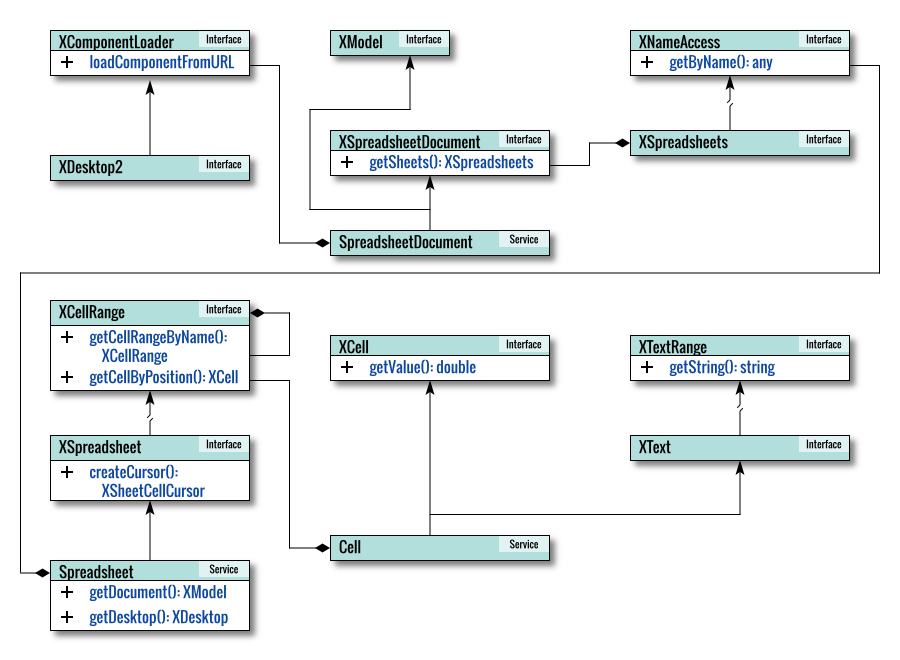
Internal Diagram
To facilitate your comprehension of what’s transpiring internally in the LibreOffice API, let’s visualize the service and interface.
Result Preview
You can observe the file name is still untitled.
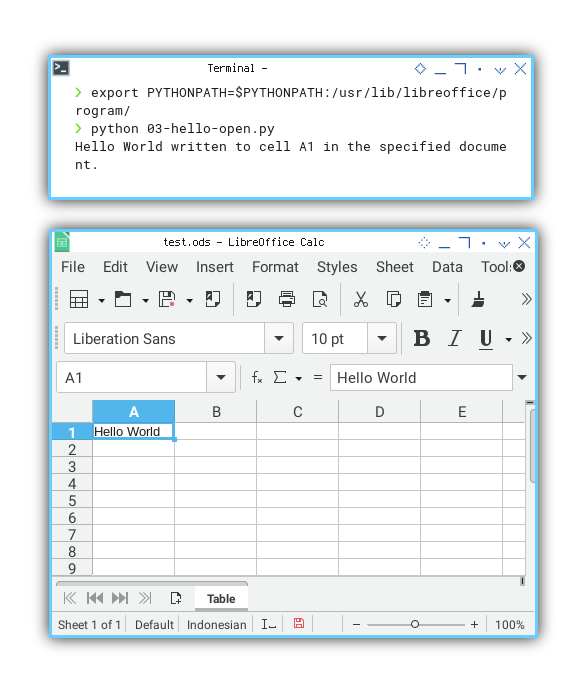
Opening Existing Document
For the open document, the import clause will be:
import os

# Local Library
from lib.helper import (
  get_desktop, open_document, get_file_path)
In the main part,
first we need to define the absolute path of the existing document.
In this example, I use the same directory as the script.
And use a provided spreadsheet named test.ods.
def main() -> None:
    # Get the directory where the current script is located
    # Create the file path for your test.ods file
    # Now you can use file_path to open your test.ods file
    script_directory = os.path.dirname(os.path.abspath(__file__))
    file_path = os.path.join(script_directory, "test.ods")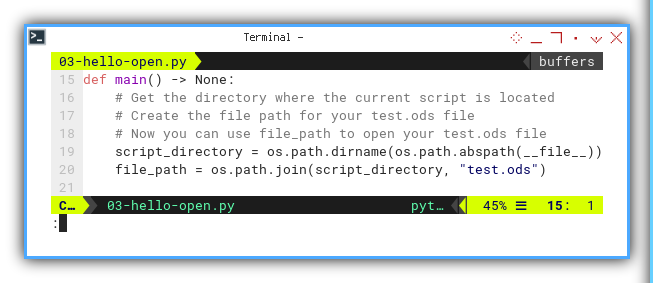
Then we can write to the document, in a manner similar to the previous example.
    # Getting the source sheet
    desktop   = get_desktop()
    document  = open_document(desktop, file_path)

    if document:
      write_to_cell(document, 'Hello World')
      print("Hello World written to cell A1"
          + " in the specified document.")
Result Preview
You can observe that the file name is test.ods.
Tidying in Class
As we progress in connecting to LibreOffice, the possibilities for our project expand, and the script will naturally become longer over time. Before delving further, let’s organize our project into a simple class.
In this example, we’ll create a table header, save it into a file, open the newly created file, and read the header we just made.
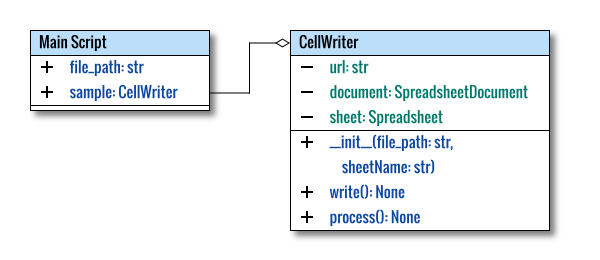
Class Diagram
We can conceptualize the class as shown below. This diagram is not a strict UML representation but aims to provide a visual understanding.
Writer: Skeleton
Given that we’ve already covered how to write a macro, this should be a straightforward task for you. However, let’s go through it step by step.
# Local Library
from lib.helper import (
  get_desktop, create_calc_instance, get_file_path)

class CellWriter:
  def __init__(self,
      file_path: str, sheetName: str) -> None:
    ...

  def write(self) -> None:
    ...

  def process(self) -> None:
    ...

def main() -> int:
  ...

if __name__ == "__main__":
  raise SystemExit(main())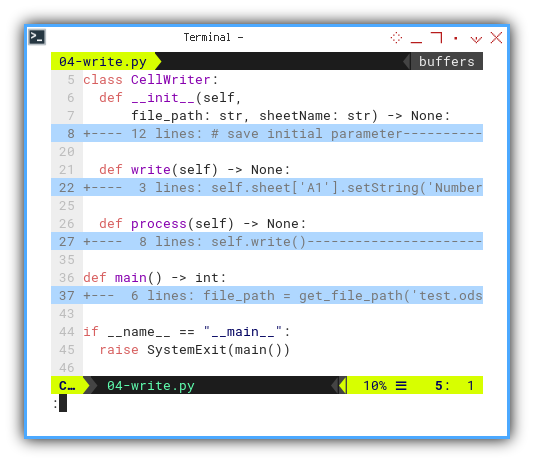
Writer: Main
Let’s name the sheet as Table.
def main() -> int:
  file_path = get_file_path('test.ods')

  sample = CellWriter(file_path, 'Table')
  sample.process()

  return 0

if __name__ == "__main__":
  raise SystemExit(main())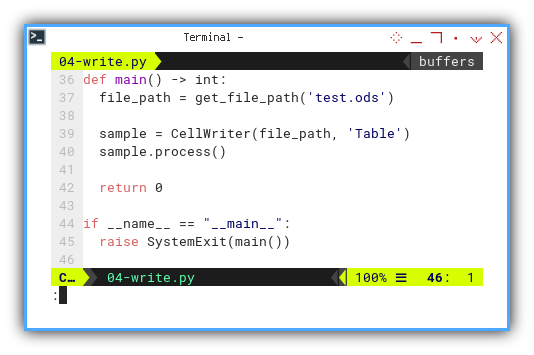
Writer: Initialization
This is quite self-explanatory.
class CellWriter:
  def __init__(self,
      file_path: str, sheetName: str) -> None:

    # save initial parameter
    self.url = f"file://{file_path}"

    # Getting the source sheet
    desktop = get_desktop()
    self.document = create_calc_instance(desktop)

    if self.document:
      # Assuming the first sheet
      self.sheet = self.document.getSheets()[0]
      self.sheet.setName(sheetName)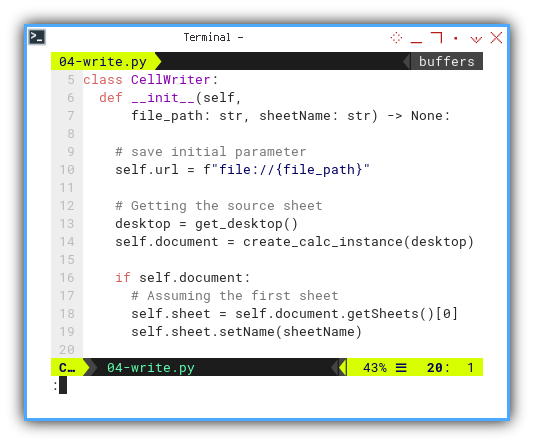
Writer: Write
This is as simple as the macro example.
  def write(self) -> None:
    self.sheet['A1'].setString('Number')
    self.sheet['B1'].setString('Date')
    self.sheet['C1'].setString('Categories')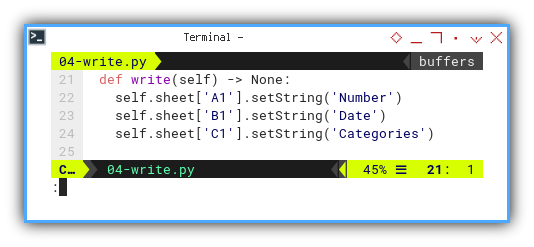
Writer: Process Flow
The entire process flow of the class is
encapsulated in the process method.
As usual, we handle I/O, such as storing the file,
in a try..except clause.
  def process(self) -> None:
    self.write()
    print('Writing Header')

    try:
      self.document.storeToURL(self.url, ())
      print('Saving File')
    except Exception as e:
      print(f"Error saving the document: {str(e)}")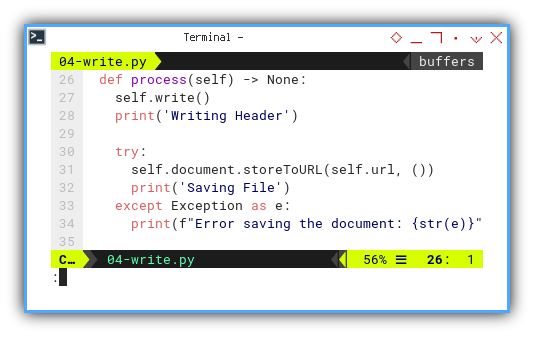
Writer: Result Preview
The result is a simple header. The log can be written in the console, allowing you to see what is happening.
❯ python 04-write.py
Writing Header
Saving File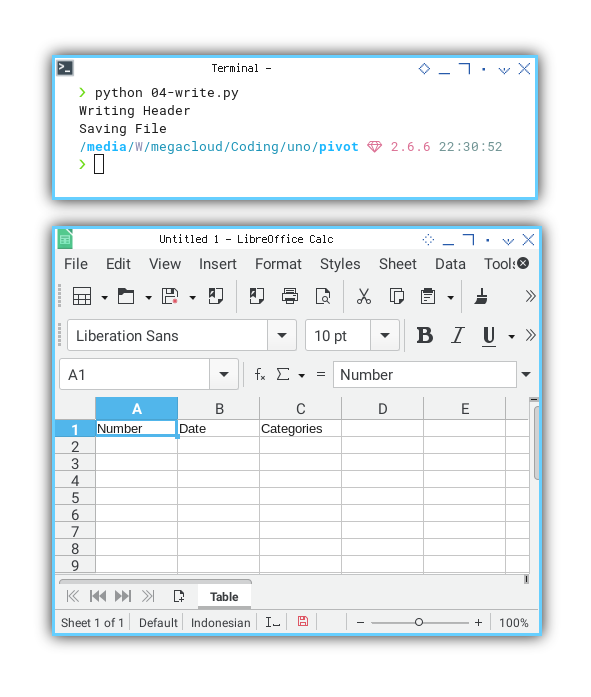
Although the title is still untitled,
it has actually been stored in test.ods.
Class Diagram
Here, we present a visual representation of the class, keeping in mind that this conceptual diagram doesn’t strictly adhere to the standard UML representation.

Reader: Skeleton
# Local Library
from lib.helper import (
  get_desktop, open_document, get_file_path)

class CellReader:
  def __init__(self,
      file_path: str, sheetName: str) -> None:
    ...

  def read(self) -> None:
    ...

  def process(self) -> None:
    self.read()

def main() -> int:
  ...

if __name__ == "__main__":
  raise SystemExit(main())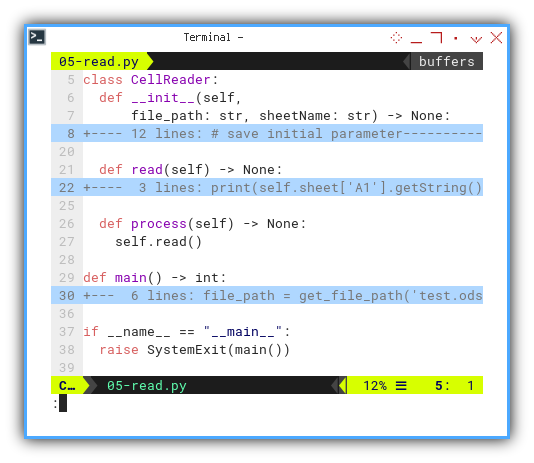
Reader: Main
Now, let’s open the sheet named Table.
def main() -> int:
  file_path = get_file_path('test.ods')

  sample = CellReader(file_path, 'Table')
  sample.process()

  return 0

if __name__ == "__main__":
  raise SystemExit(main())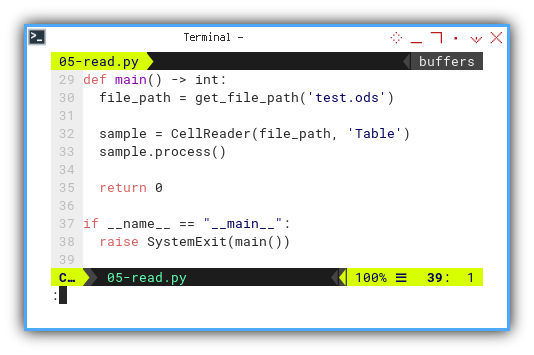
Reader: Initialization
This is also pretty self-explanatory.
class CellReader:
  def __init__(self,
      file_path: str, sheetName: str) -> None:

    # save initial parameter
    self.url = f"{file_path}"

    # Getting the source sheet
    desktop = get_desktop()
    self.document = open_document(desktop, self.url)

    if self.document:
      # Assuming the first sheet
      self.sheet = self.document. \
        Sheets[sheetName]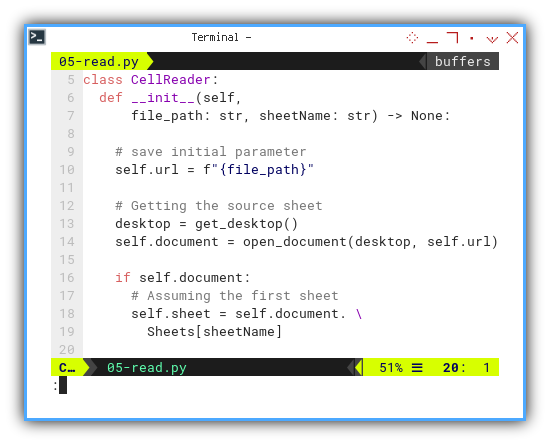
Reader: Write
This step is also as simple as the writer example.
  def read(self) -> None:
    print(self.sheet['A1'].getString())
    print(self.sheet['B1'].getString())
    print(self.sheet['C1'].getString())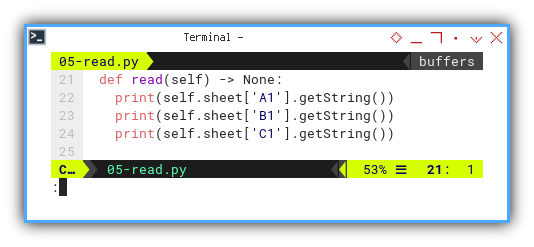
Reader: Process Flow
The entire process revolves around reading the header.
  def process(self) -> None:
    self.read()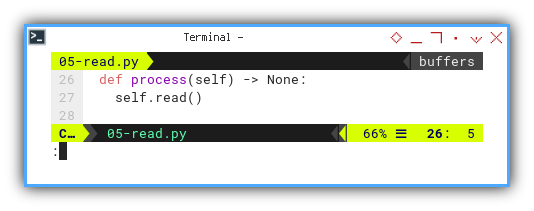
The next example won’t be as straightforward as this flow.
Reader: Result Preview
You can observe the result written in the console.
❯ python 05-read.py
Number
Date
Categories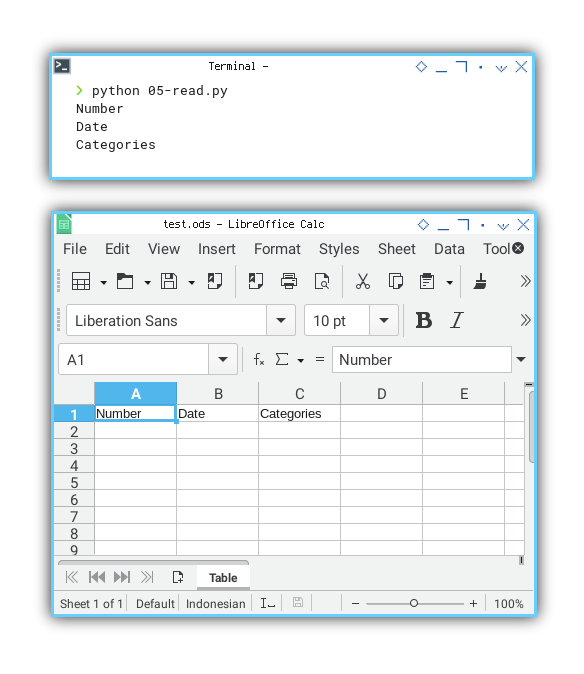
This is the basic part. It is not challenging at all.
What’s Our Next Endeavor 🤔?
Understanding spreadsheet manipulation skills isn’t truly complete without a real-life example demonstrating both reading and writing within the same spreadsheet.
Bridging Theory with Reality
As we delve into the realm of UNO, the transition becomes evident. We can effortlessly convert our prior macros into UNO scripts, as seen in our Pivot macro project.
For a hands-on experience and a deeper grasp of these concepts, let’s explore further in [ Pivot - LO UNO - Pivot Writer ].